
Building chat apps in React from scratch is an ambitious task that comes with a range of complex challenges, such as
01.
Setting up real-time infrastructure for message exchanges
02.
Managing message delivery and storage
03.
Handling presence and typing indicators
04.
Implementing user authentication
05.
Scaling for multiple users and heavy usage
06.
Designing an intuitive and functional chat interface
CometChat’s UI Kit simplifies the development process with pre-built, customizable React chat components that remove the need for heavy lifting. These components come with beautifully designed UI elements with perfect theming, robust functionality, and integrated backend logic, providing ready-to-use features right out of the box.
With an intuitive design and all the essential elements needed to create a seamless chat experience readily available, you’ll spend minimal time on customization.
To get an even quicker start, check out this video showcasing how to use CometChat’s Visual Builder to effortlessly integrate chat into your react application.
The Visual Builder is a low-code chat builder built on top of our React Chat UI Kit. It lets you quickly launch a fully functional chat experience. Customize the UI to match your app’s theme, choose and configure the features you need, and preview the experience in real time.
Once you're satisfied, simply download the working React code and drop it directly into your application.
To better understand how CometChat can accelerate your development process, here’s a quick comparison of building a chat app using the traditional DIY approach versus leveraging CometChat.
| Features/Component | DIY Approach | With CometChat |
|---|---|---|
Setup time
| 2-3 weeks for basic features
| 1-2 days for full implementation
|
Backend infrastructure
| Build and maintain servers, databases, and WebSocket connections
| Fully managed by CometChat. Scalable infrastructure.
|
Real-time communication
| Implement WebSocket handling, connection management, and error recovery
| Built into SDK with automatic handling
|
User management
| Create user systems, presence tracking, and online status
| Pre-built user management system
|
Message delivery
| Build queuing, retry logic, and delivery confirmation systems
| Automatic with guaranteed delivery
|
Security
| Implement encryption, authentication, and access control
| Enterprise-grade security included
|
UI components
| Build all chat interface components from scratch
| Pre-built, customizable UI components
|
Scaling
| Handle infrastructure scaling, load balancing, and performance optimization
| Automatically scales with your usage
|
Notifications
| Build a separate engine to manage notifications
| Out-of-the-box setup for push, email, and SMS notifications via dashboard, plus user preference controls
|
Moderation
| Build or integrate with third-party moderation tools
| AI-powered filters, conditional rules engine, and a centralized dashboard for admin control
|
Analytics
| Develop custom reports and metrics for user engagement and chat activity
| Built-in analytics with ready-made reports to track engagement, usage and chat activity.
|
In this tutorial, we'll build a full-featured chat application that supports:
One-on-one and group messaging
Rich media sharing
Message threads and reactions
User presence and typing indicators
Customizable UI components
Prerequisites
Basic React knowledge
Node.js installed
Text editor/IDE
CometChat account (free plan available)
Getting started
1. Set up your development environment
First, create a new React application by running:
This command does two things:
Creates a new React application named "react-chat-app"
Changes your current directory to the newly created project folder
Now, install the CometChat dependencies by adding the React chat UI Kit.
This command installs CometChat's React UI Kit, which includes:
Pre-built UI components for chat functionality
Core CometChat SDK for message handling and real-time communication capabilities along with required dependencies and settings.
Note: Make sure you have Node.js and npm installed on your system before running these commands.
2. Create a CometChat account
In order to use the components present in the UI kit, you need a CometChat account. Sign up for a CometChat account from here. After signing up, create a new app in your dashboard and copy these required credentials from your app:
App ID: Your chat application's unique identifier
Auth Key: Required to access CometChat services
Region: Specifies where your chat data is stored
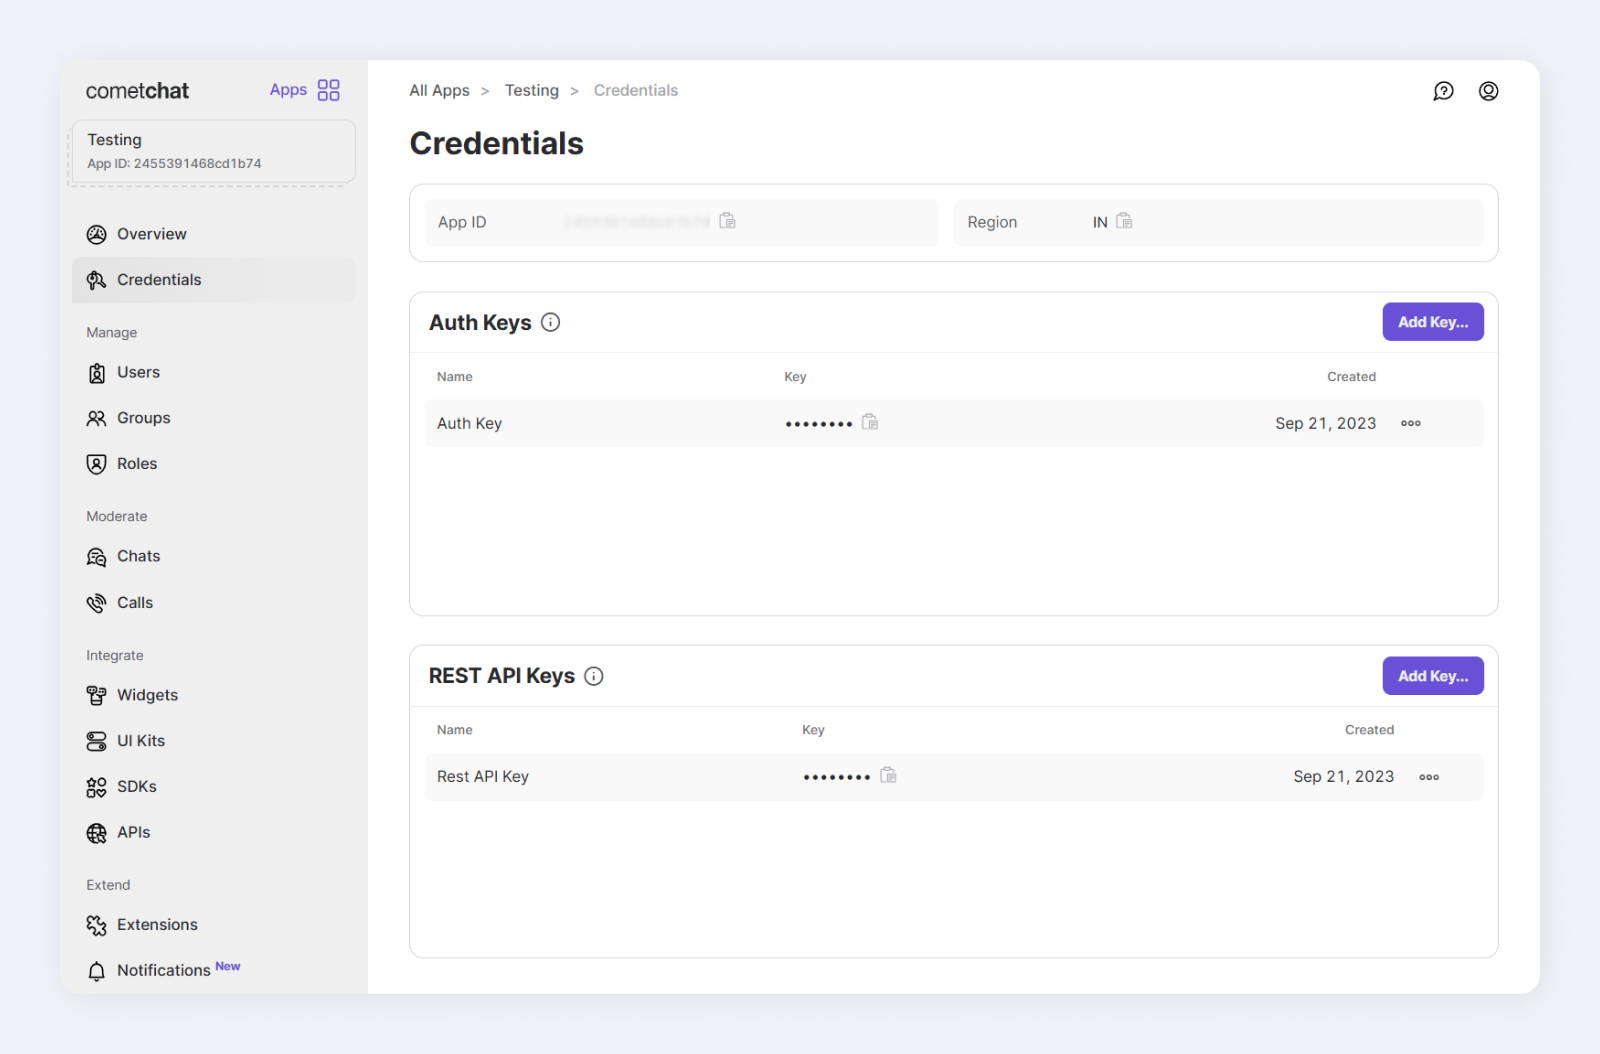
You'll use these credentials in the following steps to initialize the CometChat UI Kit and configure your application.
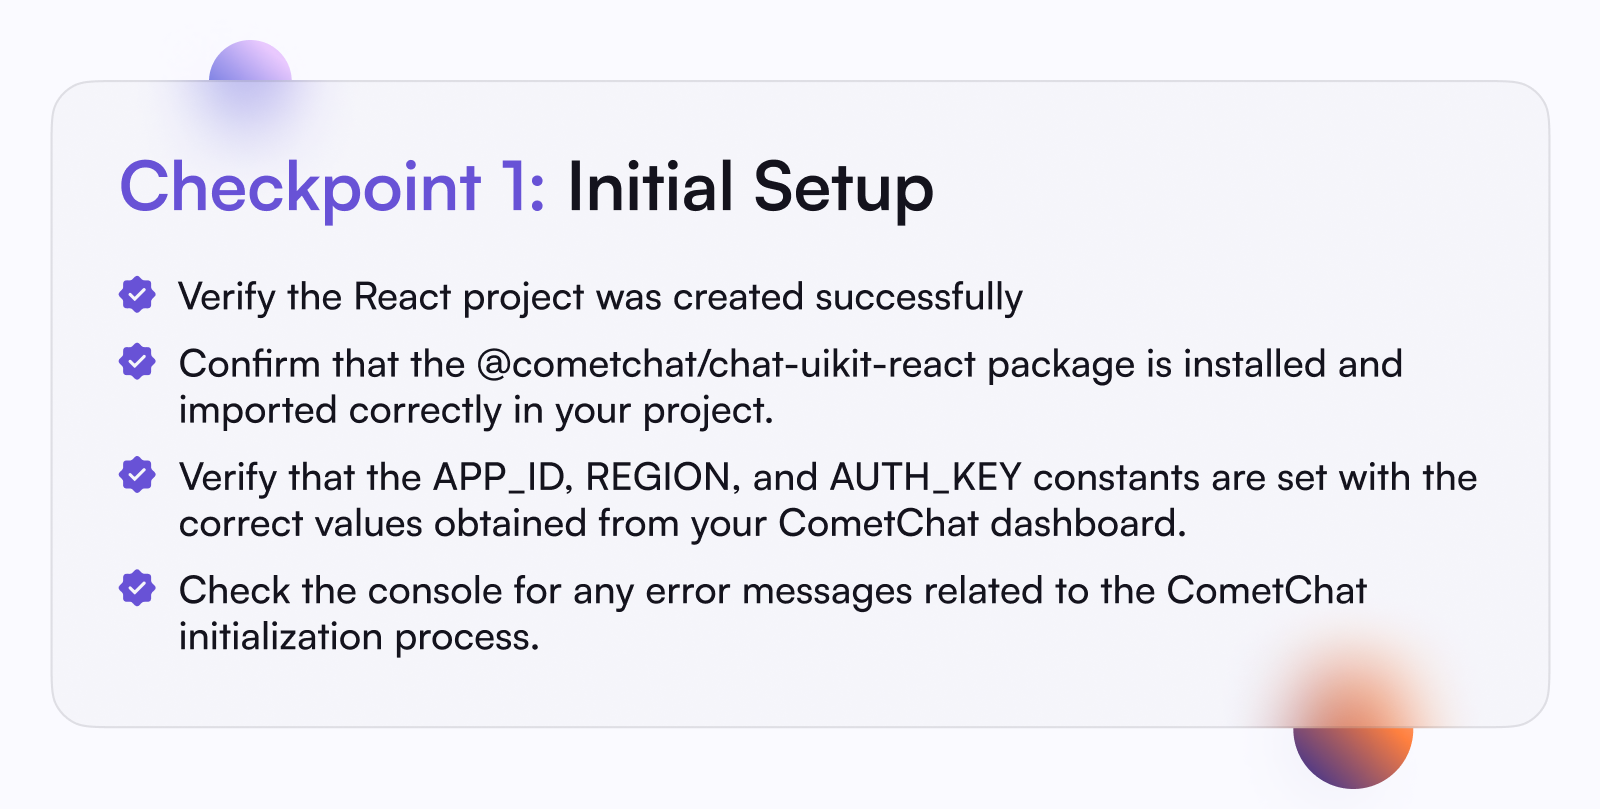
3. Initialize the React chat UI kit
In this step, we will initialize the CometChatUIKit within the React application using the credentials obtained from your CometChat app. If the initialization is successful, a success message will be logged to the console. If there's an error (e.g., due to invalid credentials or network issues), an error message is logged instead.
With the CometChatUIKit initialized, we can now start building the core components of our chat application. We'll start by setting up user authentication, including login functionality and session management, to ensure secure access and maintain user state throughout the application.
Next, we’ll build the main chat interface, which includes designing the primary chat layout, setting up the message display area, and implementing real-time message exchange. The chat interface will serve as the central hub for users to view their conversations and intercat with other users in real time.
Building the chat app interface
1. User login and authentication flow
Before diving into building the chat interface, we'll create a login component that authenticates users with CometChat using their unique User ID. This authentication system is fundamental as it establishes a secure connection between users and CometChat servers, managing user sessions and ensuring proper access to conversations.
We'll create a login form that:
Accepts a User ID input from the user
Authenticates the User ID against CometChat's backend
Handles loading states and error messages
Establishes a user session upon successful login
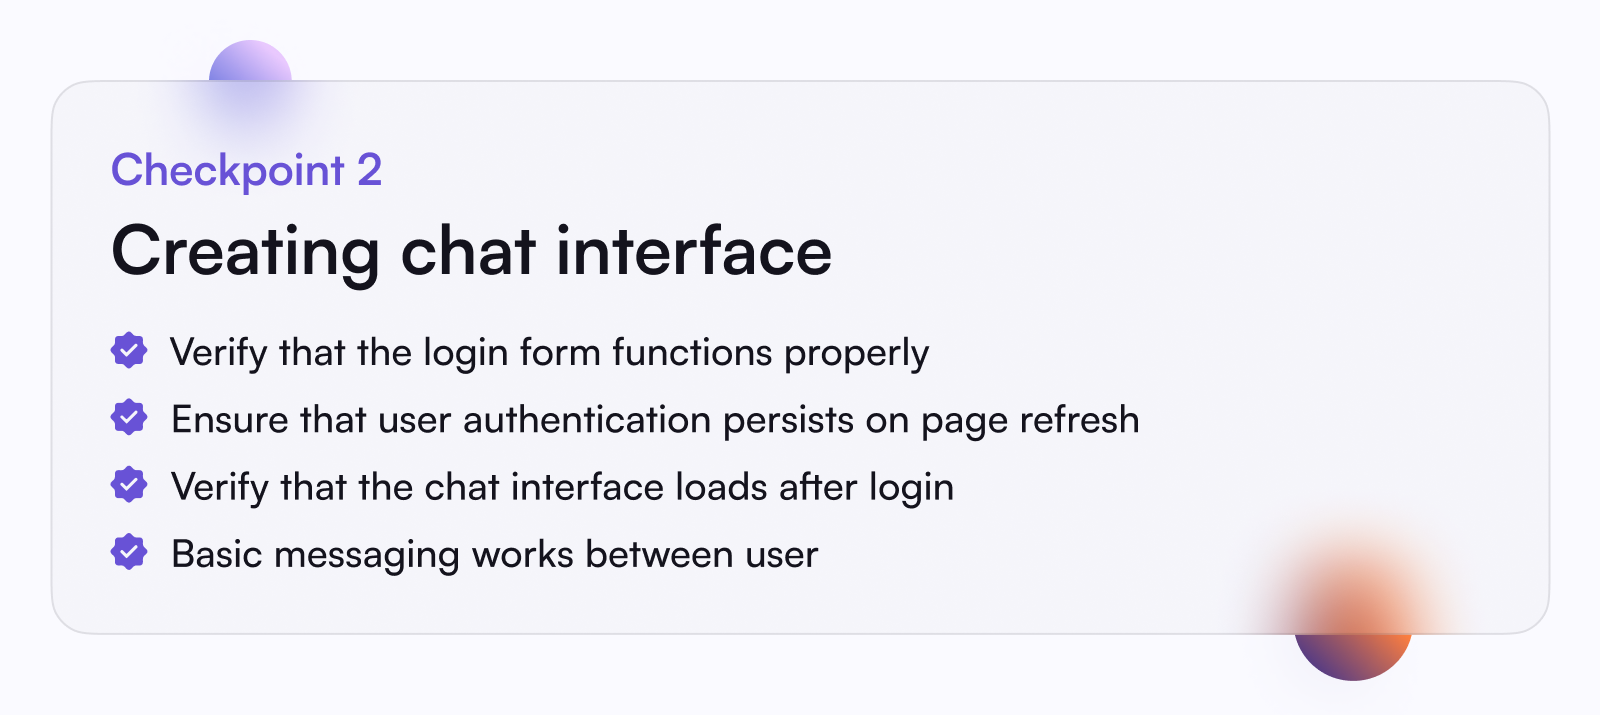
2. Building the chat interface
After implementing user authentication, the next step is to create the main chat interface where users can exchange messages. This section demonstrates how to seamlessly integrate the chat interface into your React app.
If chat is a separate feature in your app, this interface will serve as the inbox. However, for apps like WhatsApp or Telegram, where messaging is the primary focus, this will function as the homepage of your app, where users land after logging in.
The chat interface we're building will consist of two main elements:
Conversation list: Displays recent chats based on the user's ID.
Message screen: A dedicated area for real-time messaging with message composer for creating and sending messages, read receipts, typing indicators and more.
To simplify the development process, we’ll use the CometChatConversationsWithMessages component from the CometChat React UI Kit. This component offers developers a streamlined way to build a complete chat interface packed with all user engagement features with a single import.
It comes pre-configured with all the UI elements and features needed for a fully functional chat interface. Additionally, it connects directly to CometChat's backend infrastructure, managing all server communications and real-time updates.
By using this one component, you eliminate the need to configure features separately, import individual UI elements manually and set up custom server interactions for chat functionalities.
For Implementing the chat interface, update your App.js with the following code. This code establishes the core logic for rendering our chat interface.
The implementation follows these steps:
When the component mounts, it first checks the user's authentication status using the useEffect hook. Then, it retrieves the logged-in user's information through the CometChat SDK to verify their active session.
Based on this authentication check, it makes one of two decisions:
For authenticated users: Displays the chat component, providing access to conversations and messages
For unauthenticated users: Shows the login component, prompting them to sign in
This authentication flow ensures that only verified users can access the chat functionality. Once implemented successfully, the chat screen will display the conversation list and message screen, allowing users to send and receive messages in real-time.
In the next steps, we will show you how to
Enable or disable specific features
Adding notification and moderation functionalities on top of the existing features
Customize the UI to match your app's design
Modify behavior of individual components
Understanding CometChat's built-in features
When you implement CometChatConversationsWithMessages, you're getting a robust set of real-time chat features that would typically take months to build from scratch. This includes
1. Real-time message delivery
WebSocket connections for instant message delivery
Message queuing and retry mechanisms
Network state management and reconnection
Message delivery receipts and status tracking
2. Message history and syncing
Automatic message history loading
Pagination for older messages
Message gap detection and resolution
Offline message syncing when users reconnect
Message history retention and backup
3. Presence system
Real-time online/offline status
Last active timestamps
Custom status messages
Presence state syncing across devices
4. Typing indicators and read Receipts
Real-time typing indicators with throttling
Multi-user typing states in group chats
Read receipt tracking and display
Message seen status across multiple devices
Beyond the UI: How CometChat handles complex chat operations
In addition to the features mentioned above, CometChat handles all the complex and resource-intensive operations needed to run and manage chat in your React app. Here are some critical backend activities that CometChat manages behind the scenes:
01.
Message encryption and security: Every message is encrypted end-to-end, protecting user conversations from potential security breaches.
02.
Network optimization and bandwidth management: Optimizes message delivery for speed and reliability, even in low-bandwidth or high latency conditions.
03.
Cross-platform message synchronization: Maintains message consistency across multiple devices and platforms. If a user starts a conversation on mobile and switches to desktop, their entire chat history and message status are instantly synchronized.
04.
Scalable message delivery infrastructure: Manages the complex infrastructure needed to handle millions of concurrent messages. During high-traffic periods, the system automatically scales to maintain performance without message delays.
Building these features independently would require significant expertise, time, and resources. By handling all these complex operations, CometChat frees you from having to worry about:
Setting up and maintaining WebSocket servers (which can cost thousands in infrastructure)
Implementing reliable message delivery guarantees across unstable networks
Managing presence servers for real-time user status updates
Creating sophisticated typing indicator throttling to prevent server overload
Developing robust message storage and retrieval systems that can handle millions of messages
Building complex network handling logic for various edge cases and reconnection scenarios
Adding essential features to your React chat app
Now that we have our basic chat functionality working, let's look at how to add powerful features to make your cha app stand out. Each of these features requires only minimal code but adds significant value to your chat application.
1. Message threads
Enable threaded conversations similar to Slack or Microsoft Teams:
2. Message reactions
Allow users to react to messages with emojis:
3. User Mentions
Implement @mentions to tag users in conversations:
4. Rich Media Messages
Enable sharing of various media types:
5. Link Previews
Automatically generate rich previews for shared links:
Adding advanced functionalities on top of the existing features
1. Setting up notifications
Now that your chat functionality is up and running, it's time to enable notifications so users never miss a message. CometChat’s Notifications module allows you to set up and manage notifications across multiple providers directly from the dashboard, ensuring centralized control and effortless configuration. You can easily integrate push notifications with APNs and FCM, email notifications with SendGrid, and SMS alerts with Twilio, or use webhooks to connect with any provider of your choice.
You can also enable notification preferences for your users, allowing them to customize when and how they receive notifications. Additionally, our customizable templates let you tailor notifications to your app’s tone and branding.
2. Setting up advanced moderation
Next, let’s explore CometChat’s powerful moderation capabilities, designed to help you maintain a safe and respectful environment for your users..
Front-end moderation
User reporting: Empower your users to report inappropriate behavior or content directly from the chat interface.
User blocking: Allow users to block others, preventing unwanted interactions.
Message flagging: Enables users to flag specific messages for review by administrators.
Moderation queue
Use our centralized moderation dashboard to give app admins an organized view of flagged messages, reported users, and blocked content. From this dashboard, admins can take real-time action on flagged content, issue user bans or warnings, and escalate issues for higher-level review, all in one place.
Proactive content moderation:
Use our advanced AI filters to prevent harmful content from entering your chat. These filters automatically screen every message exchanged in your app for violations defined by you and take action based on the moderation rules you’ve set up with our rules engine.
CometChat’s rules engine lets you create custom rules to address common moderation scenarios. You can define which filters to use for identifying violations and specify how to handle them, such as blocking a user or removing them from a group. This helps you keep your app free from:
Spam: Block unwanted or malicious content.
Harassment: Automatically filter harmful messages or behavior.
Image and Video Moderation: Analyze and filter media content to ensure it follows guidelines
3. Using Webhooks to extend your chat app's functionality
Leverage our webhooks to trigger actions based on key events like message exchanges, user interactions, group changes, and call activities. You can use them to automate tasks, integrate with external services, and optimize the chat experience in your app. You can configure these webhooks directly from the CometChat dashboard.
Here’s a list of available webhooks:
| Category | Webhook Event |
|---|---|
Message
| Message Sent, Edited, Deleted, Reacted, Mentioned, Delivered, Read
|
User
| User Blocked, Unblocked, Connection Status Changed
|
Group
| Group Created, Member Added, Member Left, Group Owner Changed, Member Kicked
|
Calling
| Call Started, Call Ended, Call Initiated, Participant Joined, Participant Left, Call Recording Generated
|
Customizing your react chat app : Theme, fonts and component appearance
1. Theme-Level Customization
CometChat makes it incredibly simple to tailor the look and feel of the UI Kit to match your app's theme. Whether it's adjusting the base colors, accent colors, or changing the typography settings, you can easily achieve this with minimal coding using the built-in theme provider. All it takes is modifying the palette and typography classes.
Defining your color scheme
The palette class allows you to customize the visual color scheme, including backgrounds, text, buttons, errors, and accents of your app. With just a few adjustments, you can:
Set primary and secondary colors to define the base colors of your app.
Highlight key elements by changing the accent colors.
Seamlessly switch between modes to suit user preferences.
Managing font styles
The typography class gives you full control over your app's text appearance.
Choose fonts that complement your app's identity.
Define bold, medium, and regular weights for emphasis.
Customize titles, subtitles, and captions for clear hierarchy and readability.
2. Component customization
Conversations component customisation
The Conversations component displays all conversations related to the currently logged-in user. To ensure the component aligns with your app's design and branding, you can easily customize its appearance by adjusting the properties exposed by the ConversationsStyle class. Below, you'll find a table outlining all the properties you can modify to tailor the component to your specific needs.
| Customizable Elements | Description |
|---|---|
List Item View
| Height, width, background colors, hover states
|
Avatar Display
| Shape, size, border radius, default icons
|
Status Indicators
| Size, color, position, visibility
|
Conversation Title
| Font styles, sizes, colors
|
Last Message Preview
| Length, style, condensed view options
|
Timestamps
| Format, position, localization
|
Search Bar
| Visibility, placeholder text, icon customization
|
Selection Mode
| Single/multi select, selection indicators
|
Empty States
| Custom messages, actions, layouts
|
For more advanced customization, you can define custom views within the Conversations component. This allows you to fully control and tailor each element of the interface, such as layouts, views, and UI elements, ensuring that the component perfectly matches your app's overall aesthetics and functionality. .
Messages component customization
The Messages component is a central feature of our chat interface, responsible for rendering the area where messages are exchanged between users and groups. It plays a key role in managing the real-time flow of messages within the app. Below, you'll find a table outlining all the properties you can modify to tailor the messages component to your specific needs
| Customizable Elements | Description |
|---|---|
Layout
| Size, shape, padding, margins
|
Styling
| Colors, borders, shadows
|
Alignment
| Left/right positioning, sacing
|
Text Messages
| Font styles, sizes, colors
|
Media Messages
| Preview size, player controls
|
Link Previews
| Size, layout, information display
|
Reactions
| Position, size, layout
|
Thread Replies
| Thread view, indicators
|
Message Actions
| Custom actions, menus
|
Timestamps
| Format, position
|
Read Receipts
| Style, position, indicators
|
Typing Indicators
| Animation, position
|
Other key customisation options
You have the flexibility to customize a wide range of elements beyond just themes and component styling, allowing you to create a chat experience that fits your app’s unique requirements.
Here are some of the key areas you can customize to achieve the exact look and feel you want for your chat interface:
Custom Icons and assets: You can replace default icons and images with your own custom assets, further enhancing your app’s brand identity.
Notification preferences:Tailor notification settings to suit user needs. This includes allowing users to control when they receive push notifications, email alerts, or in-app notifications based on their activity or conversation type.
Search and filter options: You can customize the search functionality by adding to sort messages by date, importance, or type.
Interaction patterns: Modify interaction patterns to better fit your app’s functionality. For example, adjusting how messages are sent (e.g., pressing "Enter" versus clicking a send button).
Message formatting: Customize how messages are displayed, including text formatting, hyperlinks, and other inline media.
Custom message: Introduce custom message types that go beyond the standard text, images, or videos.
Custom layouts: Whether it’s a sidebar layout, a full-screen chat view, or even a split-screen format, you can configure how conversations are presented to users.
Component positioning: Control the positioning of individual components to create a layout that best suits your app’s flow, such as a bottom-aligned input bar or a top-aligned navigation menu.
Empty/error states: Customize how empty states (when there are no messages or conversations) and error states (when the chat fails to load) are displayed.
Common customisation scenarios
To inspire your creativity and customization, we've compiled some common customization scenarios that our customers often use to enhance their chat applications. While CometChat's UI Kit is designed to be versatile and suitable for most use cases out-of-the-box, many users take the extra step to tailor the interface even further, ensuring it aligns with their unique brand identity. These customizations not only enhance the user experience but also help create a more engaging, personalized, and cohesive design that resonates with users.
| Customization Scenario | Description |
|---|---|
Custom color scheme
| Customize the chat interface’s colors to align with your app’s brand, ensuring consistency across the user experience.
|
Branded avatars
| Replace default avatars with custom images or logos, reflecting the brand’s identity and personalizing the chat experience.
|
Custom message bubbles
| Modify the appearance of message bubbles, including color, shape, and borders, to align with the app's visual design.
|
Branded icons
| Replace default icons (e.g., send button, emoji reactions) with custom-designed icons to enhance brand recognition.
|
Condensed message preview
| Customize the message preview to display fewer details, such as omitting timestamps or shortening message snippets, creating a cleaner, more concise view.
|
Minimal metadata display
| Reduce the display of metadata (e.g., date/time, status) to keep the interface minimalistic and focused on the conversation itself.
|
Streamlined actions menu
| Simplify or re-arrange the actions available in the message or conversation menu (e.g., remove or hide certain options) to create a more user-friendly interface.
|
Focus on content
| Prioritize the content of the conversation by minimizing other UI elements, ensuring the chat experience is straightforward and easy to navigate.
|
Large media previews
| Customize how media (e.g., images, videos) are previewed in messages by allowing larger previews, offering users a richer visual experience.
|
Enhanced link previews
| Customize how shared links are displayed, including thumbnails, descriptions, and titles, making them more engaging and informative.
|
Custom file viewers
| Implement custom file viewers for specific file types (e.g., PDFs, images, spreadsheets) for enhanced viewing experiences directly within the chat.
|
Inline media players
| Integrate inline media players for seamless playback of videos or audio files directly within the chat interface, enhancing user interaction.
|
Running & testing the complete project
Before you deploy your project to production, it's important to properly structure, test, and verify that everything works as expected. In this section, we'll walk you through how to run the project locally, test key features, and ensure that everything is functioning properly before moving to deployment.
The structure of your project should look like this:
This structure includes all the core components like Login, Chat, configuration files, and environment variables to manage sensitive credentials.
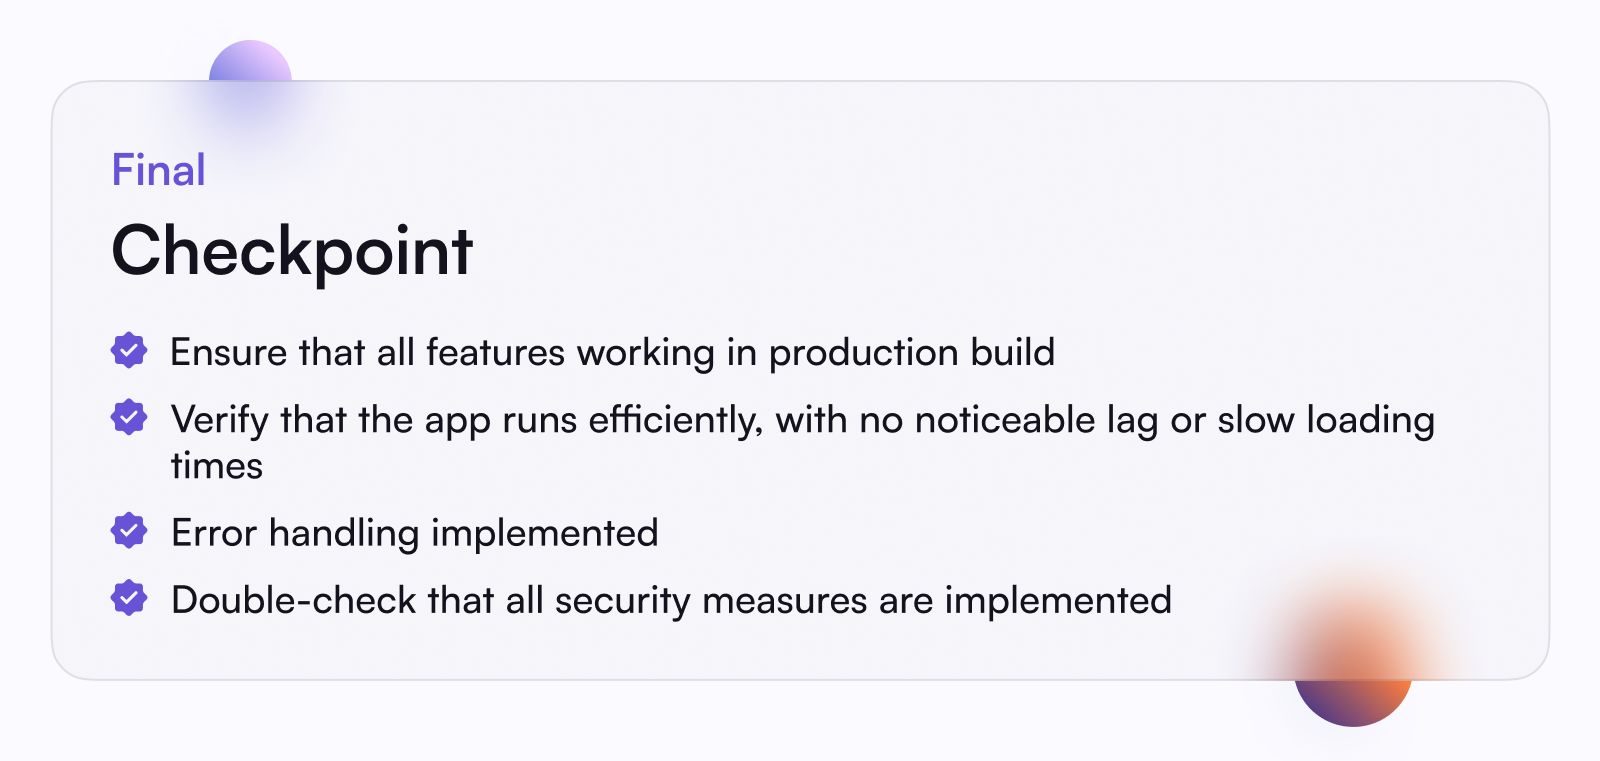
Testing checklist
To ensure that your chat app works flawlessly before deployment, here's a checklist of features you should test:
User authentication
Login: Verify that users can log in successfully with the correct credentials.
Session persistence: Ensure that users remain logged in after a page refresh or app restart.
Logout functionality: Test that users can log out, and their session is terminated properly.
Messaging features
One-on-one messaging: Check if users can send and receive messages in direct conversations.
Group messaging: Verify that group chats are functional, and users can send messages to multiple recipients.
Media sharing: Test if users can send and receive images, files, and other media.
Message threads: Ensure that replies to messages appear in threaded conversations, maintaining a clear context.
Real-time features
Message delivery: Confirm that sent messages are marked as delivered and that recipients can receive them in real-time.
Typing indicators: Test if the typing indicator appears when a user is composing a message.
Read receipts: Verify that the system accurately shows when a message is read by the recipient.
Presence indicators: Ensure that the online/offline status of users is visible and updates in real-time.
Deployment Steps
Once you've tested the app locally and confirmed that all features are working correctly, it's time to build and deploy it. Here's how to proceed:
Environment Setup
Before deployment, ensure your environment is set up for a production build.
This will create an optimized build of your project, ready for deployment. You can test it locally using the serve command to simulate a production environment.
Environment Variables
Make sure that your environment variables are configured correctly for production. This includes securing sensitive credentials like API keys and authentication tokens.
Configure production environment variables: Ensure all keys and tokens are correctly set for production. Never expose sensitive data in your code.
Ensure secure credential handling: Make use of .env files or a secrets management system to keep production credentials secure.

Haris Kumar
Lead Content Strategist , CometChat
