This tutorial is outdated. We're currently working on an updated version. In the meantime, for instructions on building a chat app using CometChat, please visit our documentation.
Introduction
If you ever wondered about building a video chat app by yourself, fear no more my friend. That’s what we’ll be doing in this tutorial. You must be thinking it must be pretty difficult, lot’s of code, lot’s of integration, etc. etc. Trust me. It’s pretty easy. Well, to be honest, CometChat makes it easy.
In this tutorial, we would be building a simple video chat app using the ios video calling sdk from CometChat. I’ll walk you through the basics of integrating CometChat in your app. We’ll then see step by step what do we need to build a simple video chat app in minutes!
CometChat
First, let’s introduce you to CometChat if you have never heard of it. The headline on its website sums up nicely in one line. Text chat & video calling for your website and apps. It has 2 variants, CometChat Go and CometChat Pro.
Go is used for drag and drop chat plugin for your websites and no-code solutions.
Pro gives you access to its APIs, SDKs, Components to build your solution with bare minimum development. We would be using CometChat Pro to build our app. You can read more about it here.
What we’ll cover in this article?

We’ll be building a simple video chat application for iOS in Swift. We’ll start off with a new project and go step by step from adding and configuring CometChat to building our first video chat app!
Below is the overview of what we’ll be doing -
Adding the CometChat SDK and configuring our project.
Implementing user registration & login
Setting up calling history & details page
Setting up listeners to handle calling events
Live video chat in action!
Now, let me ask you one thing- We can either use CometChat components and SDK methods and build the entire UI and functionality ourselves or… or… or… We can leverage CometChat Swift UI Kit and get our app ready in minutes. The UI Kit would do all the heavy lifting for us. The User interfaces and the API calls on the screens, everything. We would just extend our view controllers with relevant CometChat View controllers and get all the functionality pre-loaded. So, which one should we go ahead with? Yup, the Swift UI Kit. Good choice! Let’s get into the code and I’ll show you how this UI Kit makes the development a breeze!
Let’s start building…
Step 1 - Setting up CometChat
When I first started building apps with CometChat, I got stuck at various place unaware about the basic working and concepts how CometChat works. Don’t be like me
Before starting with CometChat, I’d recommend you to take a look at the Key Concepts page. The concepts help you take decisions with respect to your application’s flow.
Before diving into the code, we’ll need to setup CometChat in our application. CometChat Quick Start document does a wonderful job explaining the steps in detail.
We’ll outline the steps from the above document -
Step 2 - Registering / Logging User into our app
CometChat key concepts page states that -
CometChat does not handle user management. You must handle user registration and login at your end. Once the user is logged into your app/site, you can log in the user to CometChat programmatically. So the user does not ever directly login to CometChat.
It means, in the production environment, you’d either be using your custom back-end application or Firebase for user management. This is where you’d store all the registered users of your app. In this case, you would be registering and logging the users in CometChat only after you have successfully registered and logged the user in your own back-end.
But, for the sake of simplicity, In this tutorial, we would not be using any back-end service or Firebase. We would proceed with the CometChat’s default user creation.

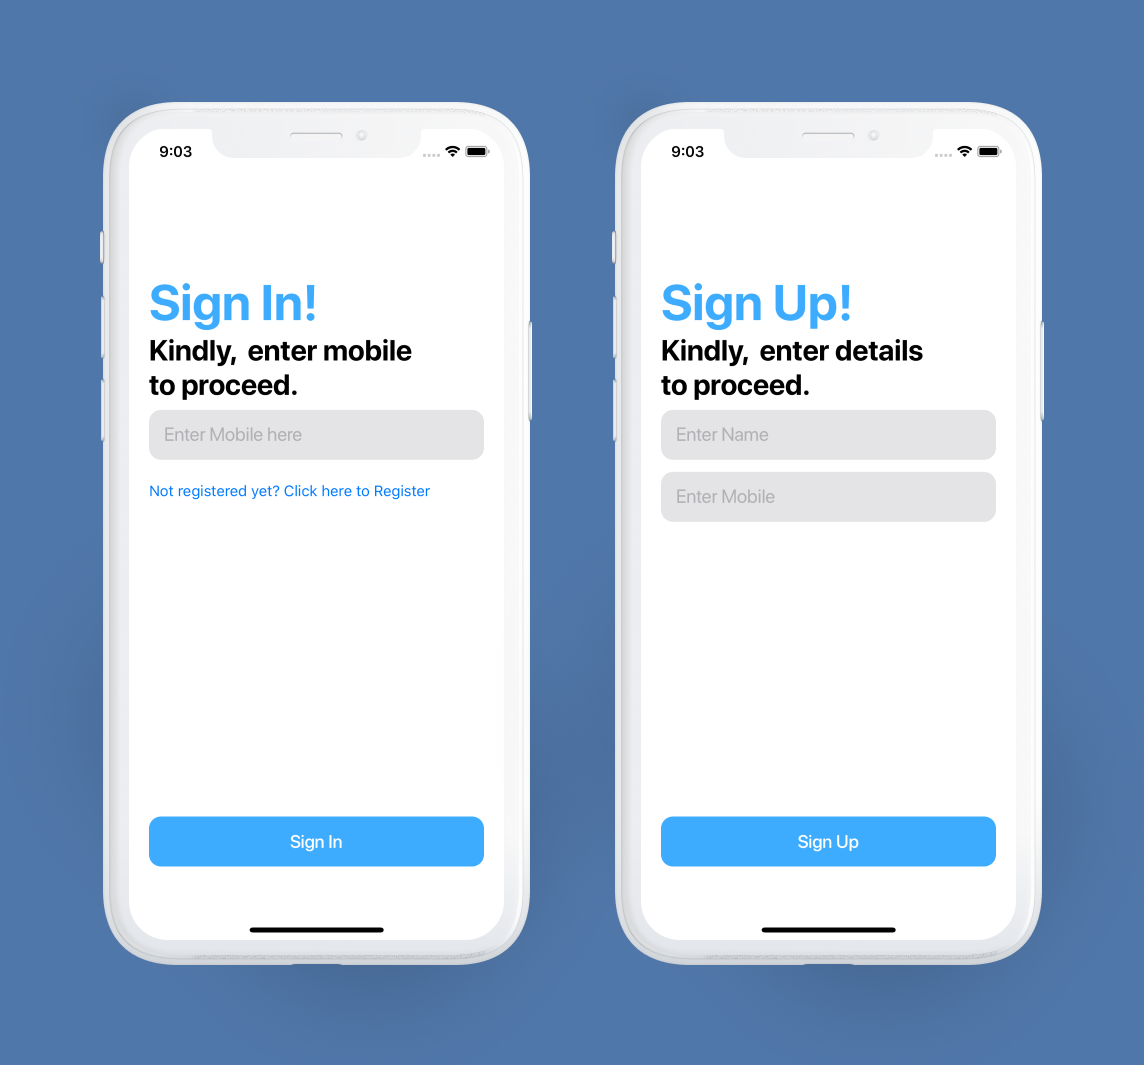
Our Registration page asks for the user’s name and mobile. We’ll consider the mobile number as the user’s unique identifier - uid.
Now that we have our user’s name and uid, we’ll use CometChat’s createUser() SDK method to create the user in our CometChat’s database.
Then in the final step, we’ll call CometChat’s login() SDK method to log the user into our app.
You can also view your registered users in the CometChat Dashboard.
Let’s see the entire process in code…
We’ll also create a Login screen for the already registered users. They would be entering their mobile numbers to log in since we used the user’s mobile number as uid. We would use CometChat’s login() SDK method to accomplish this. Here’s the code for our Login Screen-
Note: I have skipped the validation part from the scope of this tutorial. But in a production app, you should add validations on the fields to avoid crashes and unexpected behaviour. Also, you would need to store current logged in user in shared preferences or a local database and check whether the user is already logged in and appropriately skip the login page.
On both the screens, in the Login onSuccess method, I am routing the screen to CallsHistoryListVC. We’ll be setting this screen up next…
Step 3 - Setting up Calls List View
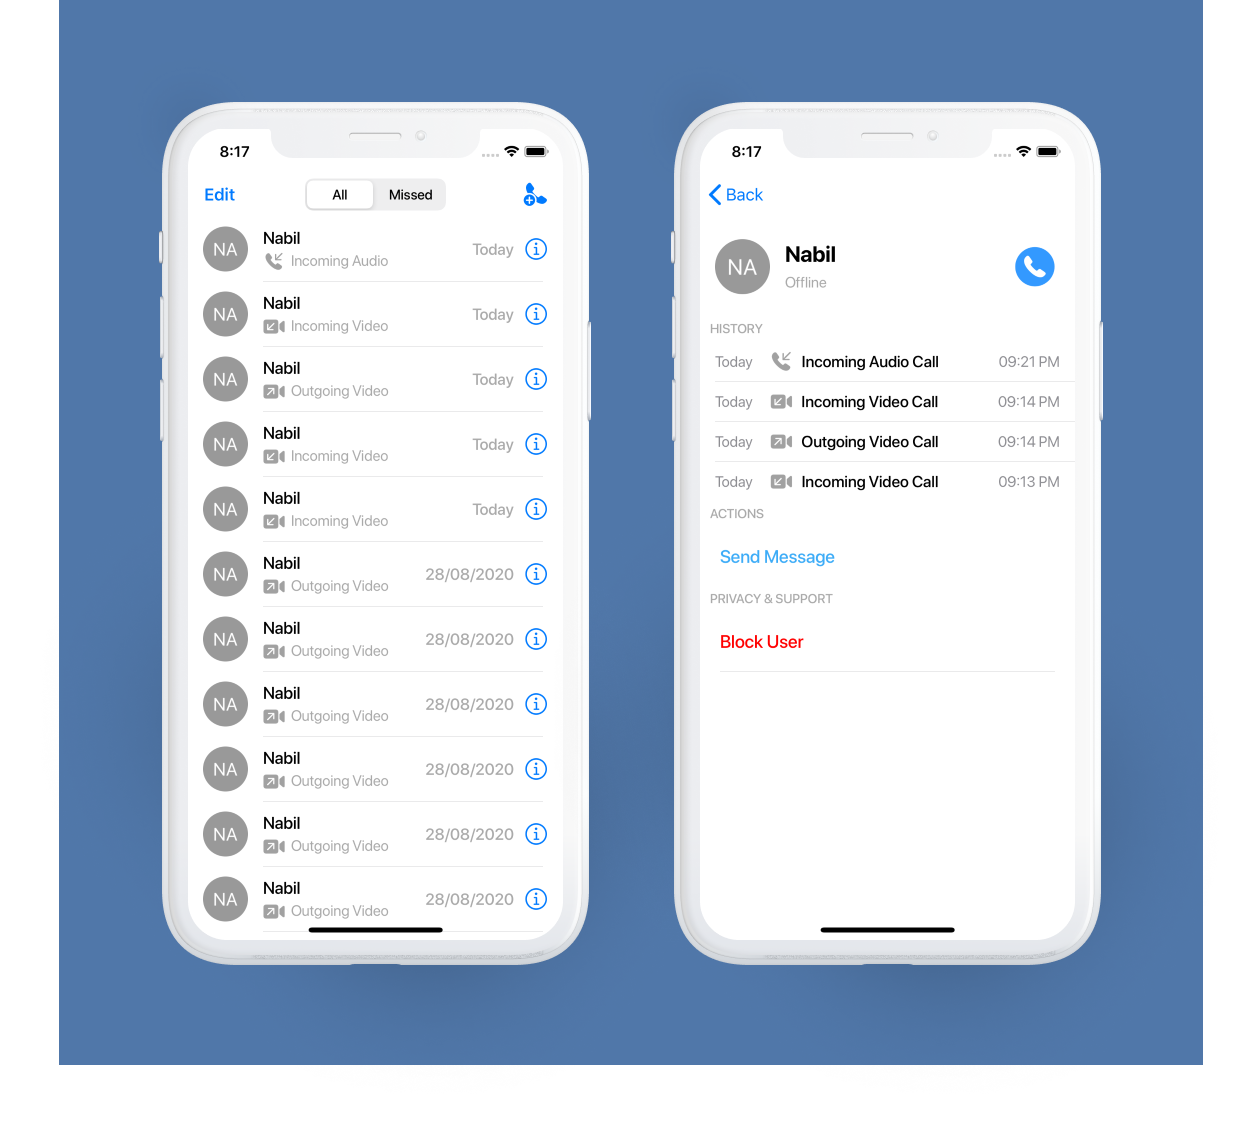
Once the user logs in the app, we would be showing the screen with the user’s call history. To implement this, we would be using CometChatCallsList from CometChat UI Kit. This would give us the following features with hardly any code!
List view with user’s call history
User details view which lists an entire call history with that user.
Video, Audio and Text chat options
So, let’s go ahead and see the code that we need to write to get all these features into our app -

We would first create a view controller. I’ll name it - CallsHistoryListVC.
Note that I have extended my view controller from CometChatCallsList. Extending our view controller with CometChatCallsList allows us to leverage all the features that we listed above.
CometChatCallsList is a part of CometChat UI Kit. We won’t have to create UITableView, UITableViewCell or any custom development of any sorts to display our call history list. We won’t even have to call the API ourselves! CometChat UI Kit would handle it all for us.
Tapping on any user item displayed would take the user to its Details screen. This screen displays the entire call history between the logged in user and the selected user. The screen also provides an option to initiate Video, Audio or Text chat!
Isn’t this great? All these features by just extending our view controller with the one from CometChat UI Kit.
Next, we’ll see how to make your first call…
Step 4 - Selecting a new user to initiate the call.
In a practical scenario, when you first sign-up into your app, the call history list is going to be empty. It would start populating when you make a few calls. To make your first call, you need to select a user from your contacts list. We’ll see the code to implement this feature.

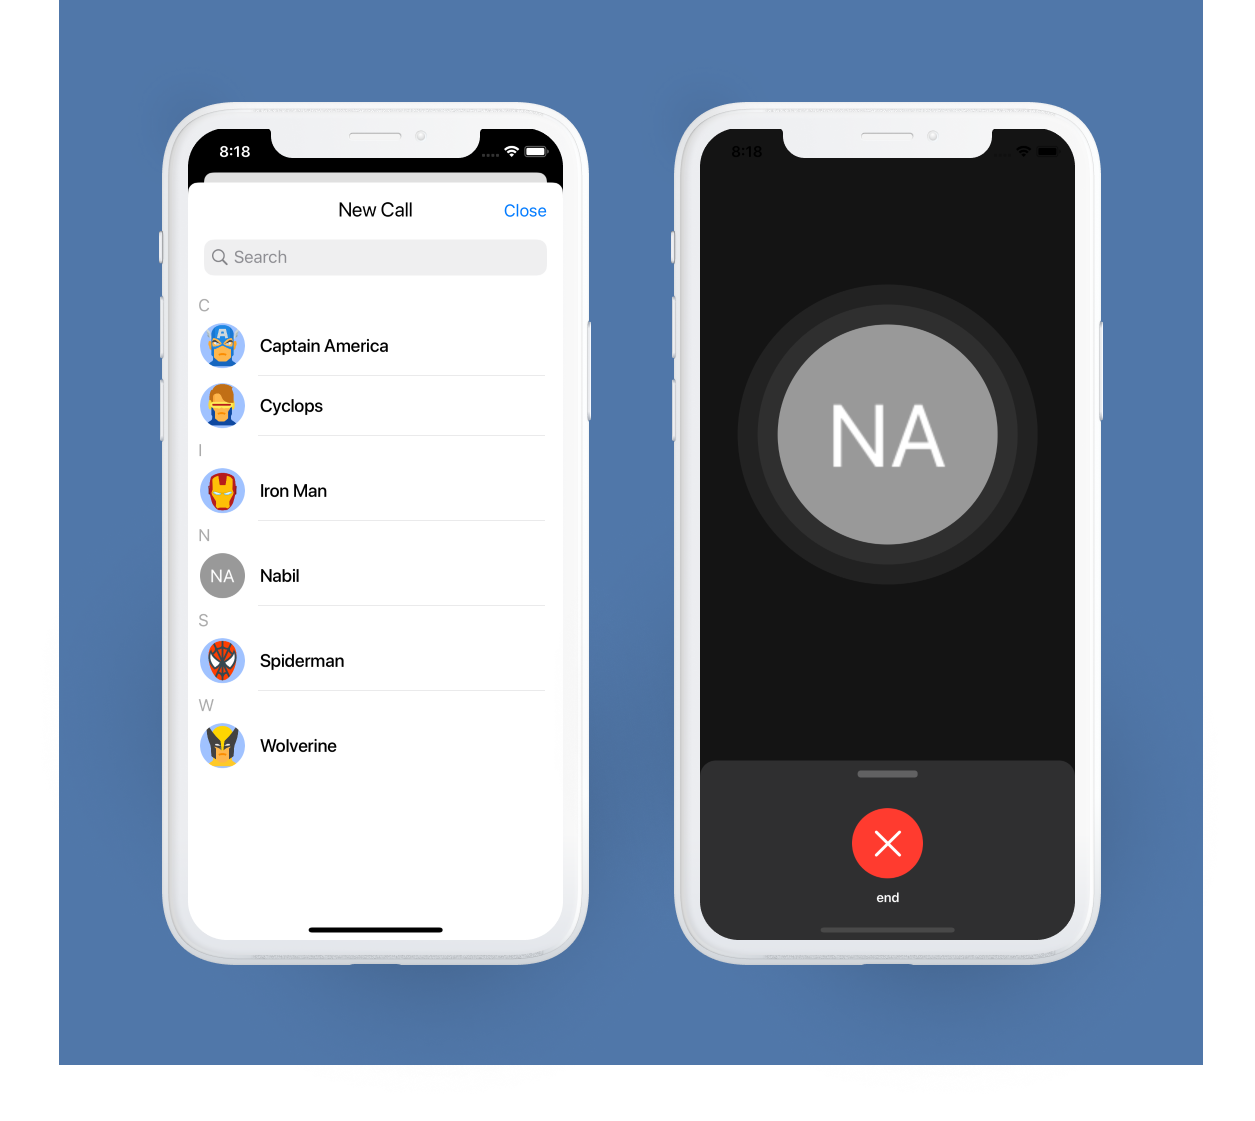
Wait! There’s no code needed for this. Remember the CometChatCallsList that we added to display the user’s call history? That screen comes with a default “+” button at the top right corner. Tapping on that takes you to the User selection screen! The CometChat UI Kit internally handles this behaviour for you.
You can then select from the displayed user list to initiate the call.
Step 5 - Implementing listeners to handle incoming Calls!
Initiating a call was pretty straight forward. We hardly wrote any code and got a ton of functionality built-in. Now we would look into some scenarios which we need to handle when a user initiates the call.

Consider a scenario where User A places a call to User B →
There are 6 specific cases that we need to handle in a video or an audio chat app.
Notify User B when User A initiates the call
Start the call on User A’s side when User B accepts the call
End the call on User A’s side when User B declines the call
End the call on User B’s side when User A cancels the call before starting.
End the call on User A’s side when User B hangs up.
End the call on User B’s side when User A hangs up.
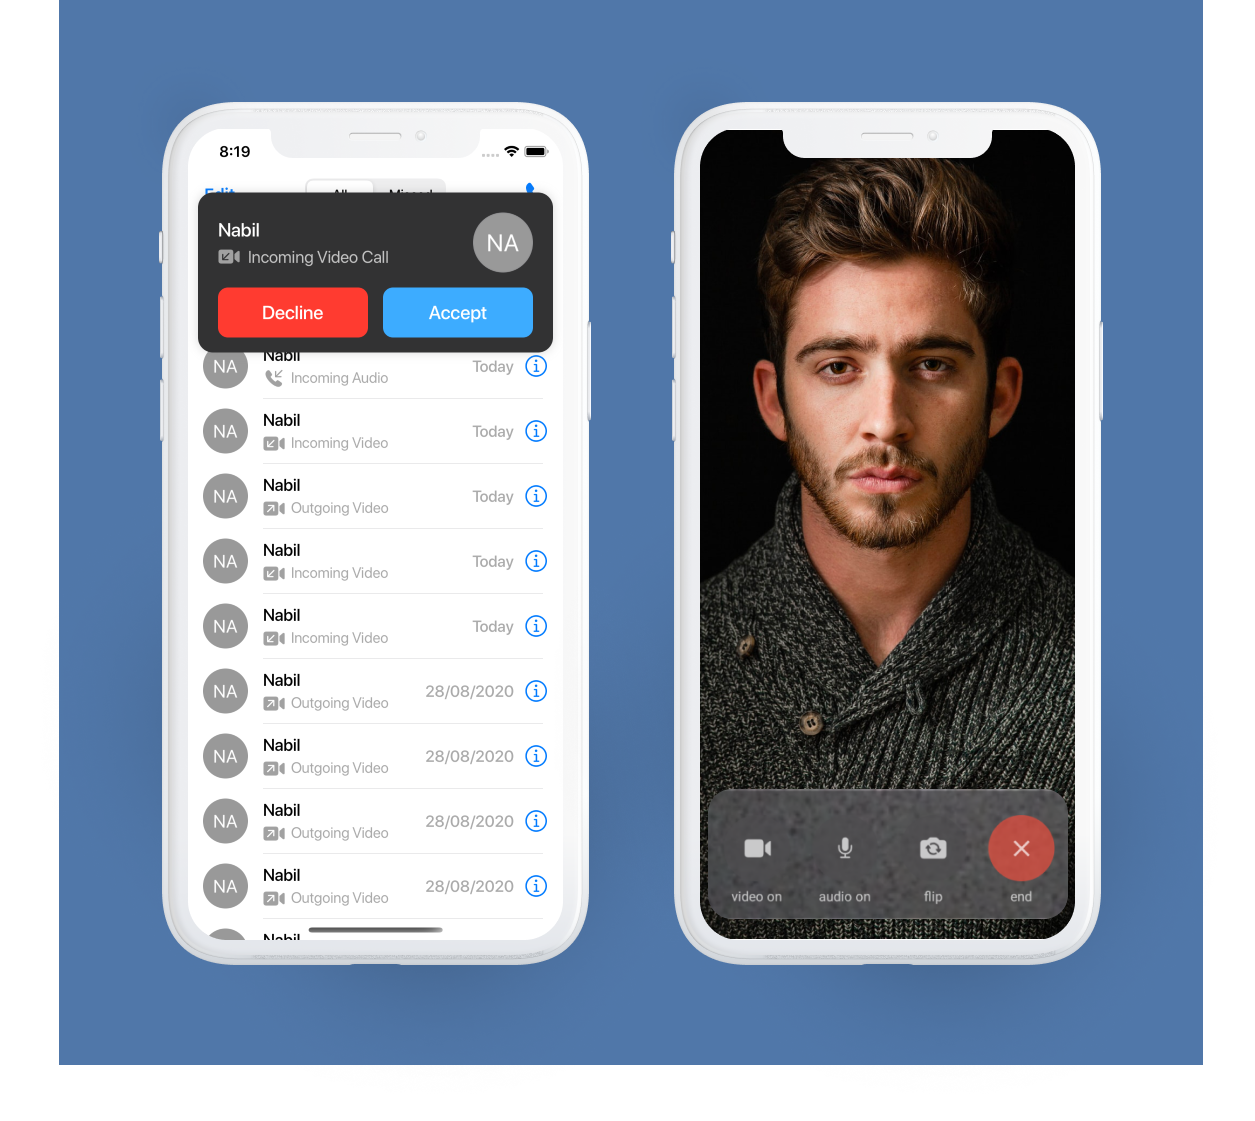
On top of handling these scenarios, we would also need to implement the UIs for these specific scenarios. For example -
The UI screen when someone initiates the call
The Incoming Call Screen
The Ongoing Call Screen
Wow, that sounds like a lot of work, doesn’t it? So lets deep dive and get straight into the code…
CometChatCallManager().registerForCalls(application: self)
Where’s the rest of the code?
Oh! wait, I forgot to mention, adding this single line of code handles everything for us! The Notifications, the UIs, the API calls, everything, just everything!!!
But where exactly do we need to add this beautiful piece of code? We would add this listener as soon as we initiate the CometChat SDK. This would be in our AppDelegate class.
Here’s the updated AppDelegate class -
We are initiating CometChat first (like you’d have seen in Step 1 of this article). Then, we add the CometChat call listener when CometChat is successfully initialised.
That’s it! You have your working Video Chat application ready in minutes! Select a user from the New Call Screen and enjoy your video chat!
You can find the entire source code of this app on GitHub.
Conclusion
How long did it take us to start from scratch and build a functioning video chat app? No seriously, how long? I guess 20 minutes max!
Woah! Nothing to a Functioning App in 20 minutes. All thanks to CometChat to make the development - easy peasy pie!
The Swift UI Kit that CometChat provides is a life saver! Just give a moment and think about the time that you’d have to spend in building all these screens - the UI’s the API calls, the notifications, etc. by yourself. It won’t be in minutes, it won’t be in hours. It would take us days to build something exactly similar to this without the UI Kit. The UI Kit helps us leave the working and logic of Video, Audio, Text chat to CometChat and spend more time working on our business logic instead. It strips away all the complexity of the chat back-end and even the front-end. We just need to plug the components and get our app ready.
If you need more detailed information on CometChat’s iOS UI Kit, the 3 different ways in which you can leverage it to make a chat app. You can take a look at the official documentation page here.
This use case isn’t for everyone. If you need to implement your custom views and screens for calling, user list, call history etc. - CometChat still has you covered with its SDK methods and components. You’d just need to implement these functions and components manually for call initiating, accepting, rejecting & ending. You can find the detailed documentation with all these methods and their parameters here.
Feel free to reach out if you face issues in the implementation or have some quick ideas. We’ll be happy to discuss. We can’t wait to see what’s the next big thing you build using CometChat .

Nabil Kazi
CometChat
