This tutorial is outdated. We're currently working on an updated version. In the meantime, for instructions on building a chat app using CometChat, please visit our documentation.
App and web development have come a long way over the last few years. Due co COVID-19 situation, we use a lot of video conferencing applications including Zoom, Microsoft Teams, Google Meets, and so on. One of the most widely used features are live chat, and voice/video calling. Using the CometChat React UI Kit, React, and Node.js backend services, you will learn how to build one of the Zoom clone with minimal effort. This tutorial will help you to create the Zoom clone in React.js and Node.js.
We should cover the following topics in this tutorial:
Users
User authentication - sign up, log in, log out.
User invitations - custom links for virtual meetings that can be shared to invite participants
Login the logged-in user to CometChat
Create a user friendly and attractive UI (The forgot password feature will not be developed in this tutorial, the purpose of it in the login page to make the UI be more attractive)
Add API call when a user registers so that the user is created in CometChat
Virtual Conferencing
Create personal meeting rooms and invite participants via a link
List online participants.
In-conference chat
Screen Sharing
Call recording
Prerequisites
To follow this tutorial, you must have a degree of understanding of the general use of React.js, Node.js and MySQL database. This will help you to improve your understanding of this tutorial.
Installing the App Dependencies
Step 1: You need to have Node.js installed on your machine.
Step 2: Create a new project with the name zoom-clone by running the following statement.
Step 3: You need to install some dependencies such as CometChat, Validator, Uuid.
Configuring CometChat SDK
Head to CometChat Dashboard and create an account.
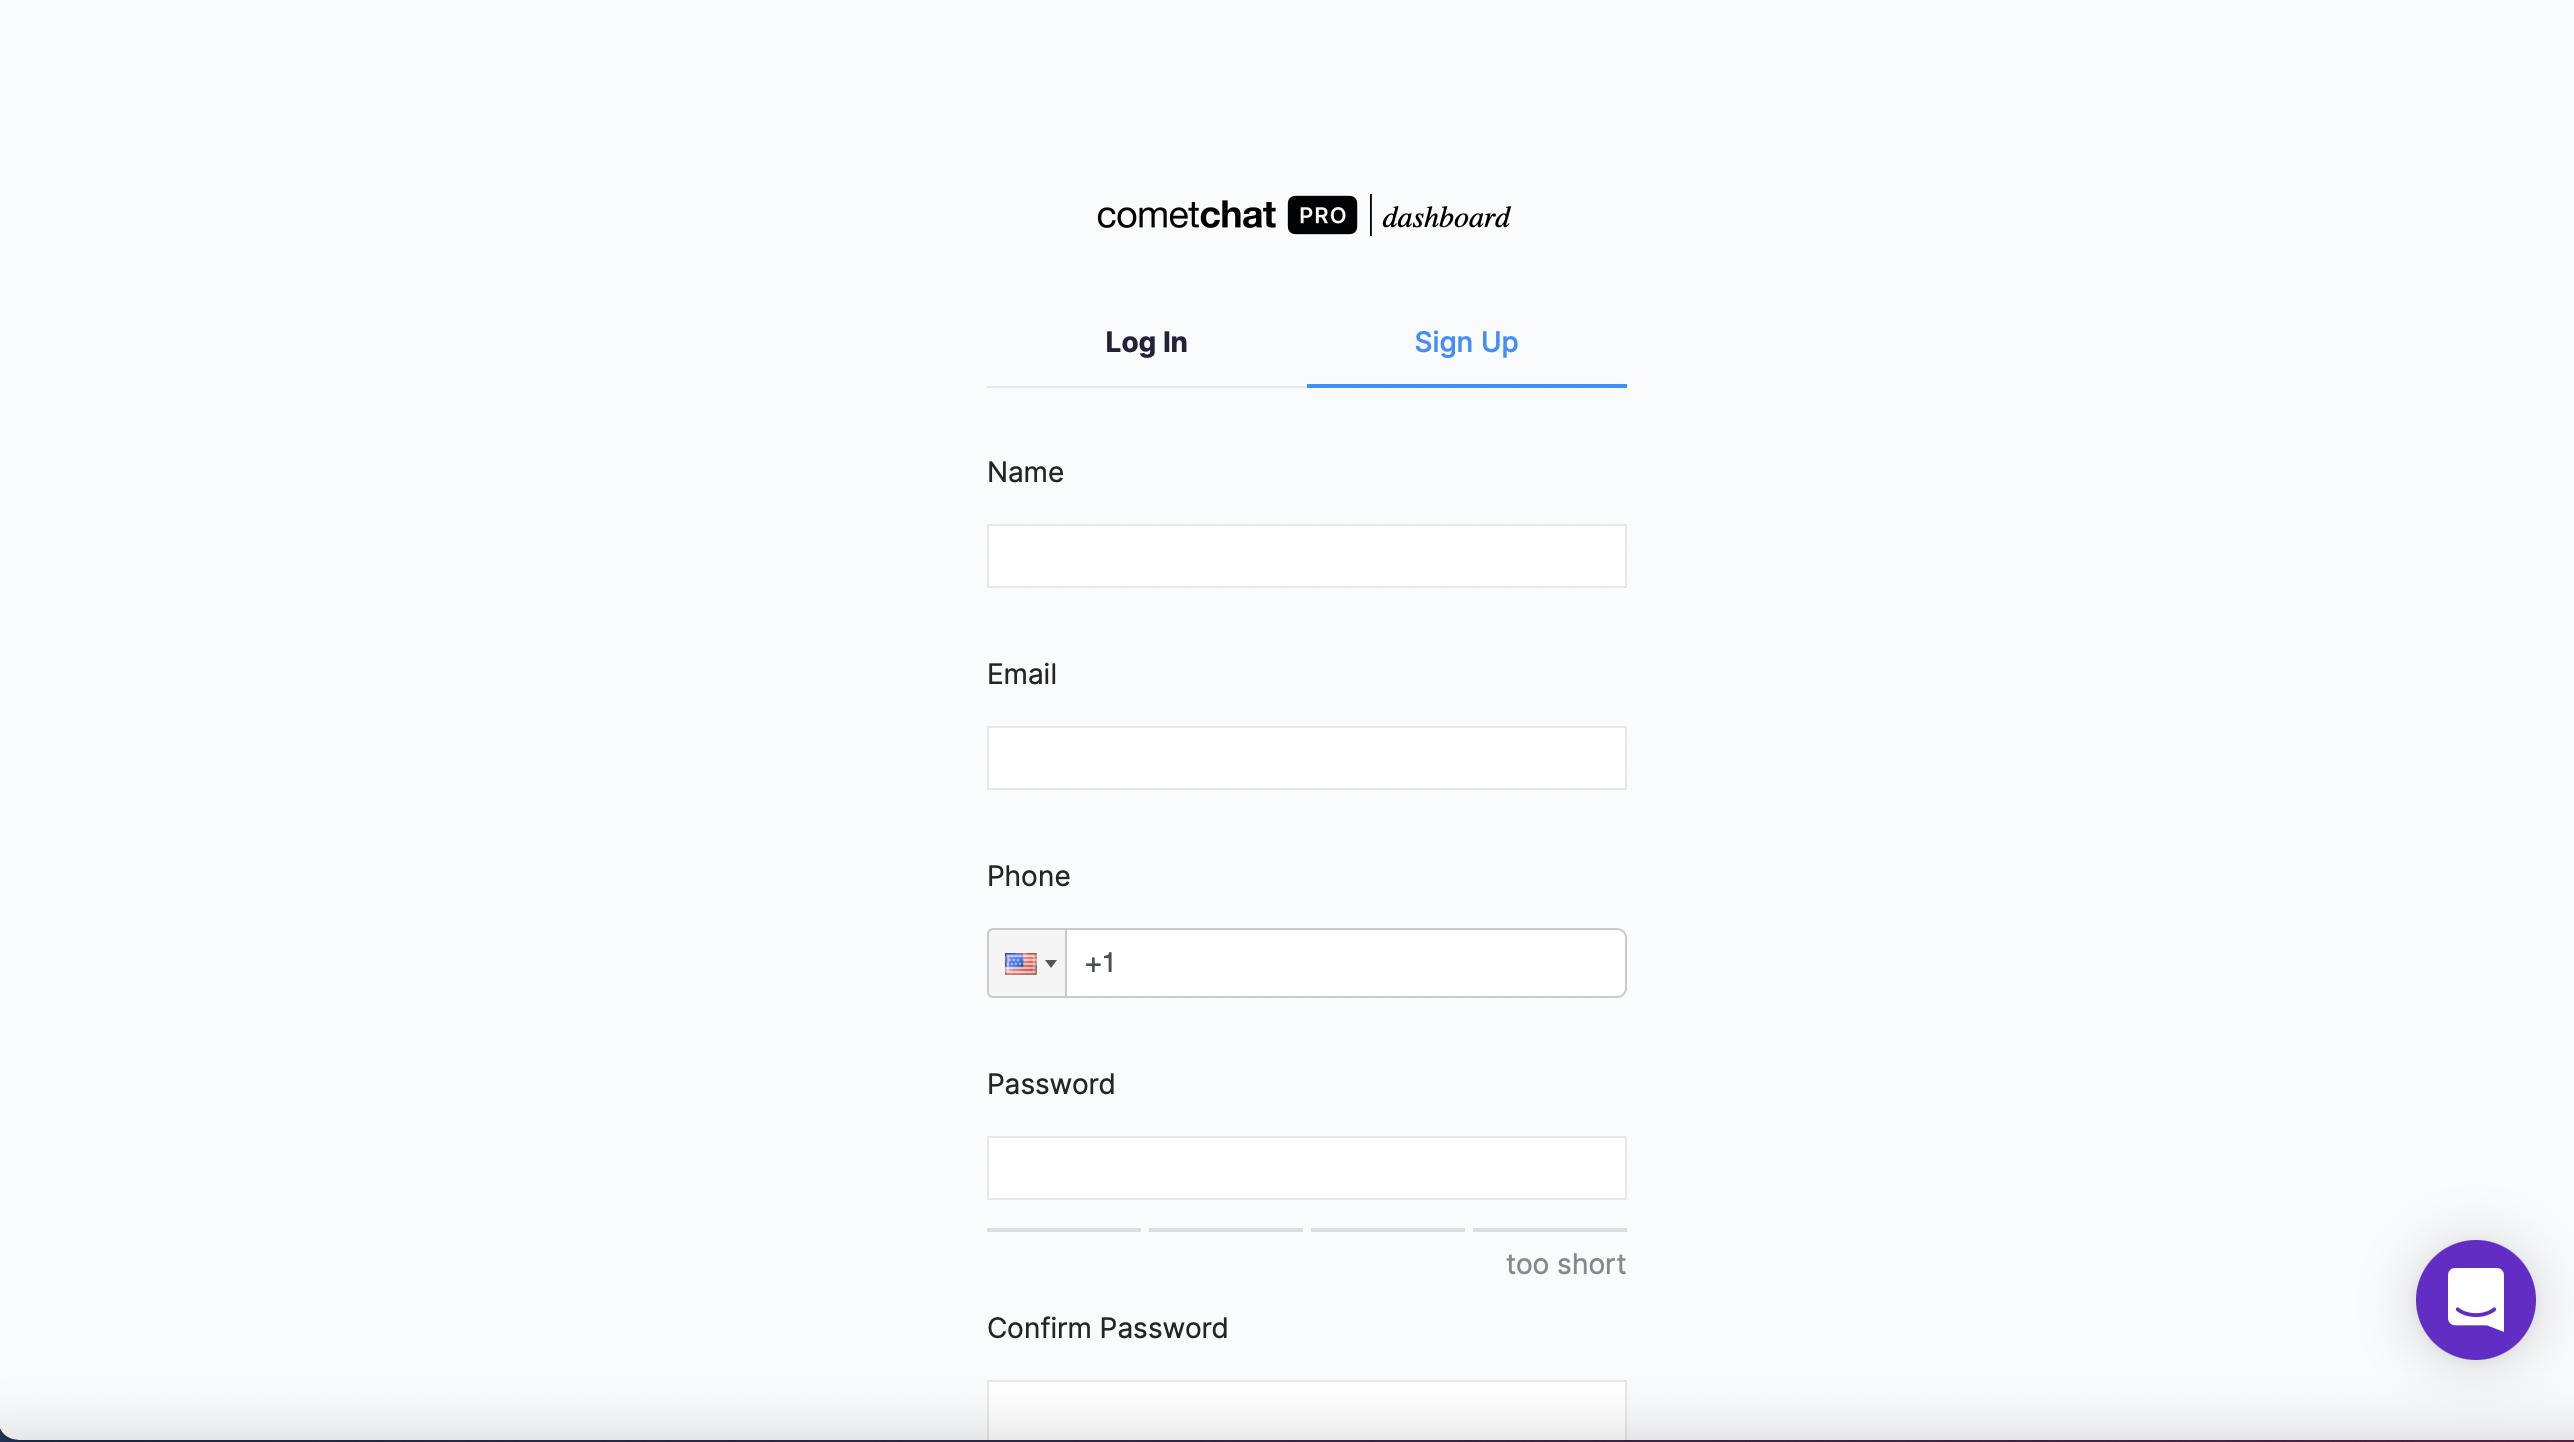
Register a new CometChat account if you do not have one
Add real-time chat with minimal effort using CometChat
2. After registering a new account, you need to the log in to the CometChat dashboard.
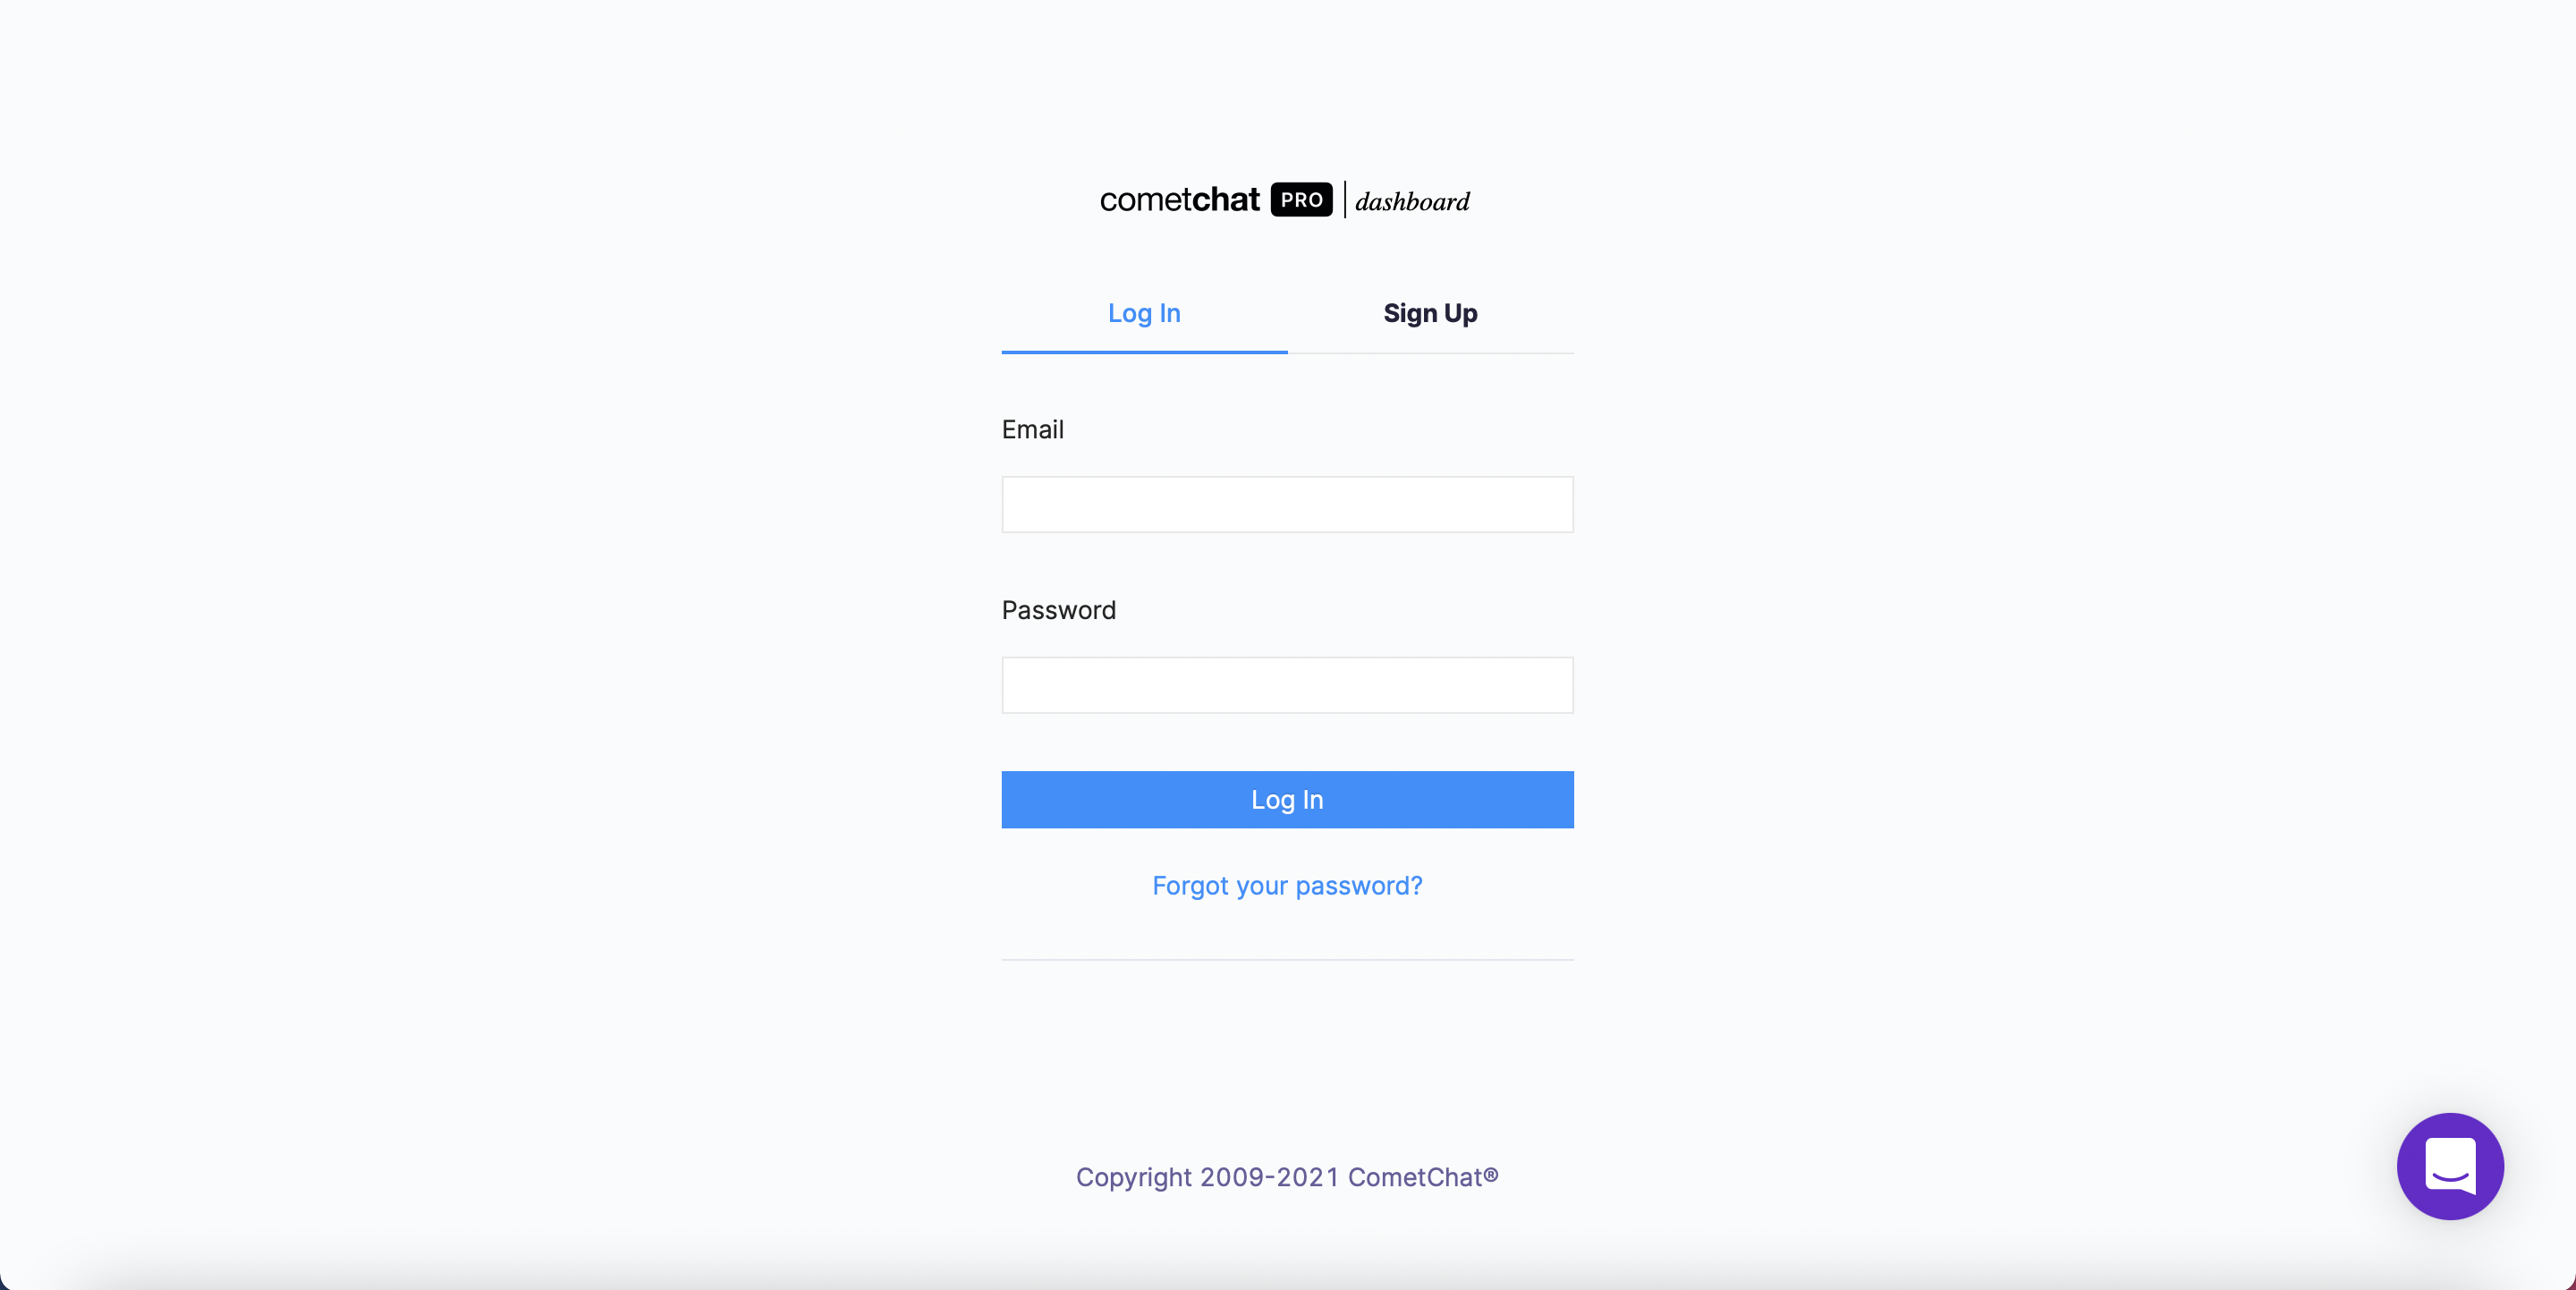
Log in to the CometChat Dashboard with your created account
3. From the dashboard, add a new app called "zoom-clone".
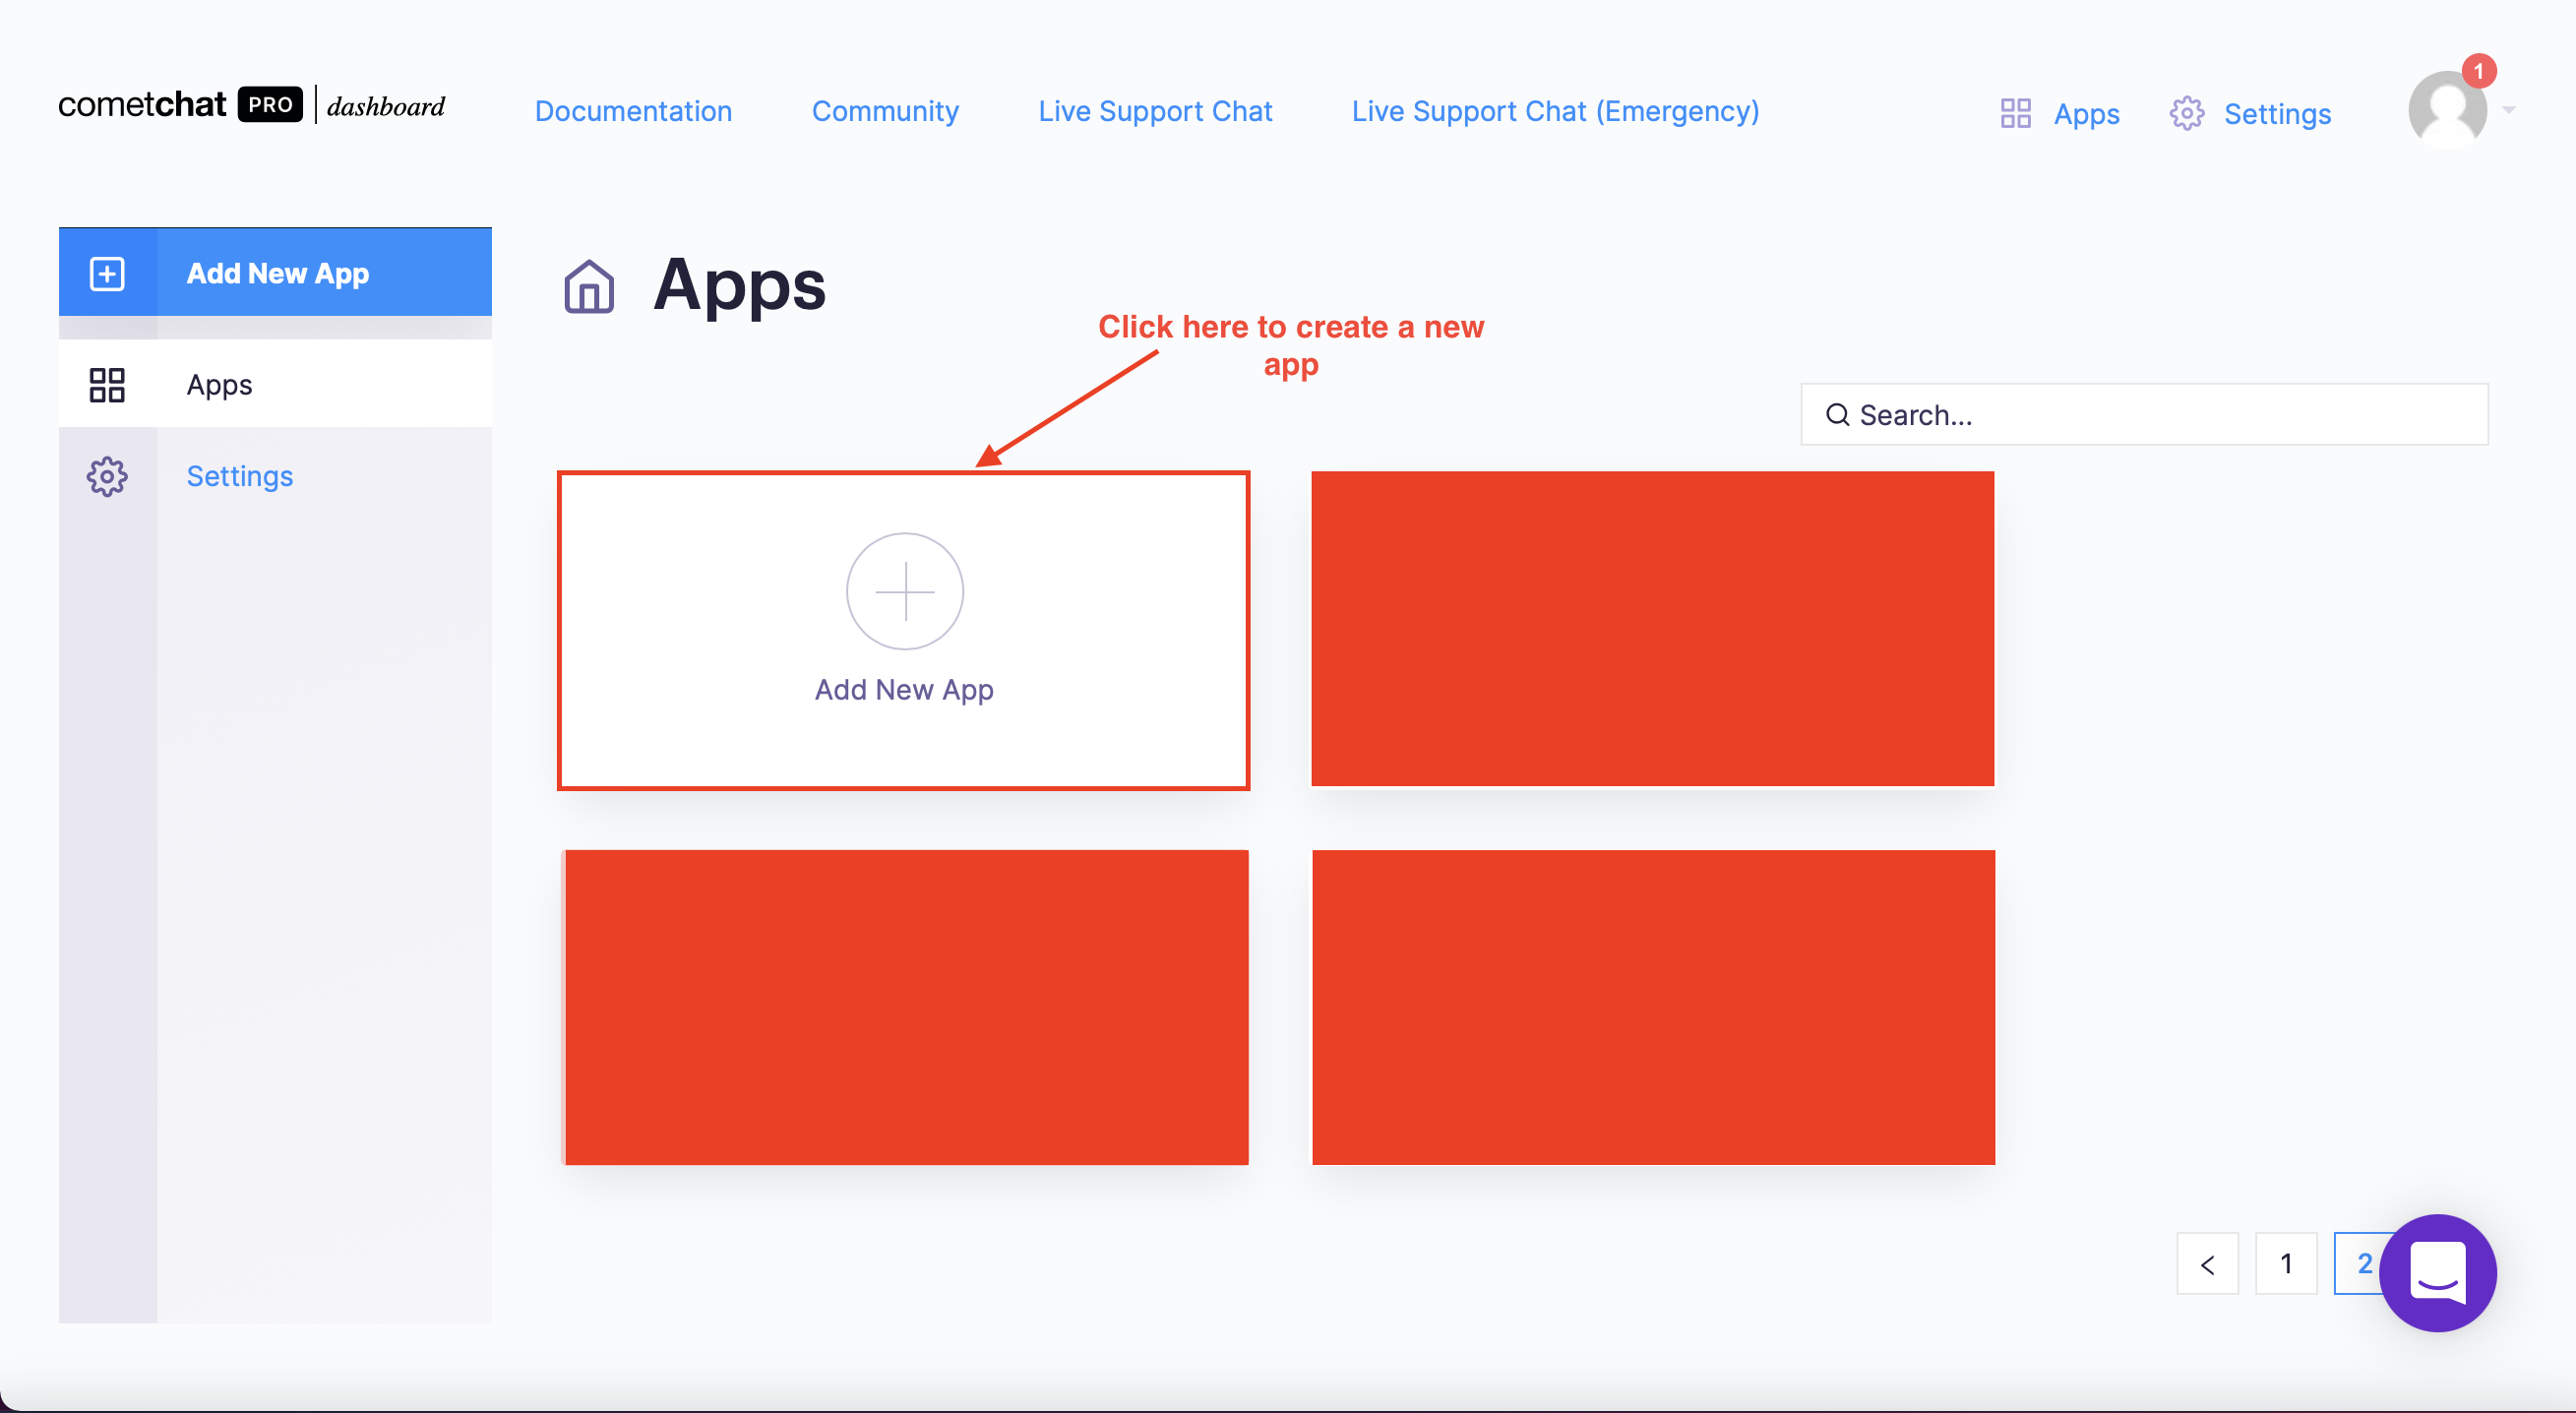
Create a new CometChat app - Step 1
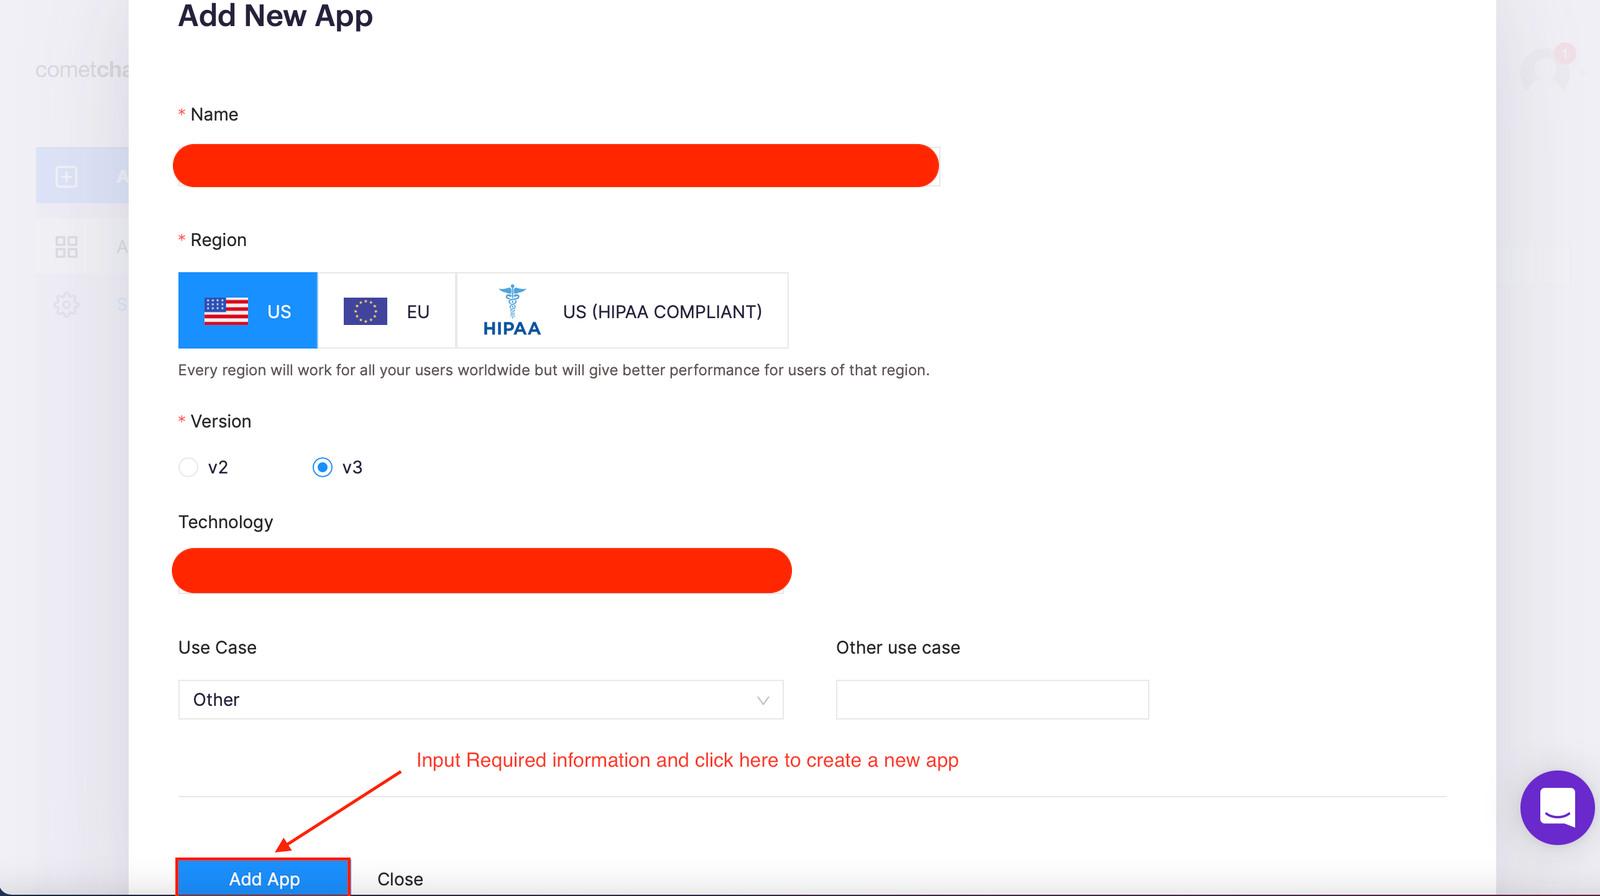
Create a new CometChat app - Step 2
4. Select this newly added app from the list.
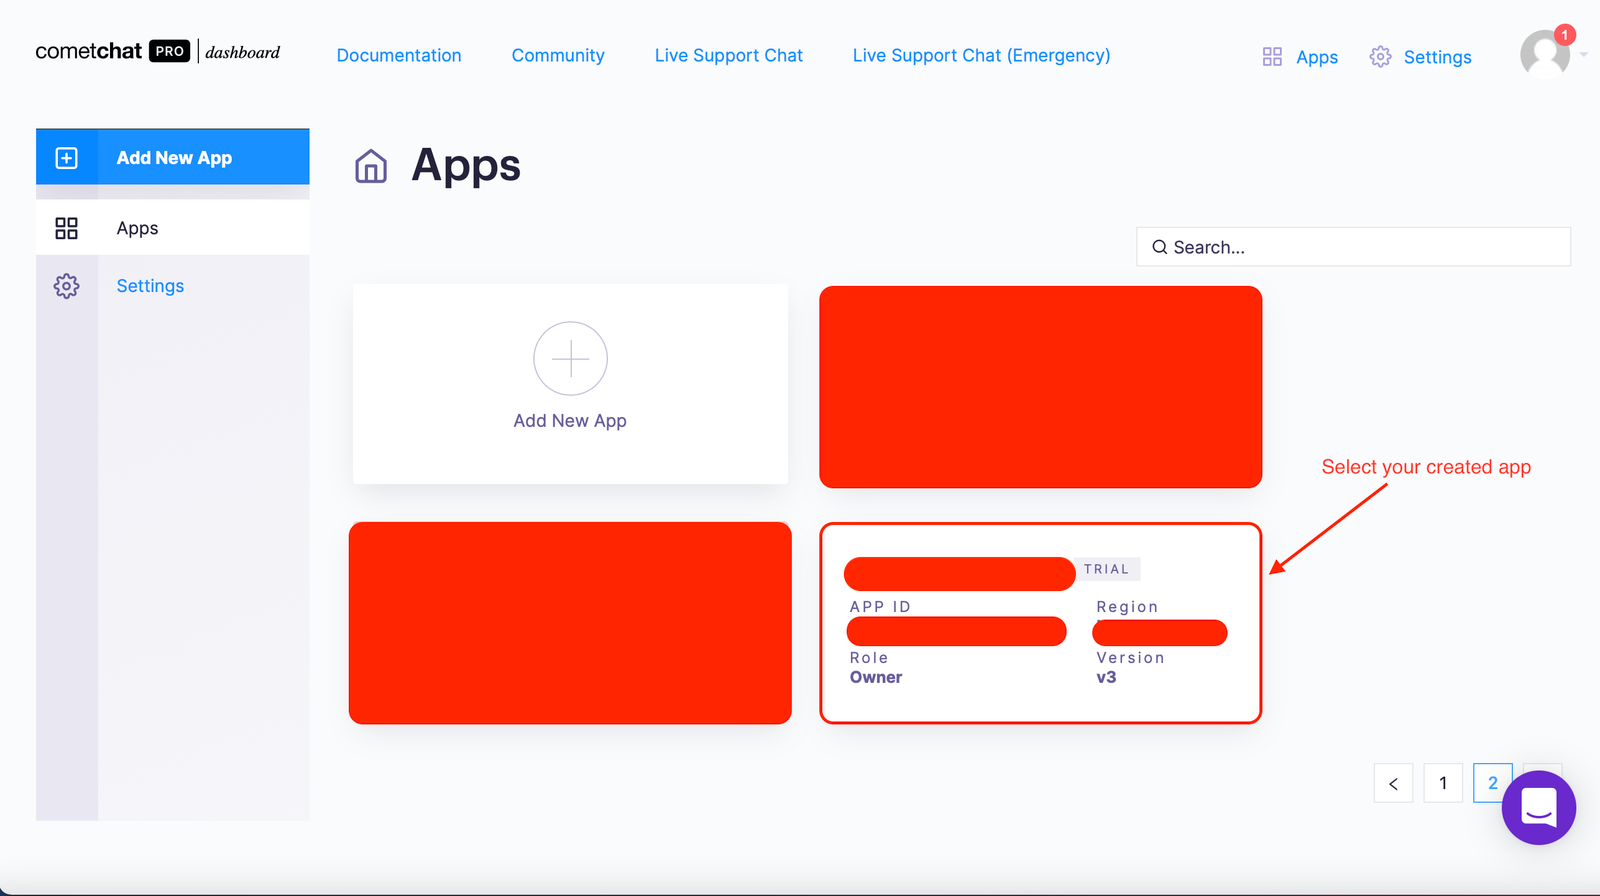
Select your created app
5. From the Quick Start copy the APP_ID, REGION, and AUTH_KEY, which will be used later.
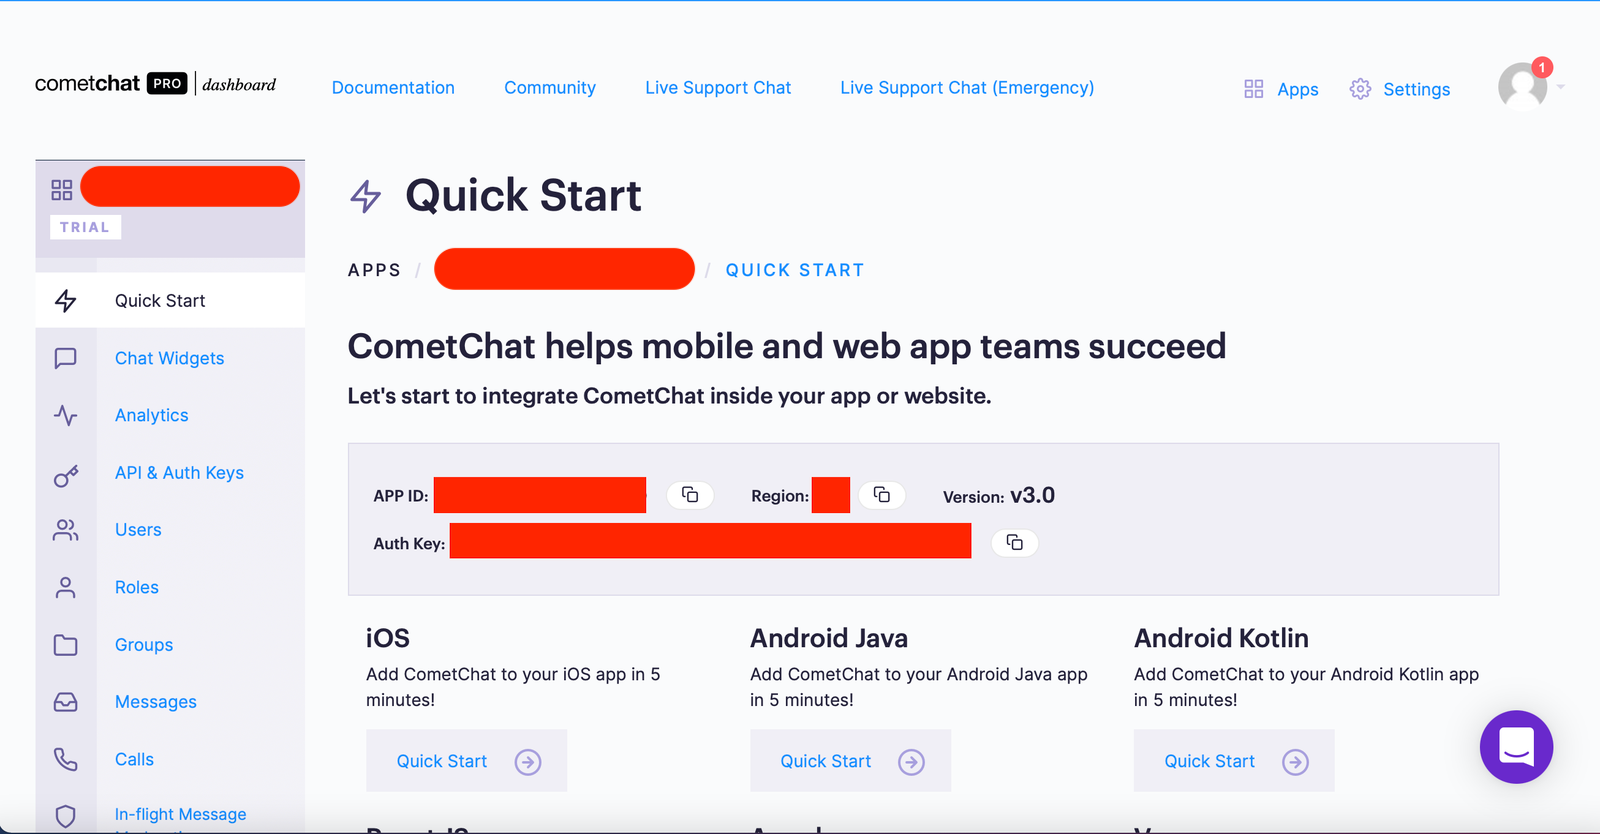
Copy the the APP_ID, REGION, and AUTH_KEY
6. Navigate to the Users tab, and delete all the default users (very important).
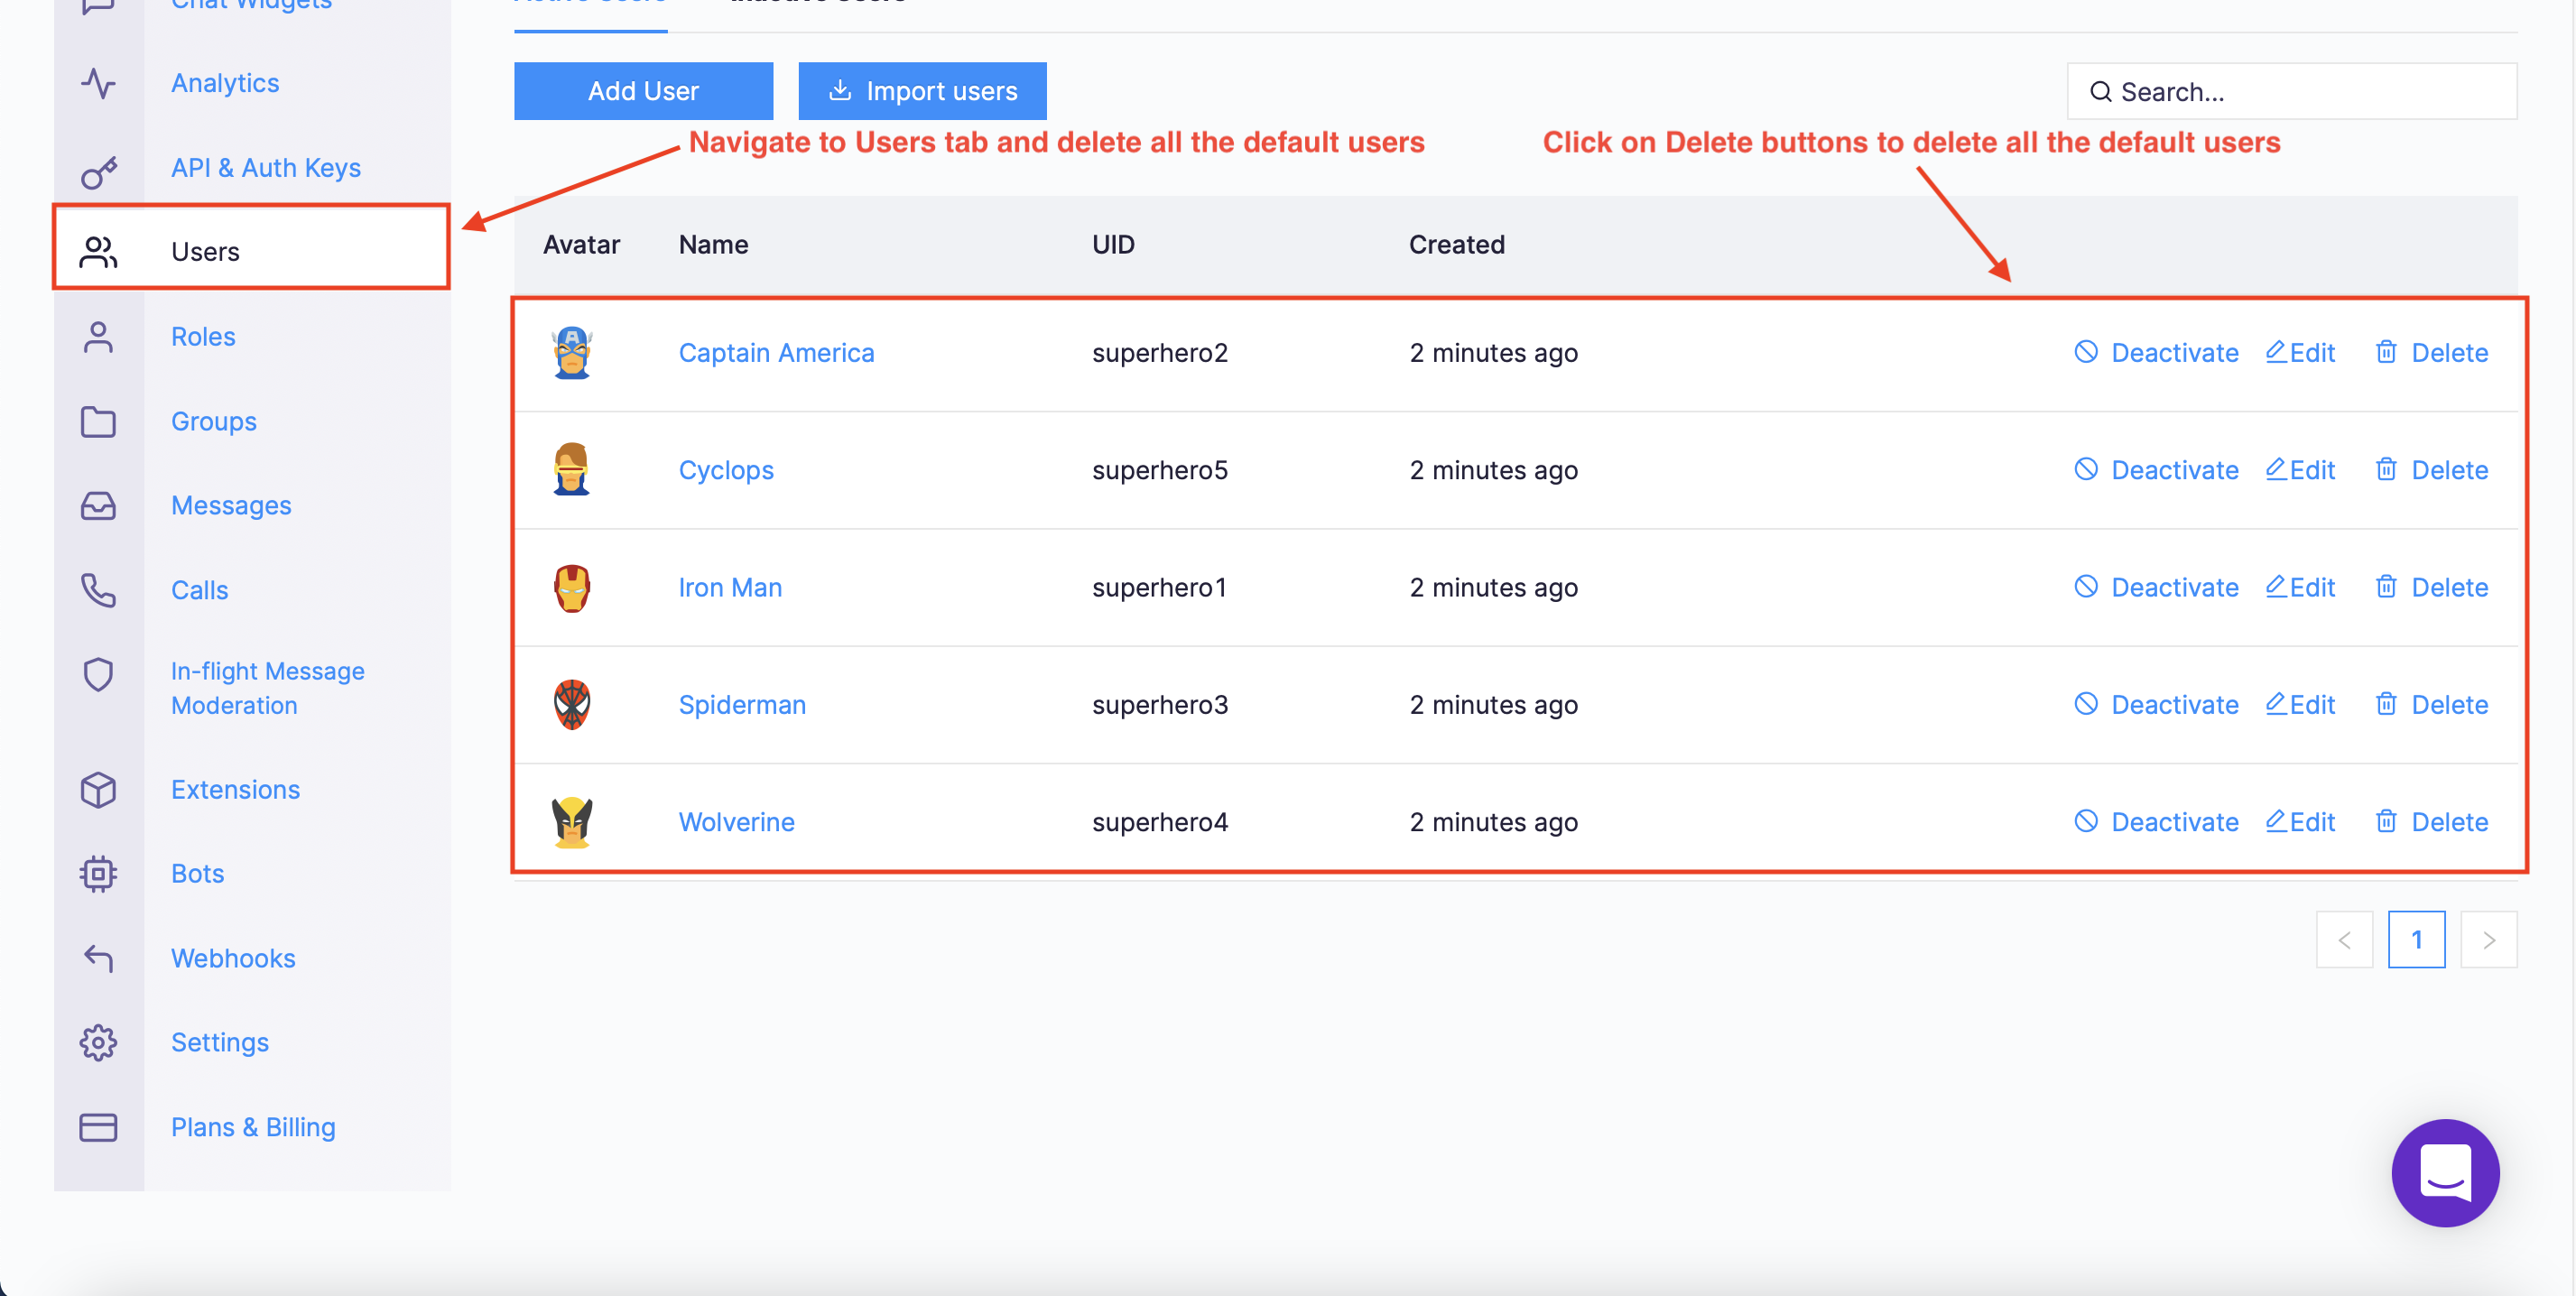
Navigate to Users tab and delete all the default users
7. Navigate to the Groups tab and delete all the default groups (very important).
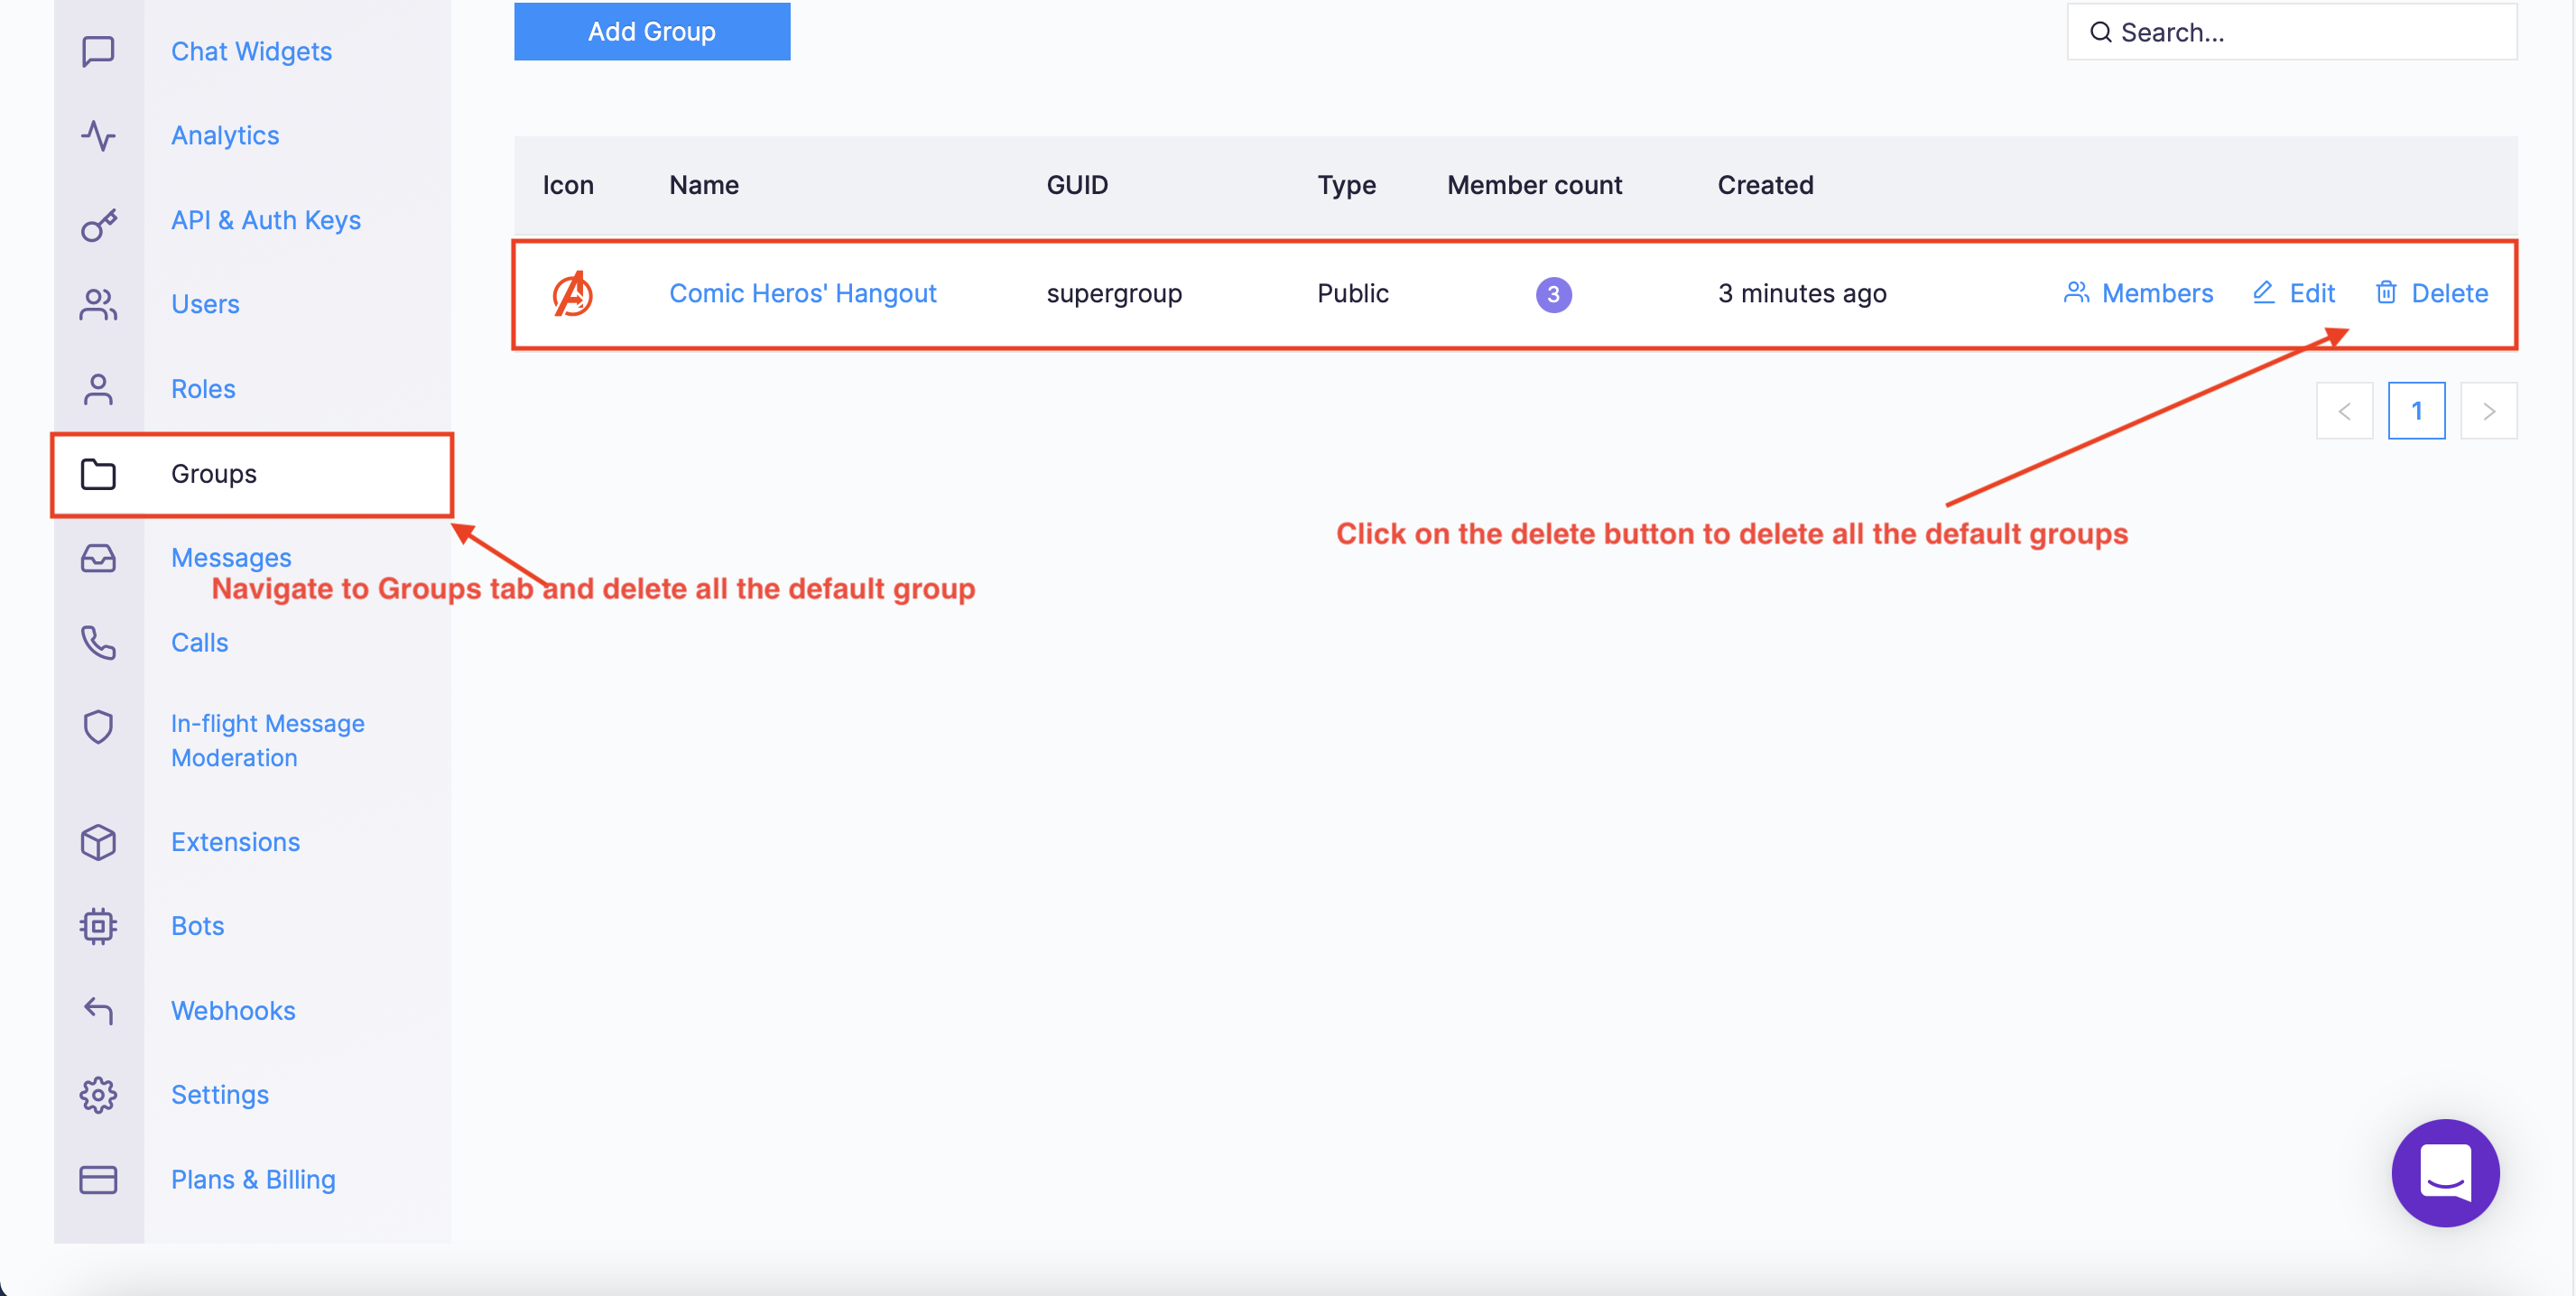
Navigate to Group tab and delete all the default groups
8.Create a file called **.env** in the root folder of your project.
9. Create the content of the **.env** file as follow.
10. Make sure to exclude **.env** in your gitIgnore file from being exposed online.
Project Structure - Client Side
The image below reveals the project structure. Make sure you see the folder arrangement before proceeding.
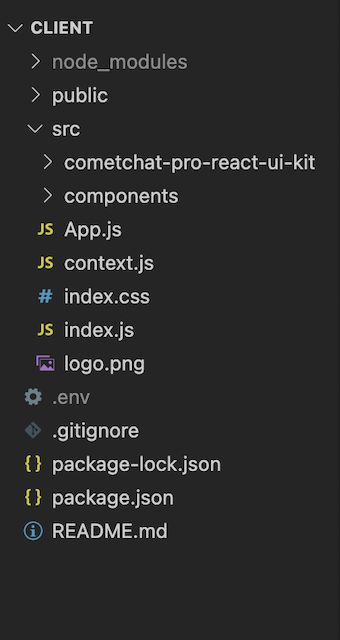
Project Structure - Client Side
Now, let's make the rest of the project components as seen in the image above.
Project Structure - Server Side
To create a new project, you just need to create a folder which is called “zoom-clone” and then run “npm init”. You can choose any name for your project. After following the instruction, you will a brand new Node.js project. The image below reveals the project structure of our Zoom clone application. Make sure you see the folder arrangement before proceeding.
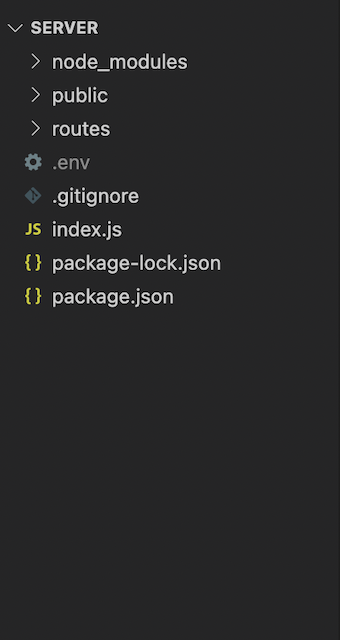
Project Structure - Server Side
Each subfolder and file will be explained in detail in the following section:
public: Contains all html, css, javascript files for the UI.
routes: Contains all files that will be used to handle the API requests.
screenshots: This folder contains images that are used for README.md file.
.env: Contains environment variables that will be used in the application.
.gitignore: This file contains files that will be ignored when committing the code. In this case, we do not want to commit the “config.js” file because it contains the secret keys of the Javascript chat application.
package.json: Contains all dependencies of the application.
README.md: Describes the application and provides steps by steps to run the application.
Installing the Zoom Clone Dependencies
Step 1: You need to have Node.js installed on your machine
Step 2: Copy dependencies and devDependencies from the package.json file.
Step 3: Run “npm i” to install the dependencies for the application.
Setting Up the Database
As mentioned above, we will use the MySQL database. For this reason, this section describes how to create the database and its table. Before proceeding, you need to make sure that you have installed the MySQL database on your computer already. To create the database and its table, you need to get the SQL here.
The above sql specifies that we need to create the below tables:
user_account: Stores the user’s information.
meeting: Stores the meeting’s information.
Each table will be explained in the follow part:
1. user_account:
id - id of the user.
user_email - Email of the user.
user_password - Password of the user.
user_full_name - Full name of the user.
user_avatar - Avatar of the user.
According to the requirements, the user can create meetings, The meeting table will be used to store the meeting’s information as follow.
2. meeting
id - The meeting’s id. It will be auto-increment if a new meeting is inserted to the database.
meeting_title - The meeting’s title - The name of the meeting.
meeting_uid - The users can copy the meeting uid and send to other users. Therefore, other users can use the meeting’s uid to access the meeting.
created_by: At the home page, we would like to show the list of meetings that were created by the authenticated user. For this reason, we need to use this field to query the database.
Aside from that, we are using Node.js with MySQL database. Hence, we need to connect to the database in our Node.js application, The best practice is to create a .env file and store environment variables. To create the .env file, please follow the below steps:
Step 1: Create a file which is call “.env” inside the root folder of your project.
Step 2: Replace the below information with your database connection information.
Create a Node.js Server
Inside the root folder of your project, you need to create a file which is called “index.js”. The full source code of the index.js file can be found here. It is the main file that will be ran when running the following statements:
"node index.js" or "npx nodemon index.js" or "nodemon index.js"
*Note: In this project, we will use the “nodemon” library because the application will be reloaded automatically whenever there is any change in your code.
The above code snippet specifies that we are including some libraries to help them create a server. In this case, we need to use the express framework and the mysql library for connecting with the MySQL database, and so on. The database connection information that will be read from the .env file and this file should be included in the .gitignore file.
On the other hand, we are requiring all API routes of the application at line 45. However, we have not define it, yet. Please do not worry about it, we will discuss about it in the following section.
Creating the Routes Folder
The routes folder will contain API routes in the application. Inside this folder, we need to create another “index.js” file. We will export a function that will take responsibility for combining all API routes, that function accepts an object as a parameter. The object will contain the express app object, the database connector object. Those objects will be used in different API routes as you can see in the below code snippet. The full source code of the “index.js” file can be found here.
*Note: We will define three API routes in the application. the “authRoutes” is used for authenticated purpose, the “userRoutes” is used for user management. The last but not least, the “meetingRoutes” is used to manage the meetings in the application. All of them will be discussed in the following section.
Creating APIs with Node.js
In this section, we will develop the APIs that will be needed to build our Zoom clone node.js. The below endpoints describes the information about the APIs for the application.
/login: Check user’s credentials and ensure that the user can login to the application, or not.
/users/create: Create a new user in the application.
/meetings: Create a new meetings in the application.
/meetings/:id: Get all the created meetings for the authenticated user. We need to pass the uid of the authenticated user. The server will return all the created meetings for that user.
/meetings/:id/get: Get the information of an individual meeting. We need to pass the meeting uid. This API will be used when an user would like to access a meeting. That user needs to pass the meeting’s uid. The server needs to fetch the meeting by that uid to make sure that the uid existed in the database.
The Login API
The login API will receive the user’s credentials and validate that information. If the user’s information is valid, the user can log in to the application and vice versa. To create the login API, you need to create the “auth.js” file inside the “routes” folder. The full source code of the login API can be found here.
its method is POST and the request payload should contain the user’s email and user’s password. If the user’s information is valid, the authenticated information will be returned as the response. Following that, a warning message will be returned if the user’s credentials are not valid. Your can refer to the code snippet below for more information.
The User APIs
This section will describe the APIs for user management. Firstly, we need to create the “users.js” file inside the “routes” folder. It will contains an API endpoints to register a new user. The full source code can be found here.
The Create User API
In this part, we will develop an API to create a new account in the application. The API will have the below information. Its method is POST and we will send the request body from the client side and the request should contain the user’s id, user’s email, user’s password, user’s avatar, user’s full name.
The above information is required. If you miss something in the request payload, a warning message will be returned back from the response. Moreover, the API will check the user’s email has been used in the application, or not. If it existed in the system, a warning message will be returned to inform the user about that. You can refer to the below code snippet for more information.
The Meeting APIs
This section will describe the APIs for meeting management. Firstly, we need to create the “meetings.js” file inside the “routes” folder. It will contains some API endpoints such as creating a new meeting, get all the created meetings for the authenticated user, get the meeting information by its uid. The full fouce code can be found here.
The Create Meeting API
As mentioned above, the end-users can create meetings. Therefore, the application needs to have an API to insert a new meeting to the database.
The Get Meetings API
On the home page, the authenticated users can see their created meetings. For this reason, we need to provide an API to get all the meetings by the created_by information.
The Get Meeting By Id API
This API will be used when an user would like to access a meeting. That user needs to pass the meeting’s uid. The server needs to fetch the meeting by that uid to make sure that the uid existed in the database.
Configuring Styling for the Application
We have created the APIs that will be needed for the Zoom clone. It is time to write code for the client side and interact with the back-end services. Inside your project structure, open the index.css files and paste the codes here. The index.css file will contain all CSS of the application.
Creating React Context
In this application, we need to pass some data between the components. We can save several options to achieve that such as using state management libraries, RxJS, and so on. However, we can get in-built support from React by using the React Context API. the React Context API helps us pass data through the component tree without passing down at every level. Please create the “context.js” file inside the “src” folder. The full source code of the “context.js” file can be found here.
Initializing CometChat for the Application
The below codes initialize CometChat in your app before it spins up. The App.js file uses your CometChat API Credentials. We will get CometChat API Credentials from the .env file. Please do not share your secret keys on GitHub.
Actually, App.js does not contain only the above code. It also contains other business logic of the application. The full source code of App.js file can be found here.
The App.js File
The App.js file is responsible for rendering different components by the given routes. For example, it will render the login page if the user has not logged in, yet or it renders the home page if the user has signed in to the system. On the other hand, it will be used to initialize CometChat. The full source code of the App.js file can be found here.
The Loading Component
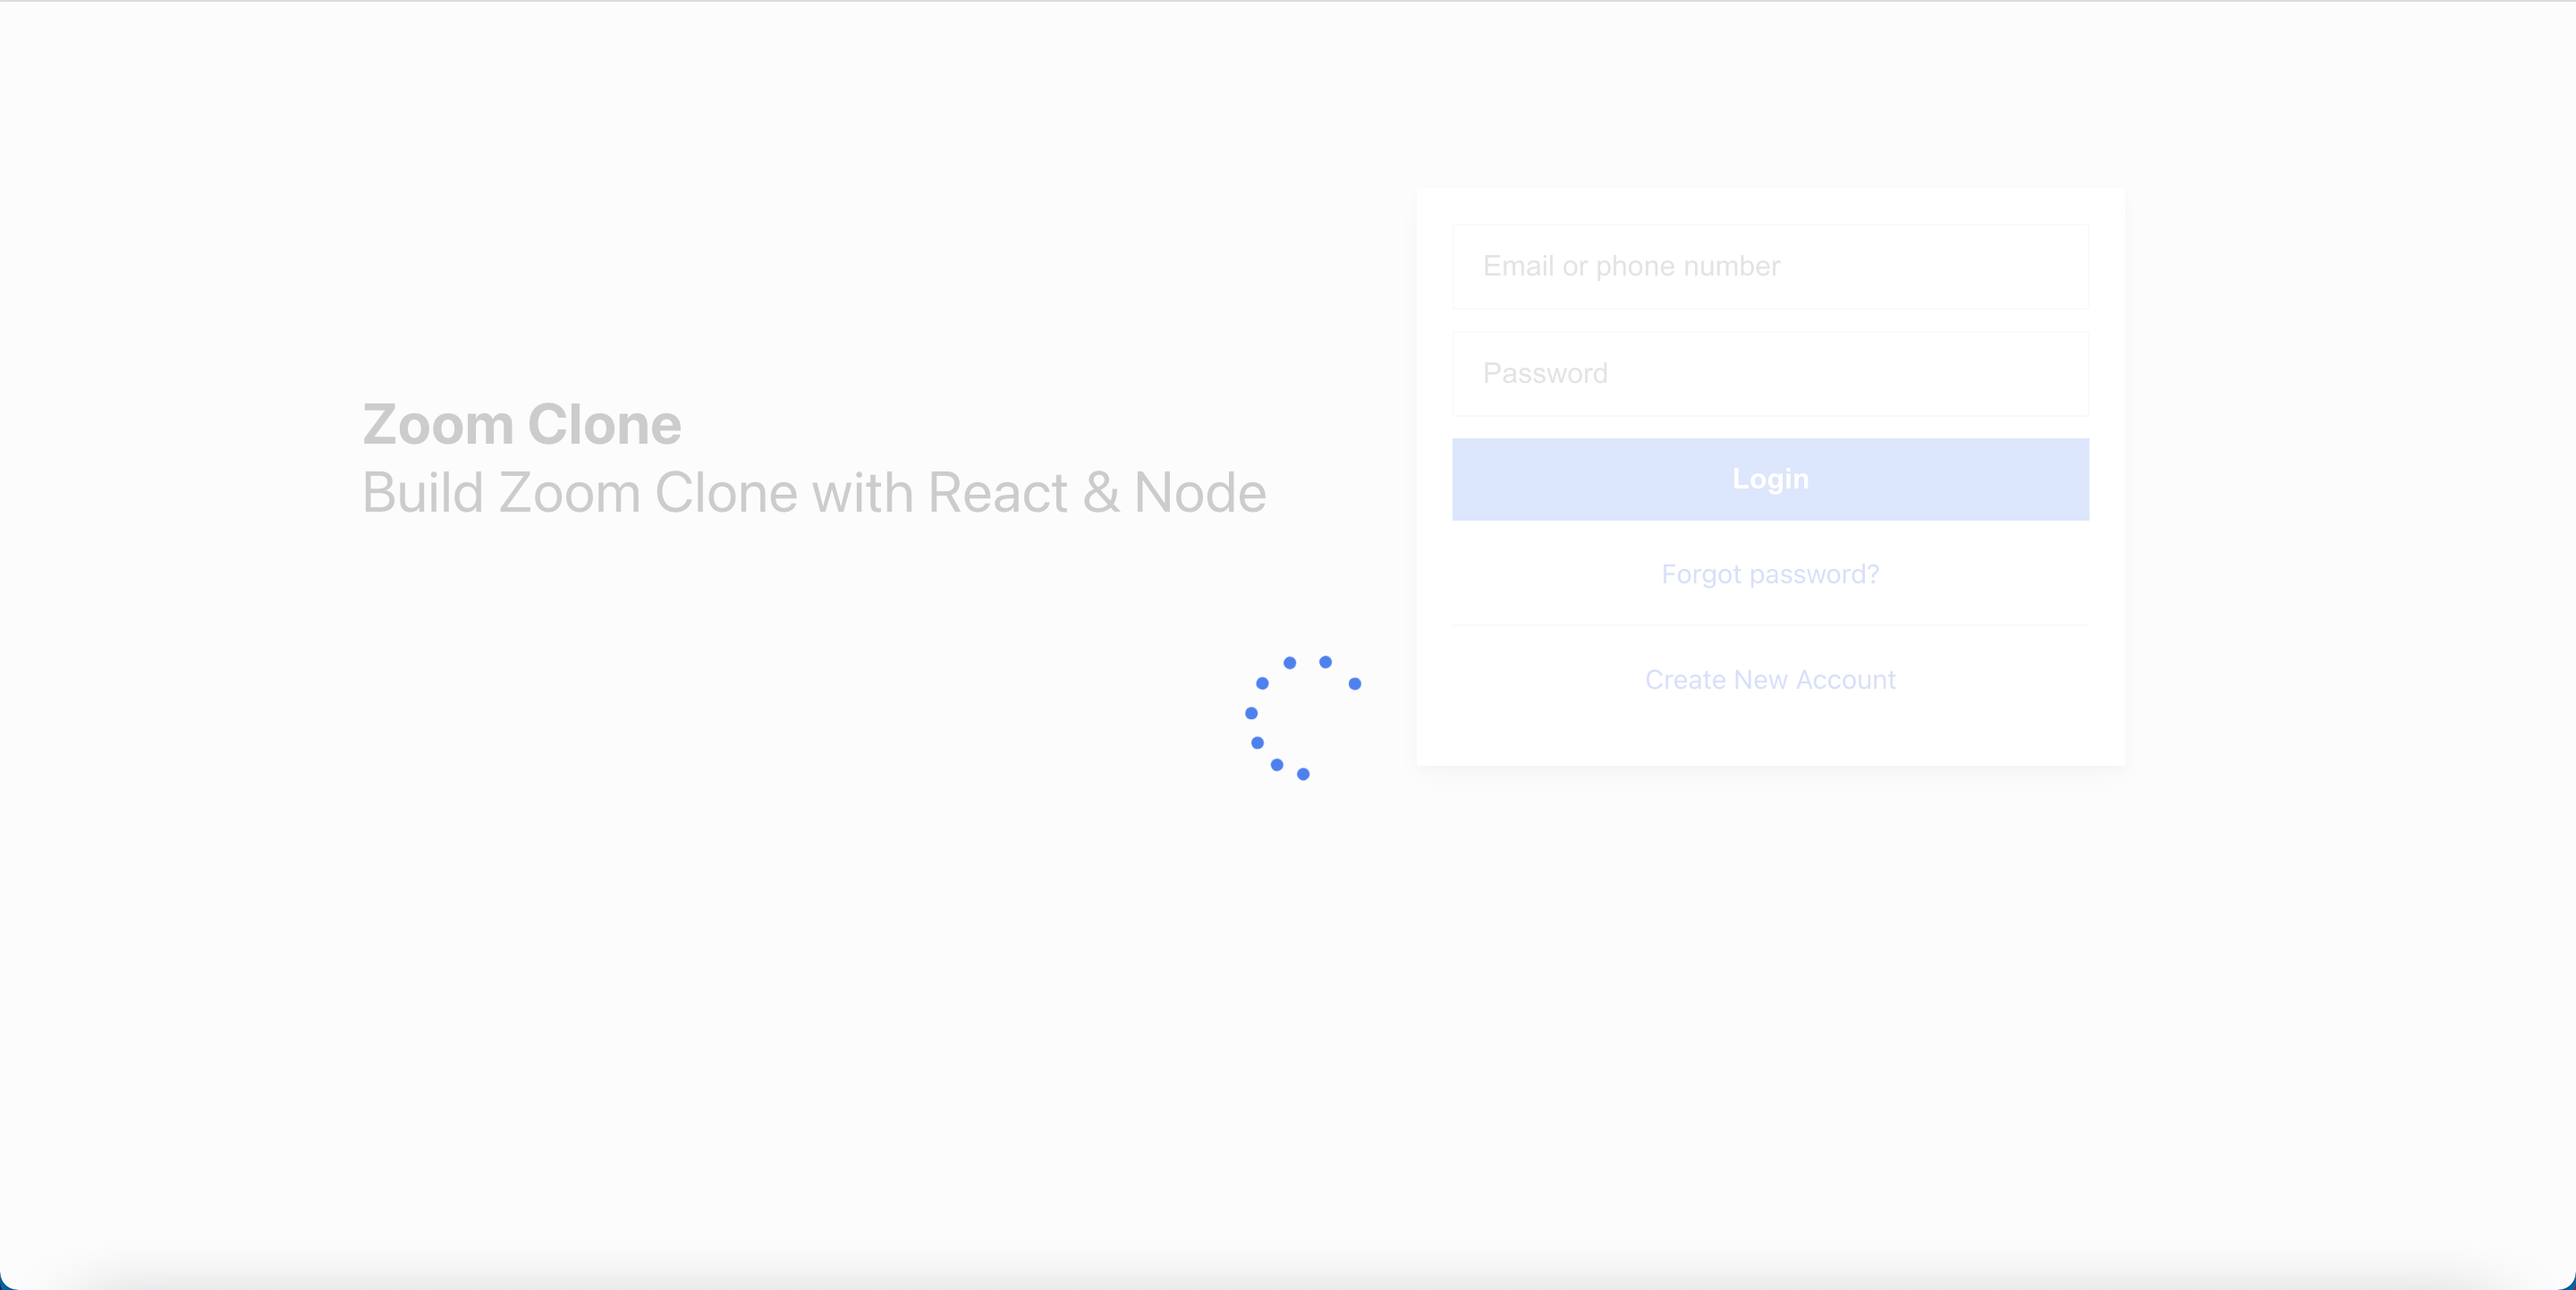
The Loading Component
The loading component will be shown when the system performs some side effects such as interacting with the back-end services or calling CometChat APIs and so on. This component will be used to increase user experience. If we do not have this component, the end-users cannot know when the data is loaded successfully. Please create the “components” folder inside the “src” folder, and create the “common” folder inside it. The “common” folder is used to store the common components that will be used in different places in your application. After that, you need to create the “Loading.js” file inside the “common” folder. The full source code of the loading component can be found here.
The Login Component
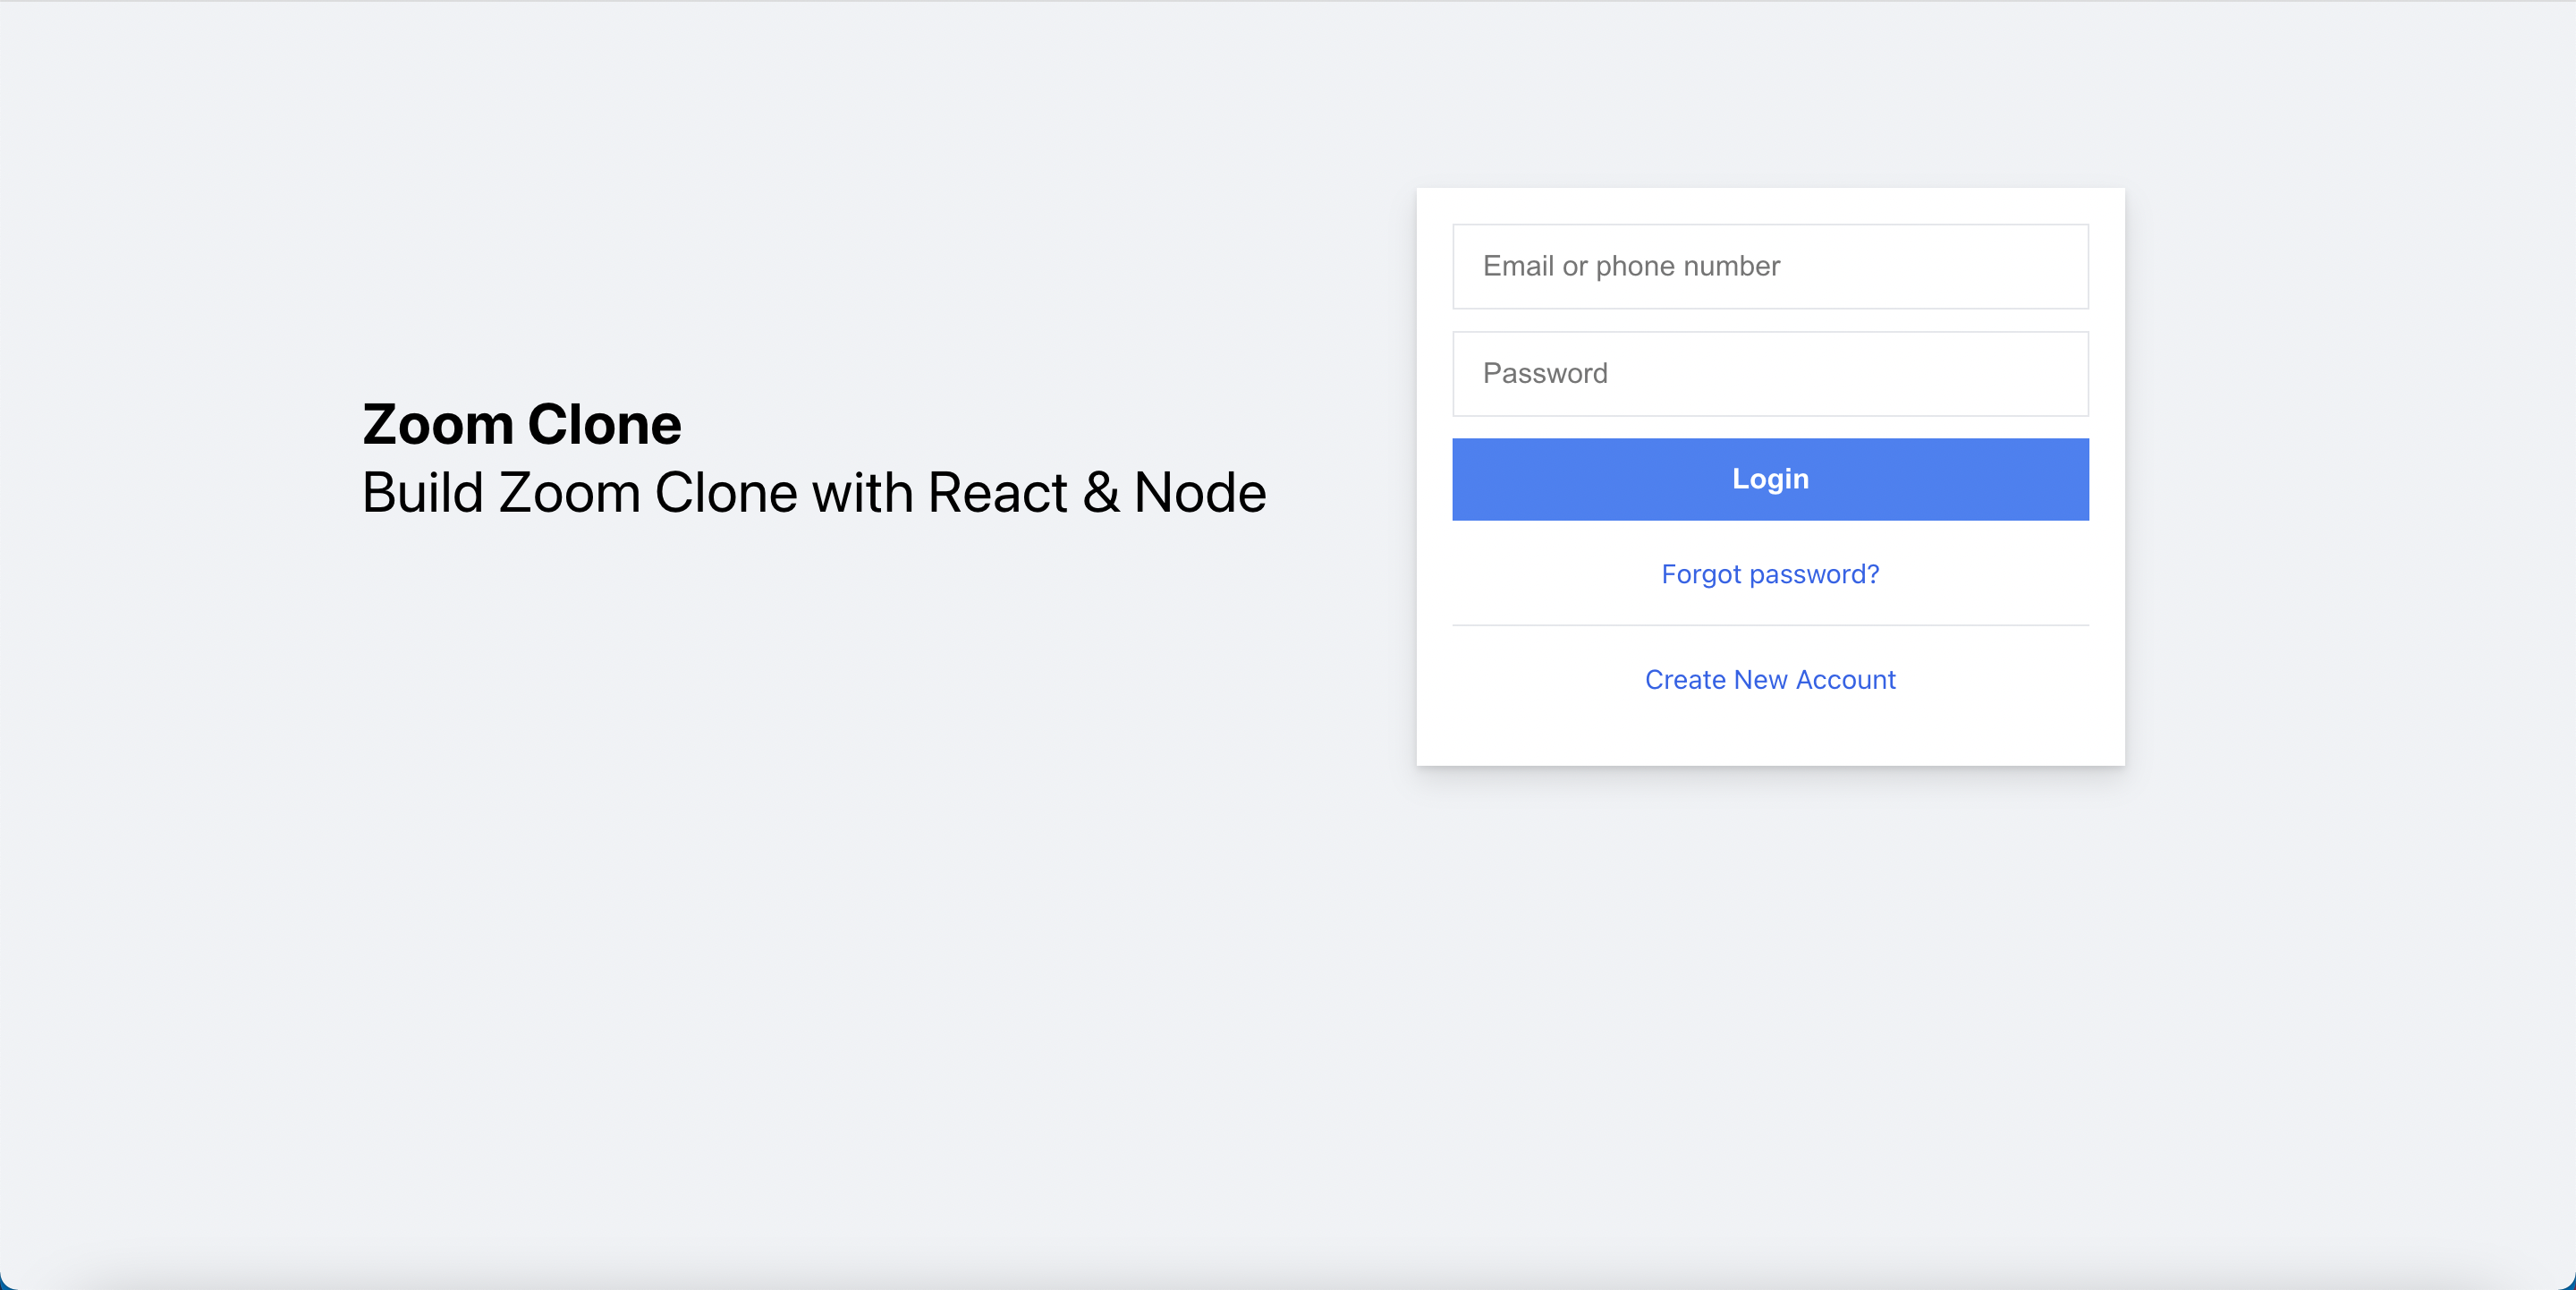
The Login Component
This component is responsible for authenticating our users. It accepts the user credentials and either signs him up or in, depending on if he is new to our application. See the code below and observe how our app interacts with the login API and the CometChat SDK. Please create the “login” folder inside the “components” folder, and create the “Login.js” file inside the “login” folder. The full source code can be found here.
We store the authenticated Information to the local storage for further usage such as getting that information in different places in the application, prevent the end-users come back to the login page after signing in to the application.
To login to the CometChat, we call the cometChat.login function, you can refer to the below code snippet for more information.
The above code indicates that we are using withModal as a higher-order component. This higher-order component will be used to reuse the code of showing and hiding the custom modal. In this case, we want to show the sign-up modal to let end-users register new accounts. We will discuss the sign-up component in the following section.
The withModal - Higher-Order Component
As mentioned above, we would like to show the SignUp component as a modal. Actually, we have multiple modals in the application, and we should avoid duplicating common functionalities such as showing/hiding the modals, and so on. To reuse the common logic, we can have several options. In this project, we will create a higher-order component called “withModal”. That higher-oder component helps us to avoid duplicating code and we can customize the UI for the modals. Please follow the below code snippet for more information. Please create the “Modal.js” file inside the common folder.
The Sign Up Component
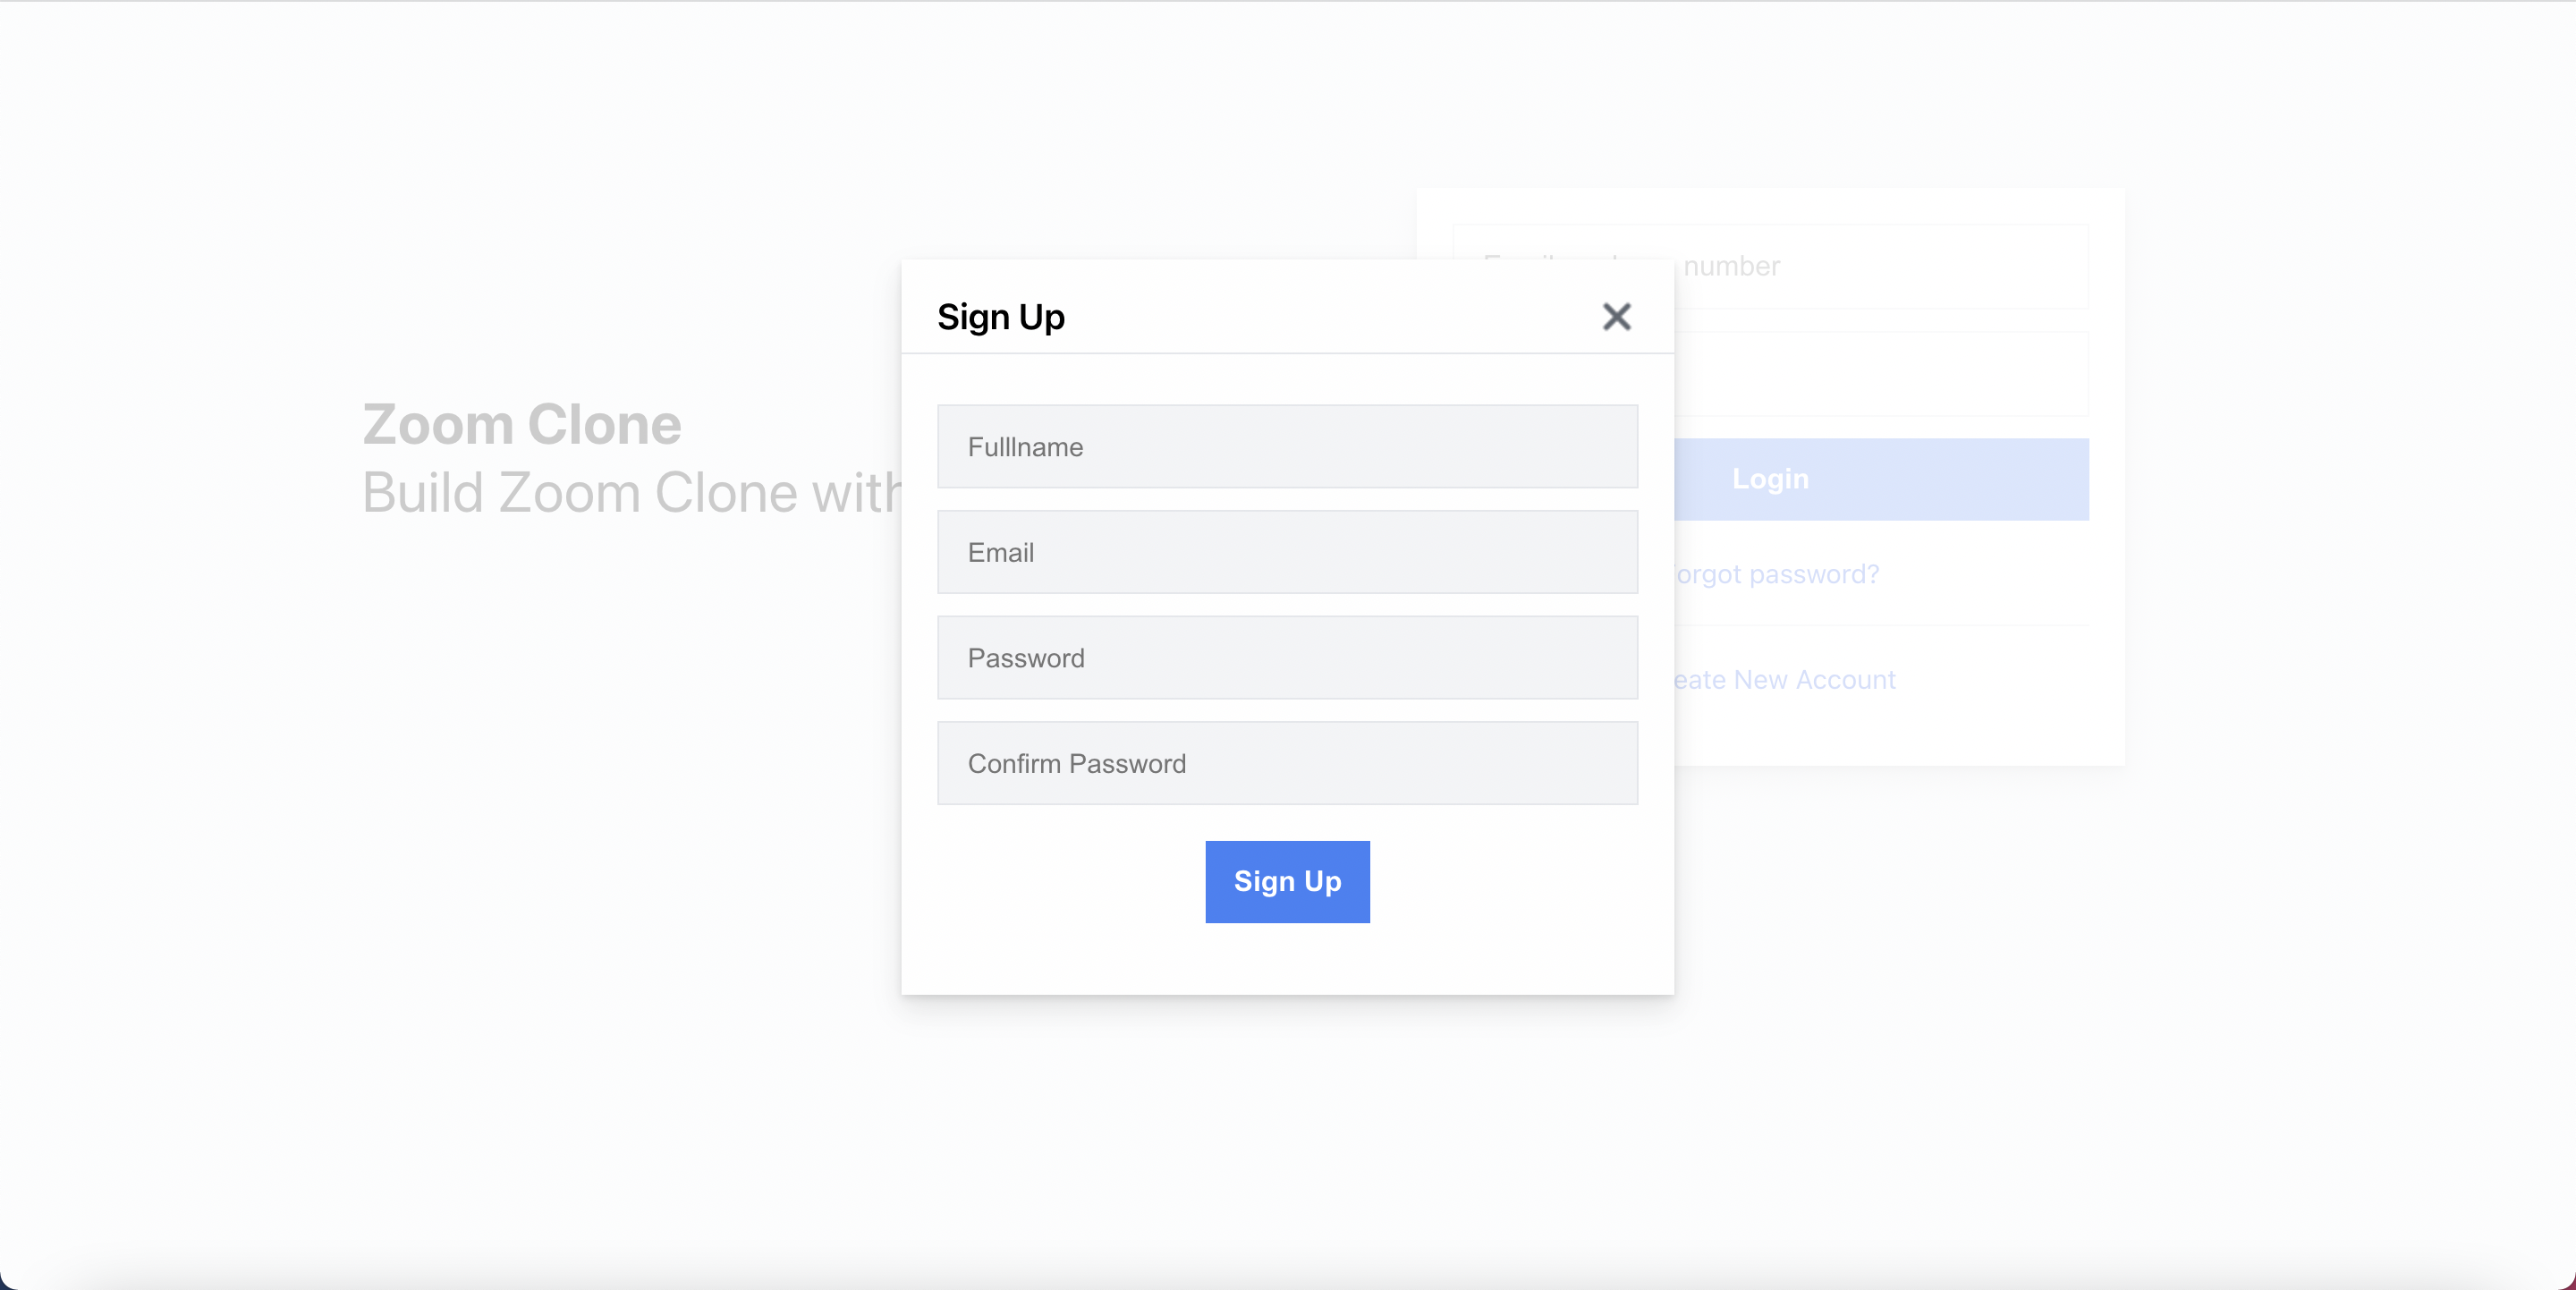
The Sign Up Component
The sign-up component will help end-users to register new accounts. This component will do two things. The first thing is to register new accounts by calling the create user API. Aside from that, it also registers new accounts on CometChat by using the CometChat SDK. Please create the “register” folder inside the “components” folder, and create the “SignUp.js” file inside it. The full source code can be found here.
To create a new CometChat account, we call cometChat.createUser function. You can refer to the below code snippet below for more information.
Add the CometChat UI to our Application
Before we can use the CometChat Pro React UI kit, we need to add it in our project so that we can reference it. In this case, we are using React UI Kit v3.0. To do that, follow the next steps:
Step 1: Clone the CometChat React UI Kit Repository like so:
Step 2: Copy the folder of the CometChat Pro React UI Kit you just cloned into the src folder of your project:

Copy the cloned folder in the src folder
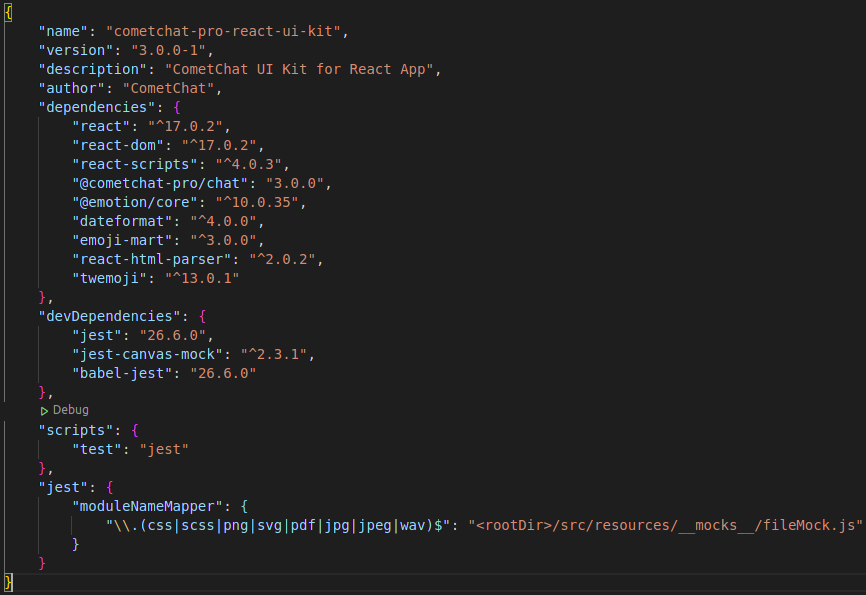
React UI Kit Dependencies
Step 3: Copy all the dependencies from the package.json file of the CometChat Pro React UI Kit folder and paste them in the dependencies section of the package.json file of your project.
Step 4: Save the file and install the dependencies like so: npm install.
As soon as the installation is completed, you now have access to all the React UI Components. The React UI kit contains different chat UI components for different purposes as you can see in the documentation here. It includes:
1. CometChatUI
2. CometChatUserListWithMessages
3. CometChatGroupListWithMessages
4. CometChatConversationListWithMessages
5. CometChatMessages
6. CometChatUserList
7. CometChatGroupList
8. CometChatConversationList
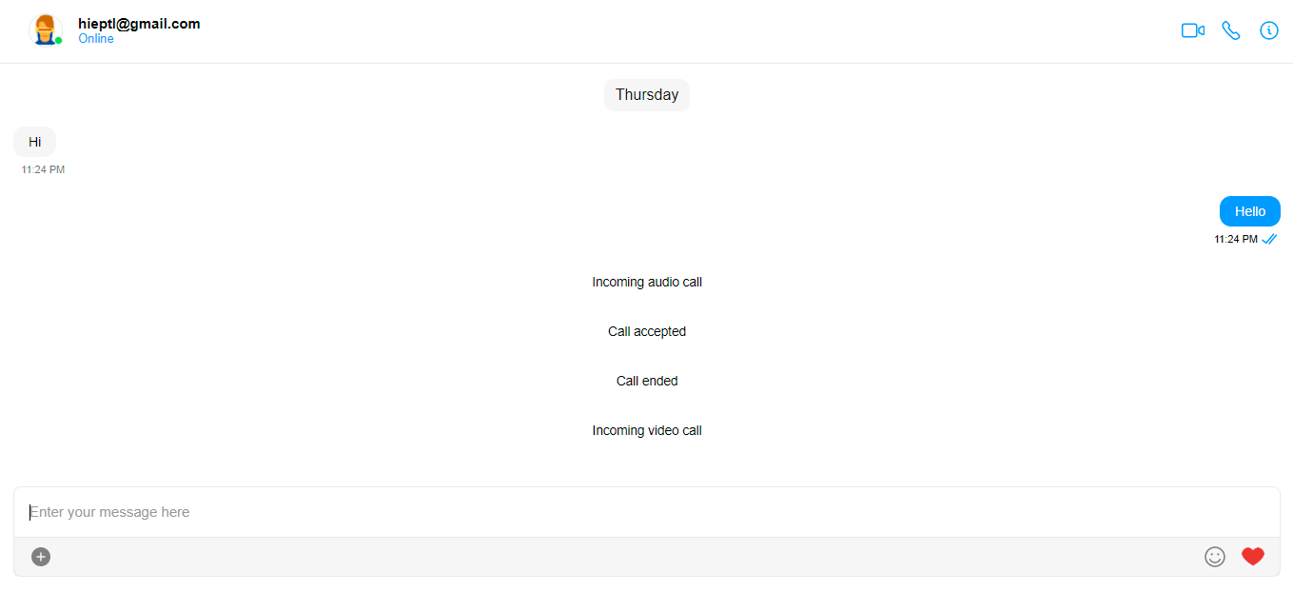
CometChatMessages Component
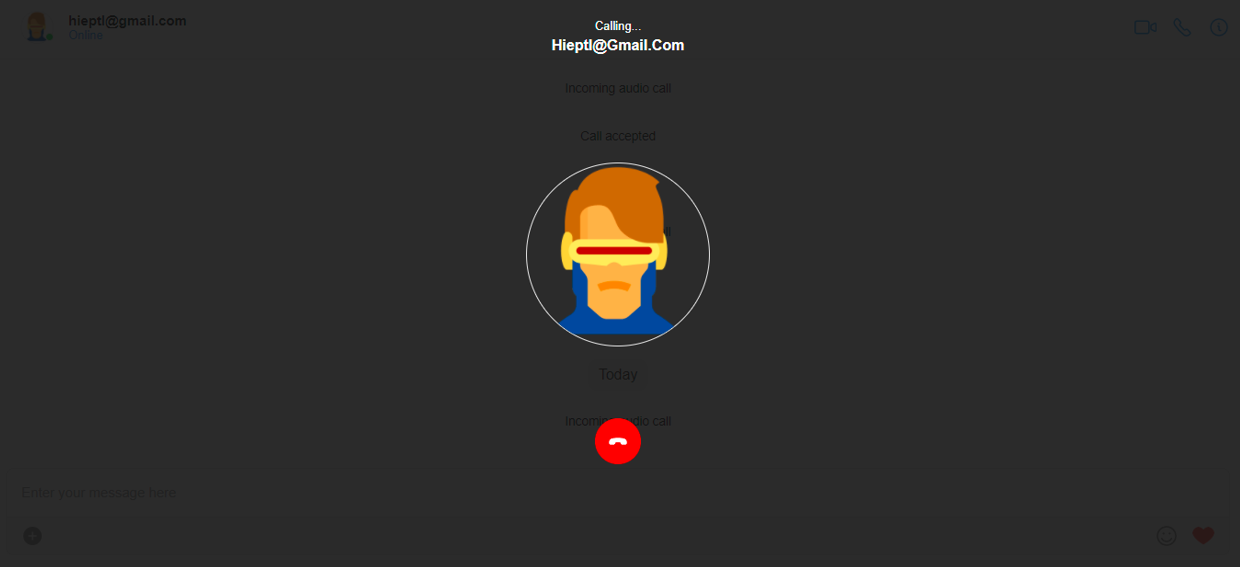
CometChatMessages Component - Voice and Video Calling
The Header Component
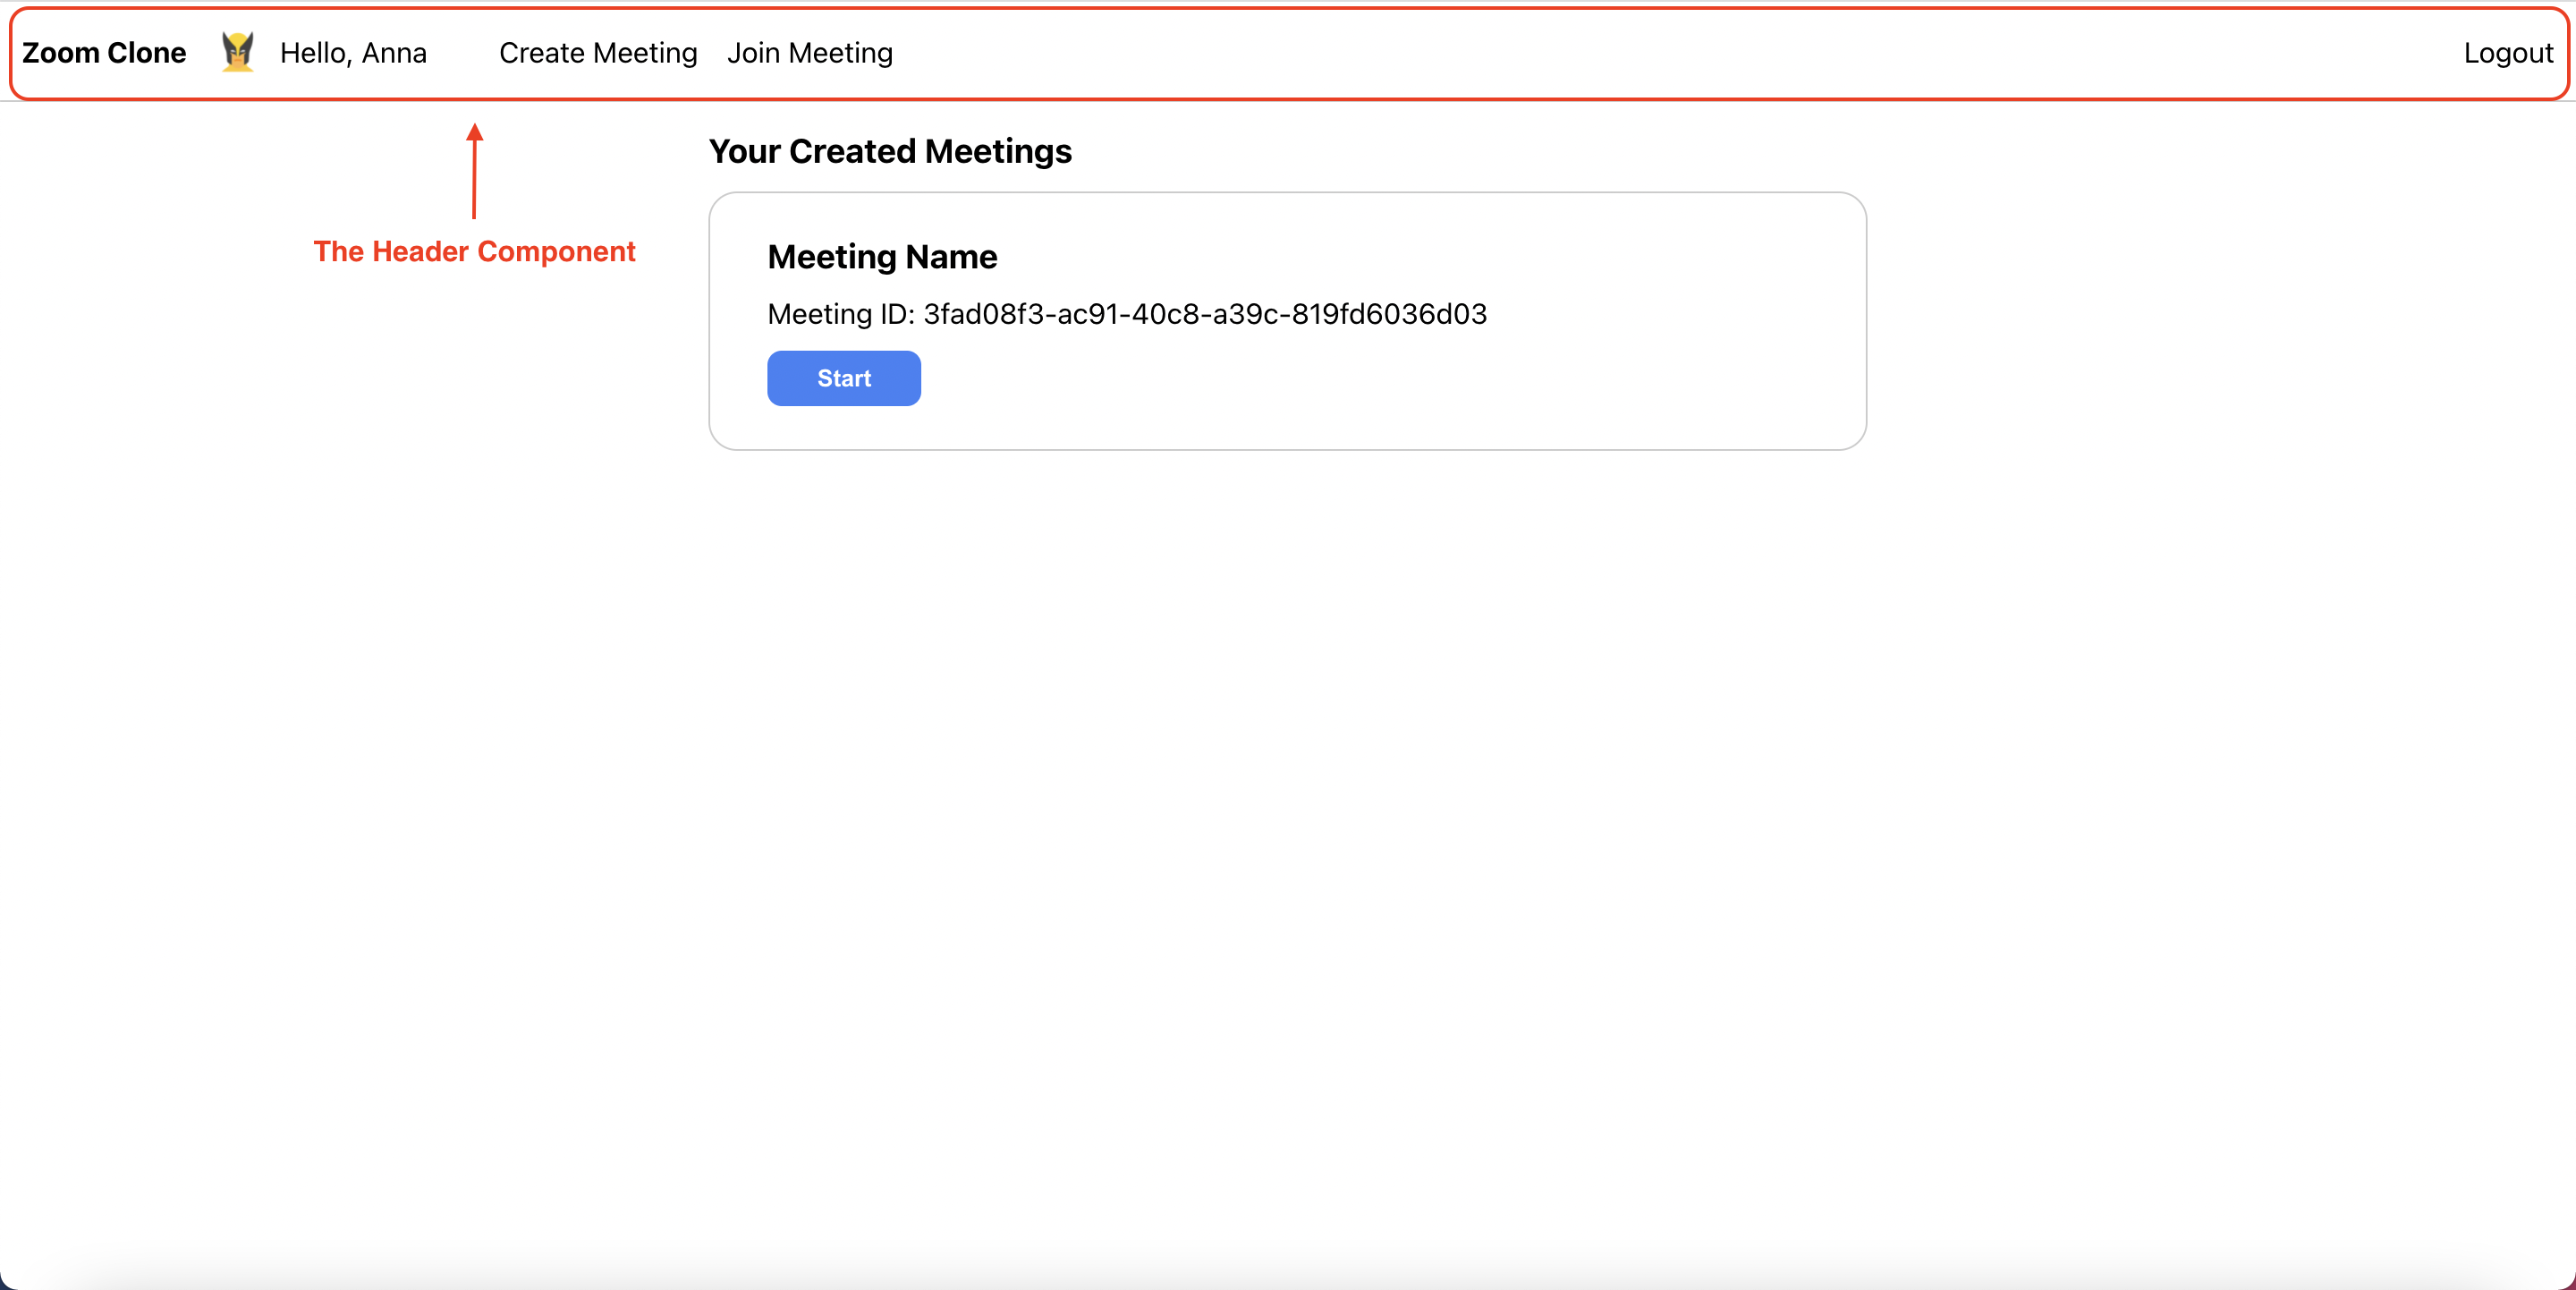
The Header Component
The Header component is used to render the Header of the Zoom clone. Please create the “Header.js” file inside the “common” component because the Header component will be reused in different places in the application. The full source code of the Header component can be found here.
The Create Meeting Component
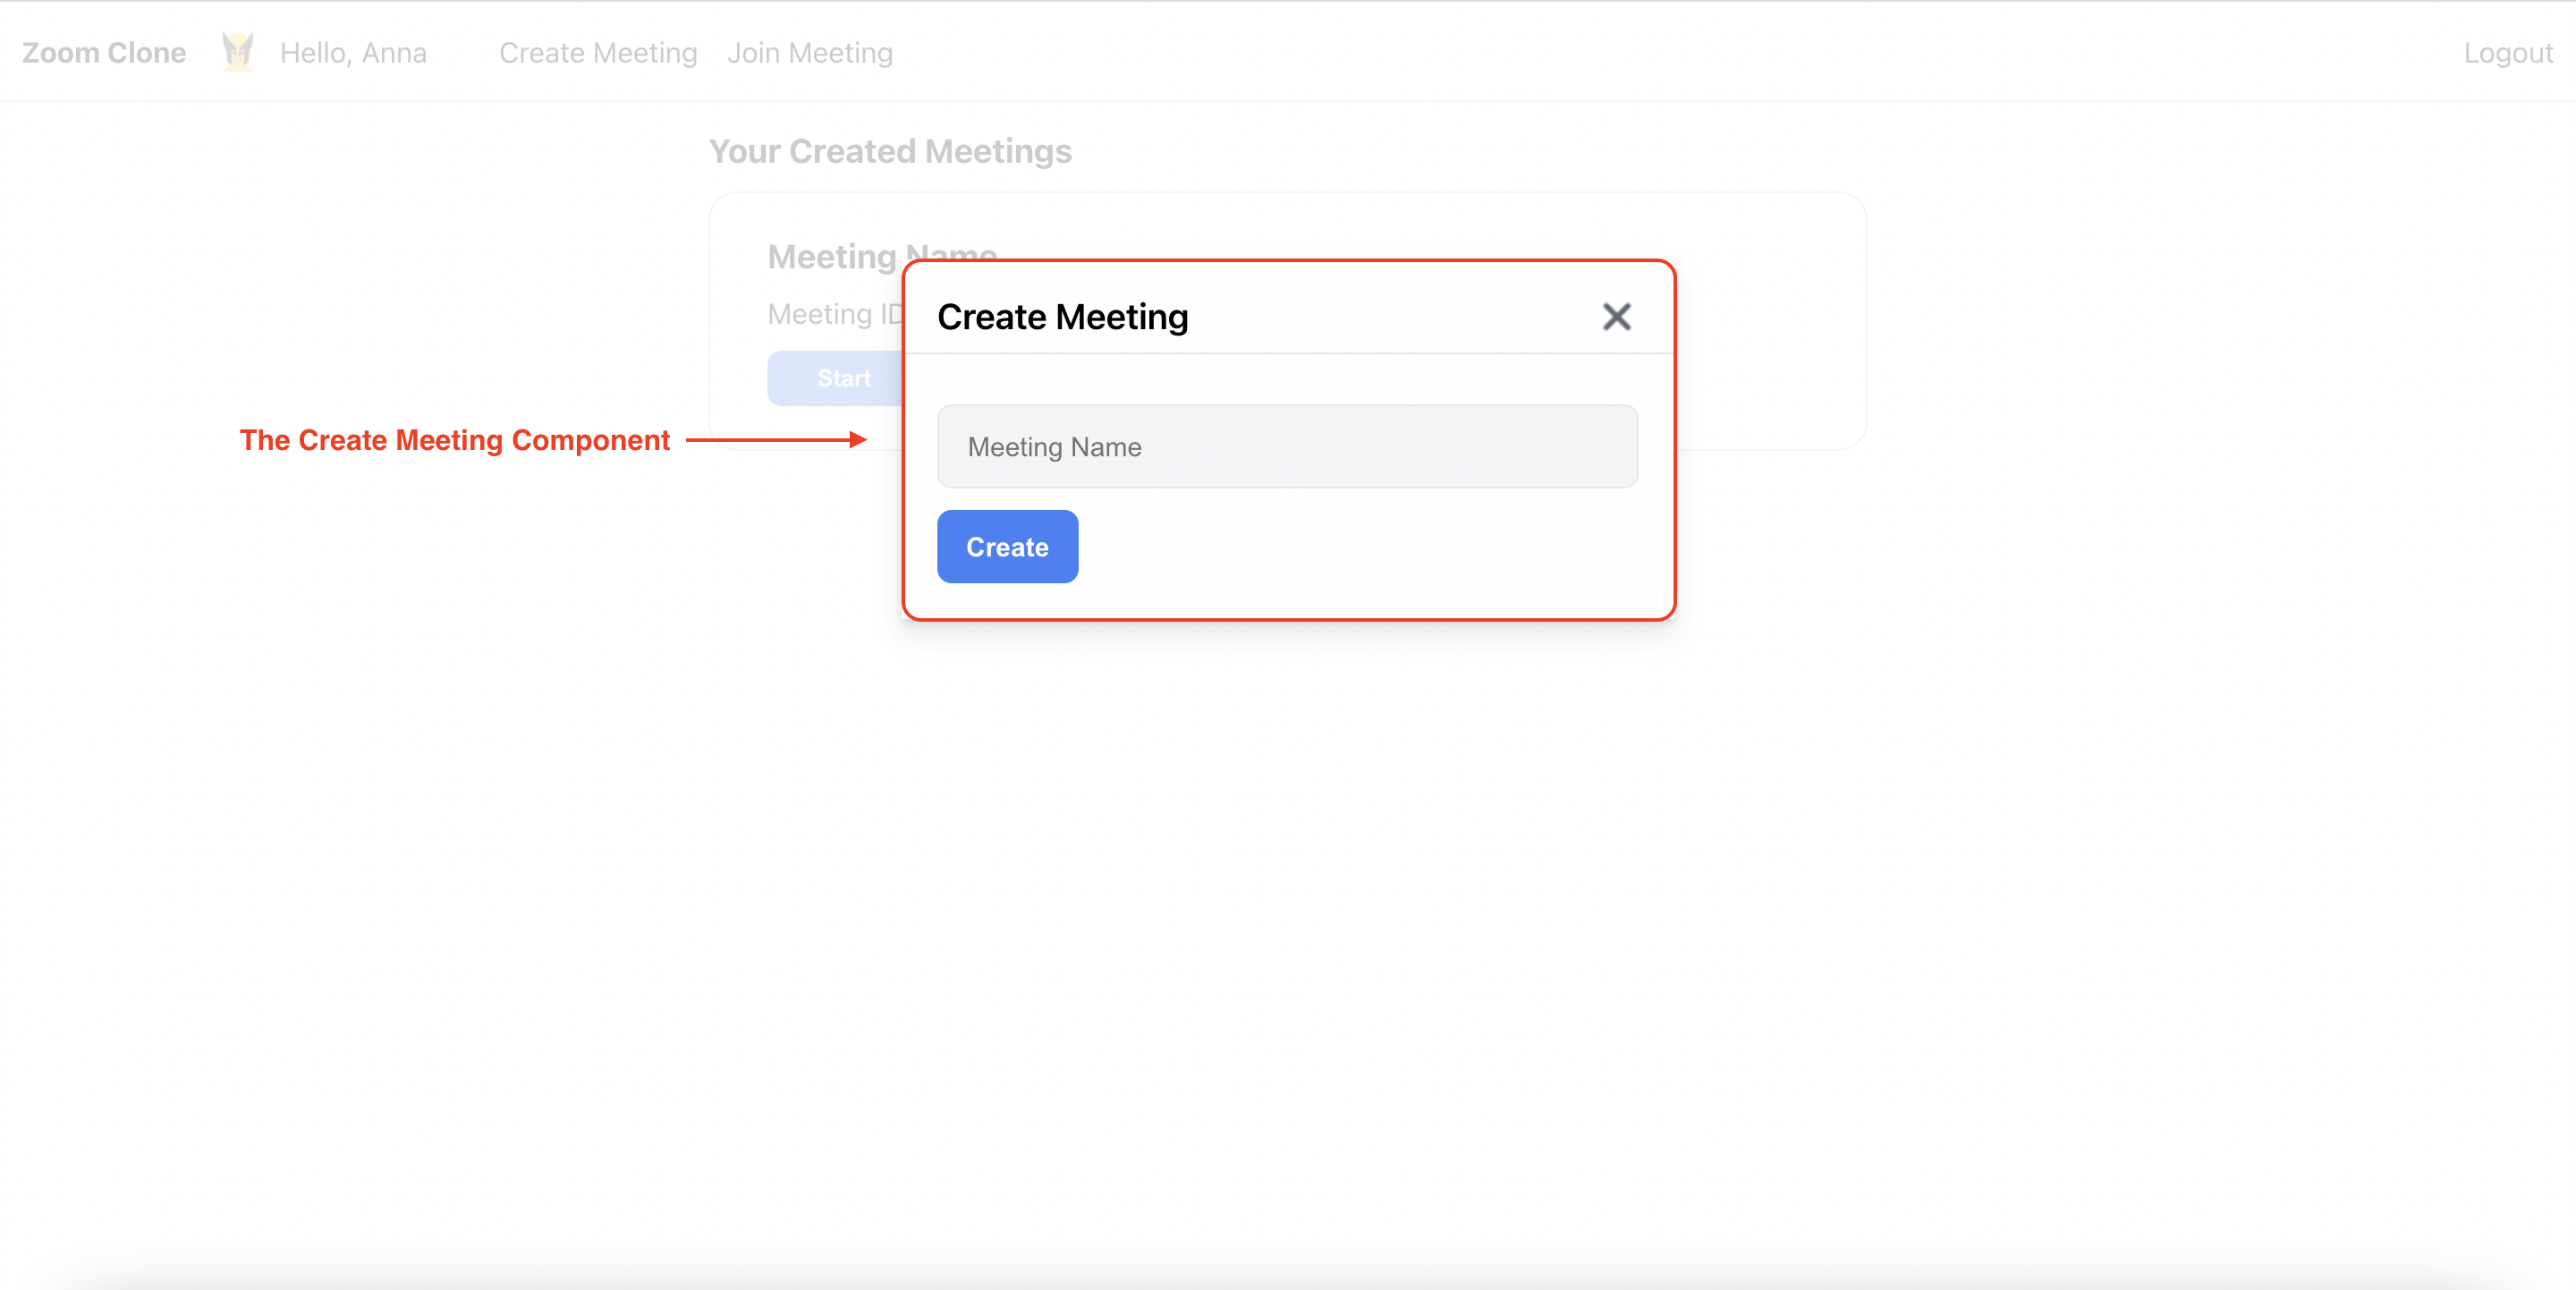
The Meeting Component
After the end-user has selected the “Create Meeting” option on the header. The Create component will be displayed as a modal. In this case, the application will interact with the back-end service by calling the create meeting API. Please create the “home” folder inside the “components” folder, and then create the “Create.js” file inside it. The full source code of the Create component can be found here.
When creating a new meeting, we need to do 2 things - call the create meeting API, and call the CometChat service to create a new CometChat group. To create the CometChat group, you can refer to the below code snippet.
The Home Component
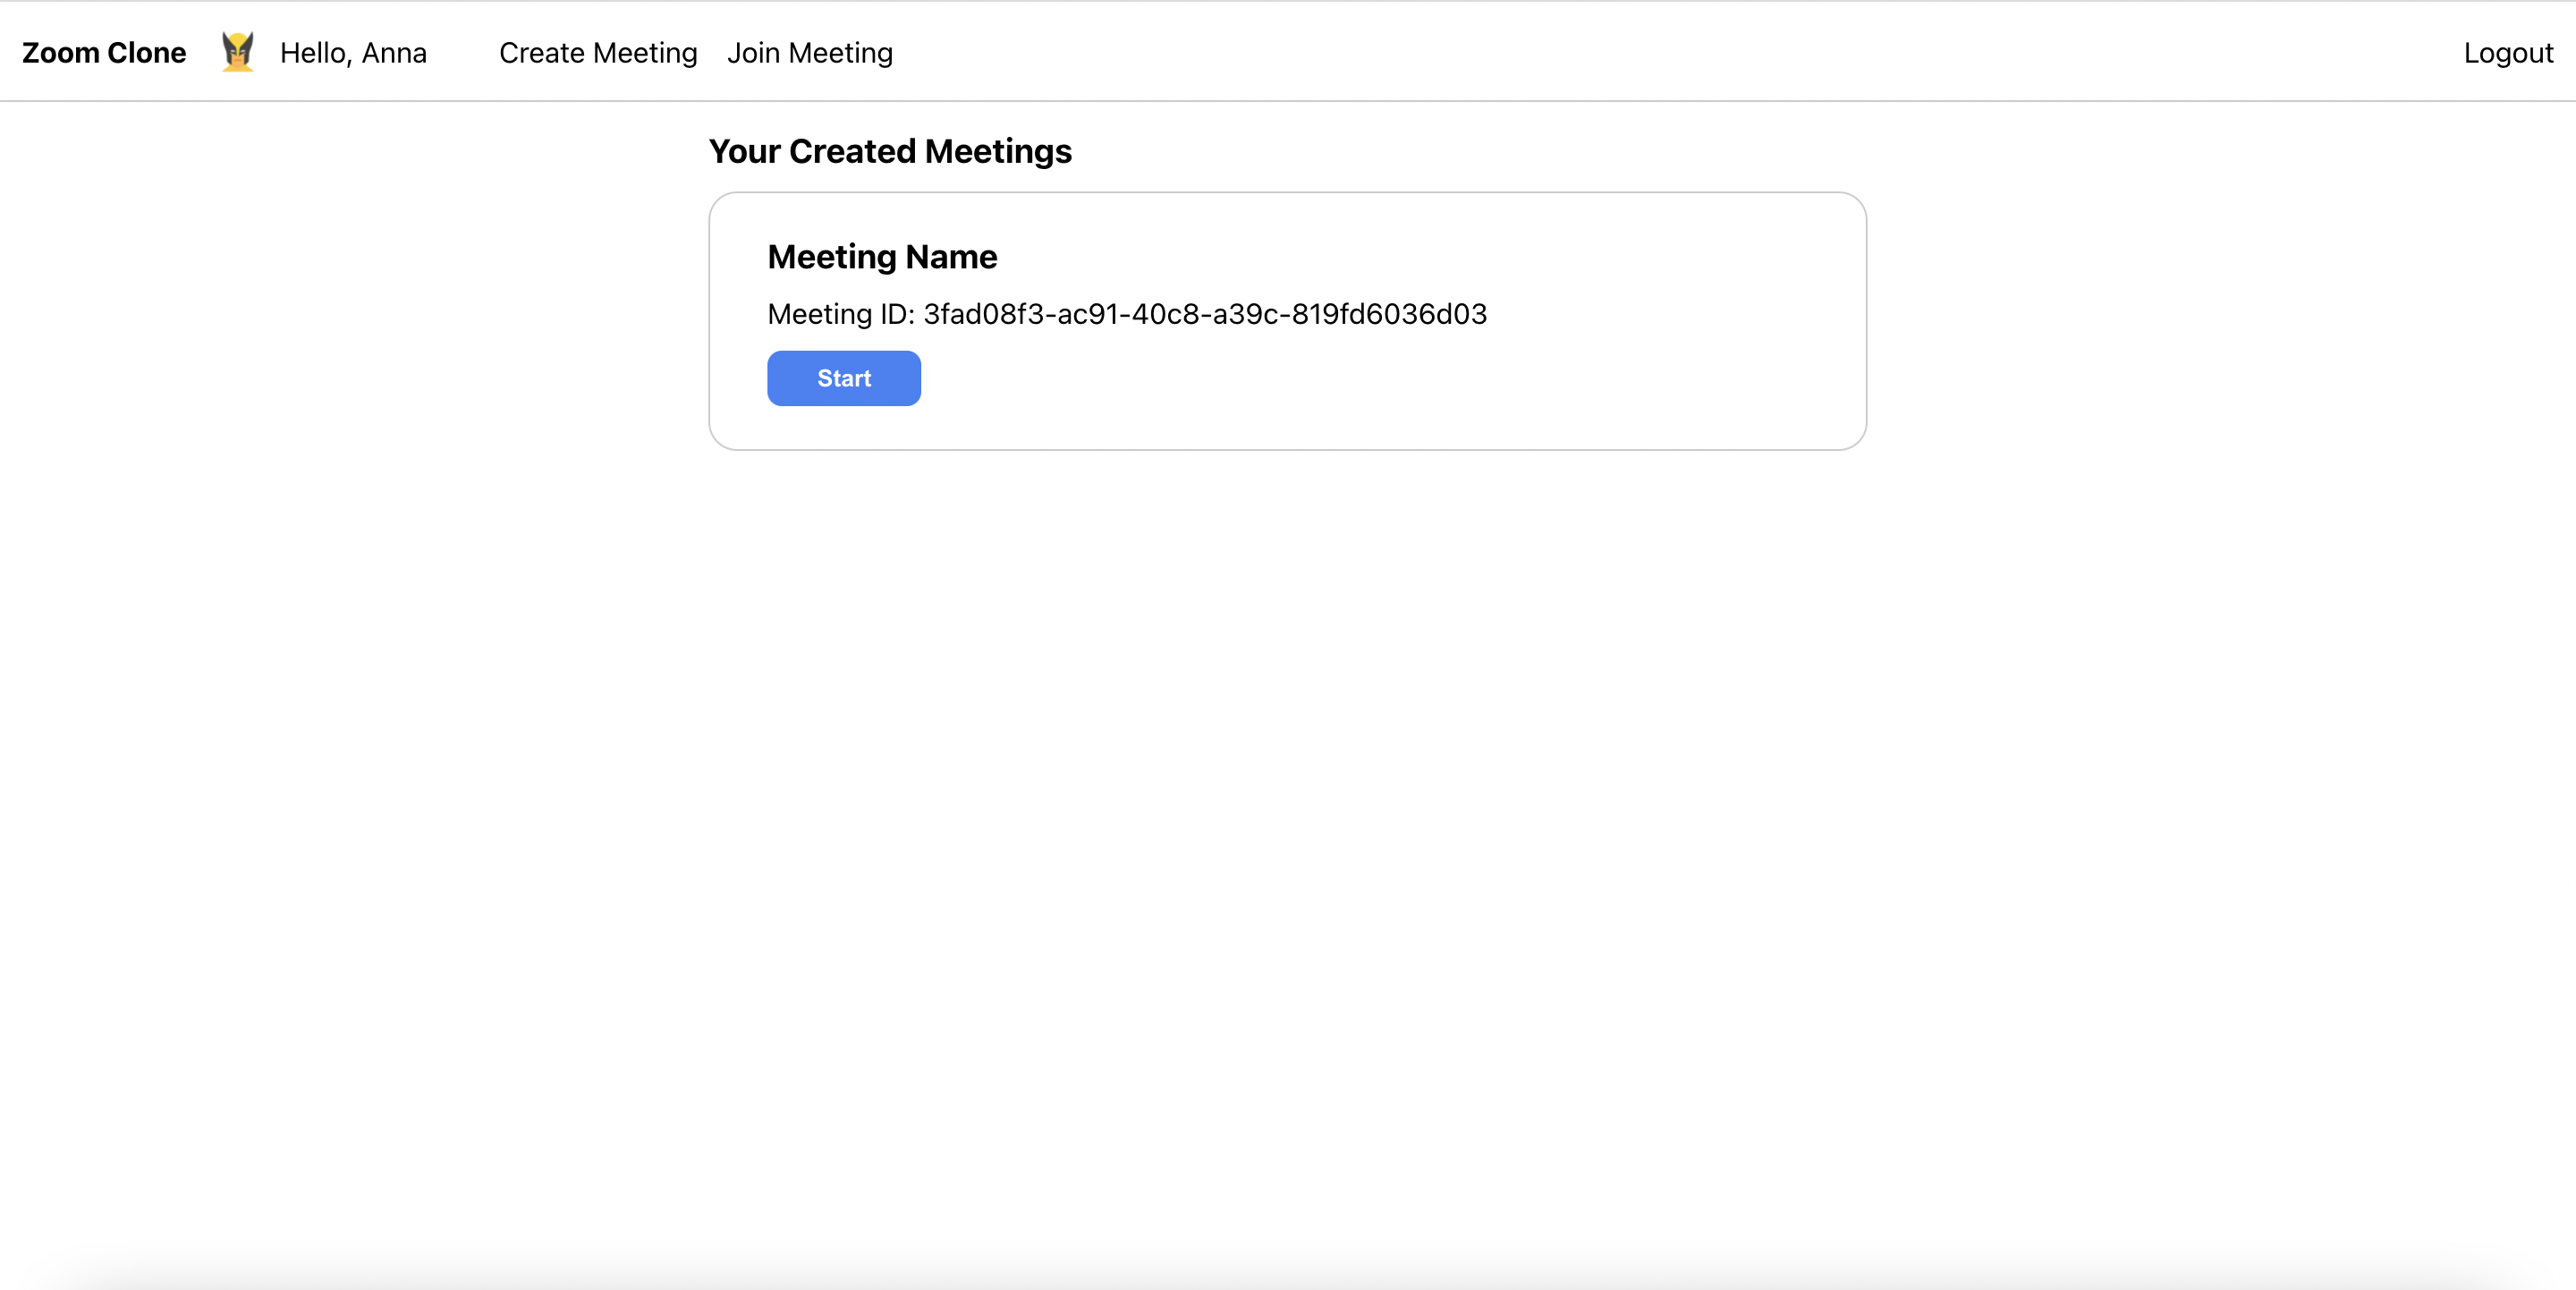
The Home Component
The Home component acts as a container component. It means that it will interact with the back-end service (calling the get meetings API), get the response and render the data on the UI. Other component inside it will perform as presentational components - render the data on UI. The Home component will contain the Header component that we have mentioned above. Please create the “Home.js” file inside it. The full source code of the Home component can be found here.
The Join Component
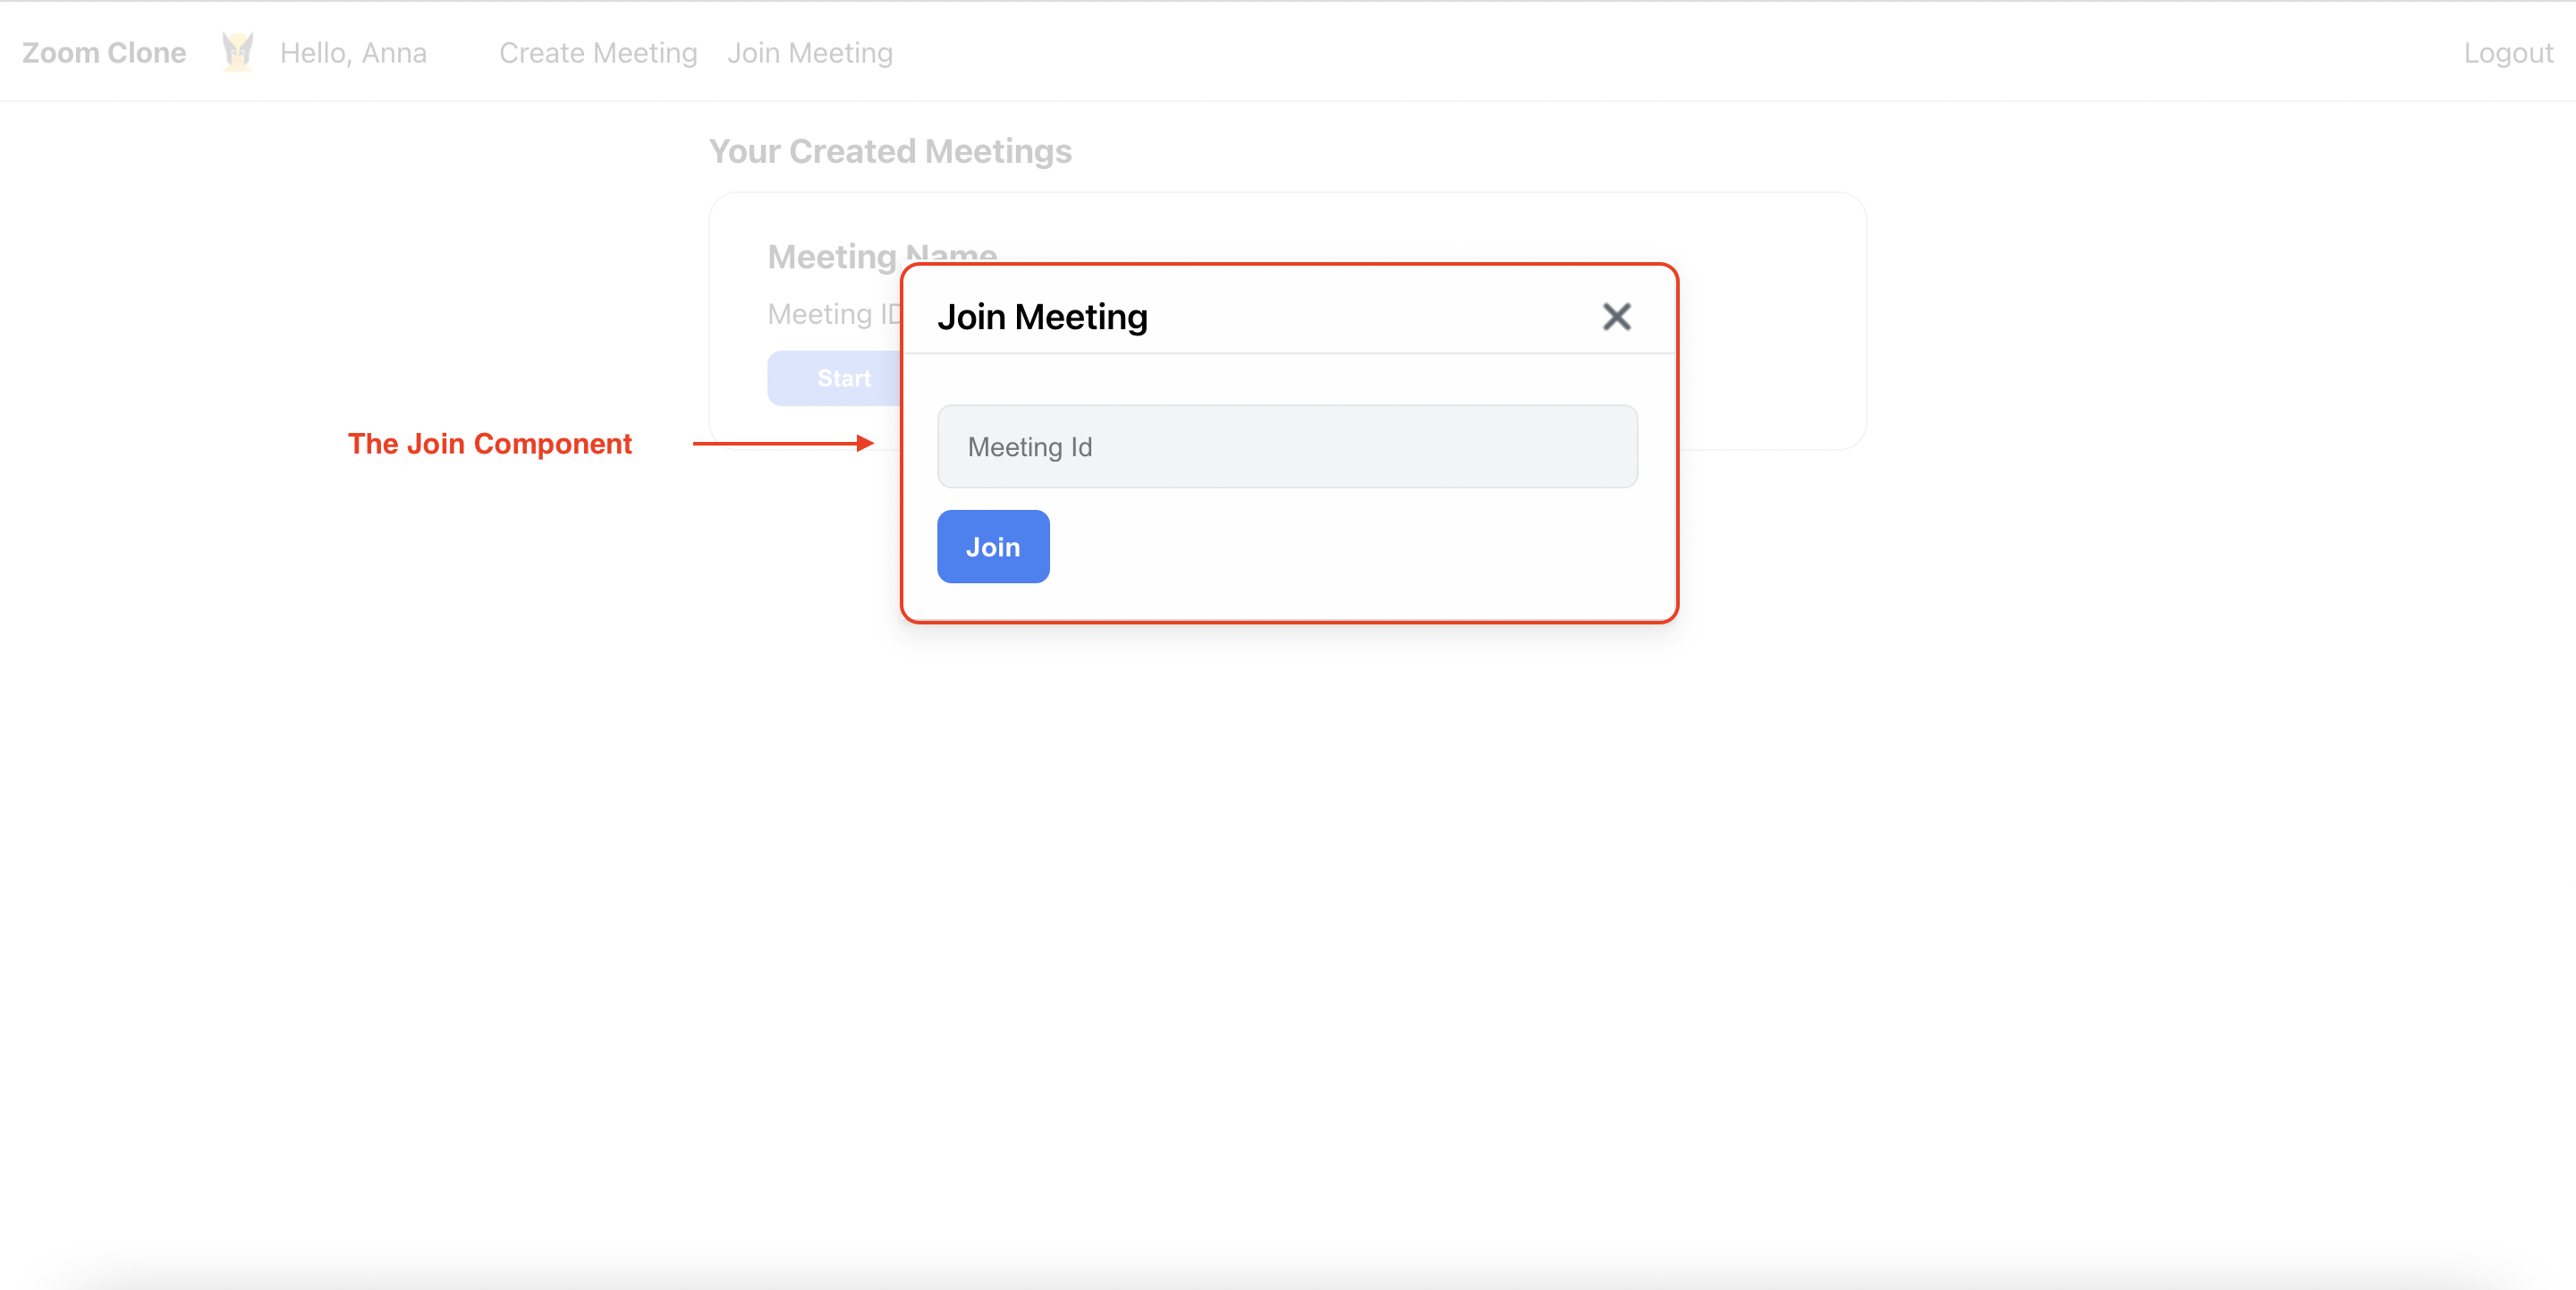
The Join Component
After create a new meeting, we can get the meeting id and share to other users. Other users can use that uid to access the created meeting. As you can see in the image above, the users just need to input the meeting uid and then click on the “Join” button. Please create the “Join.js” file inside the “home” folder. The full source code of the Join component can be found here.
When we are talking about joining a meeting. It also means that we need to join the CometChat group. To join the CometChat group, you can refer to the below code snippet.
The Meeting Header Component

The Meeting Header Component
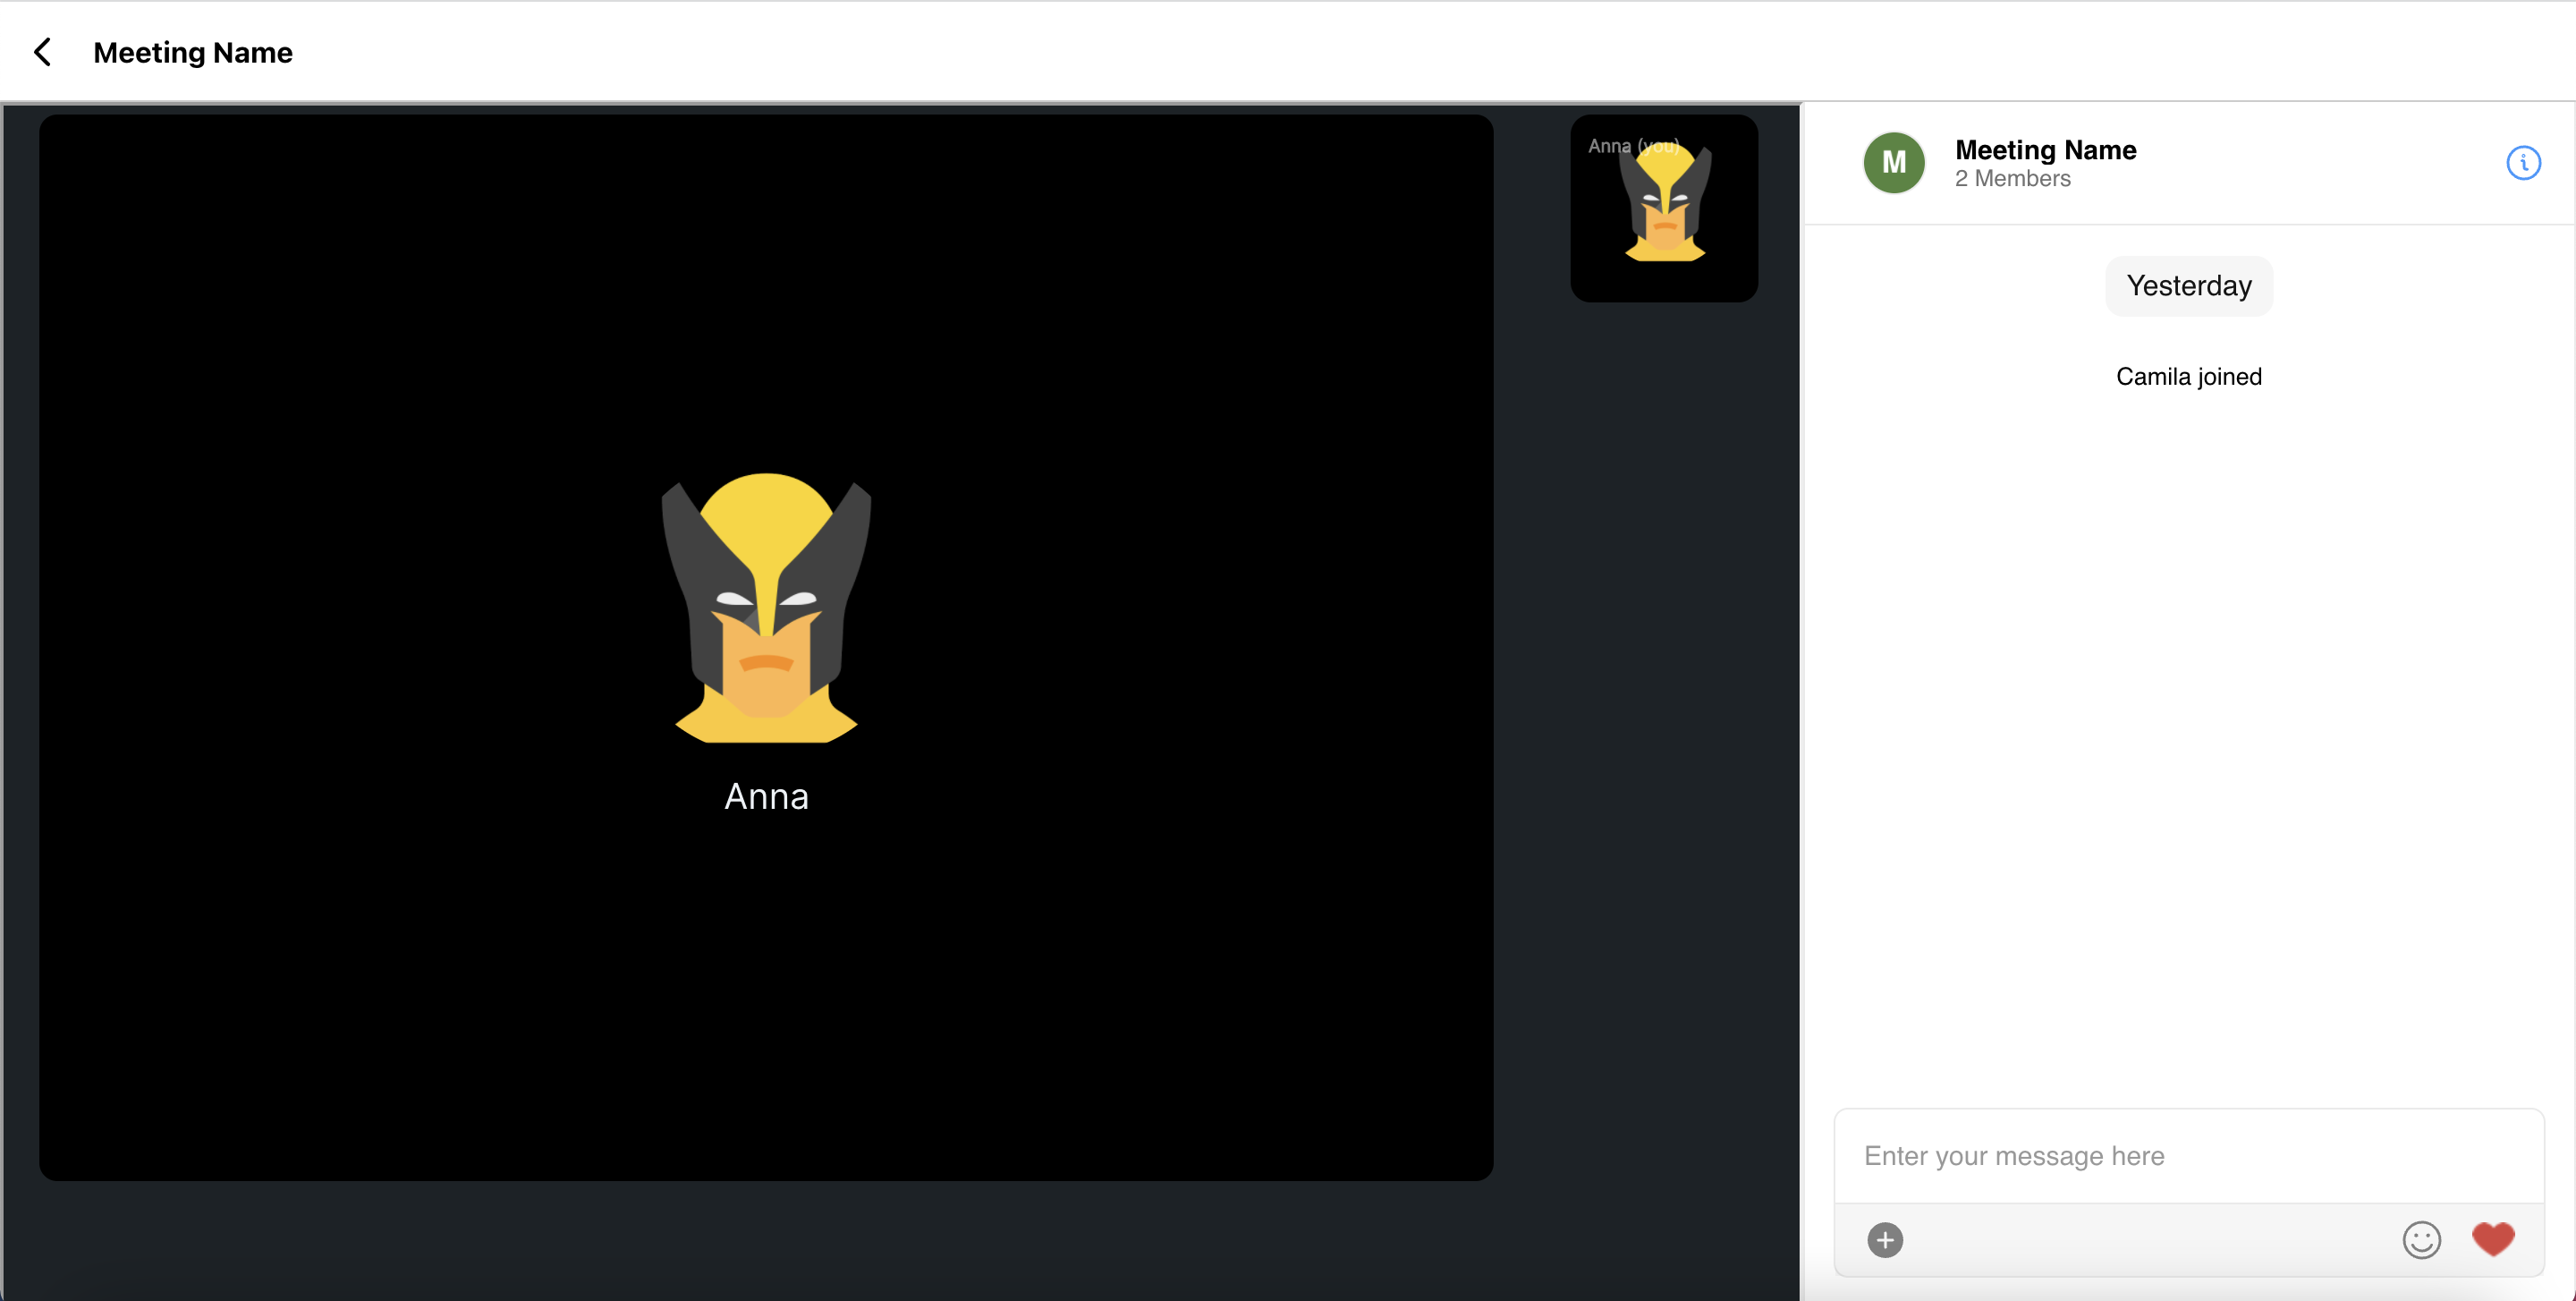
After the users click on the “Start” button on any item of the meetings list or the users join a meeting. The users will be redirected to the meeting page. The Meeting Header component is used to show the name of the meeting and it contains the back button so that the users can leave the meeting. Please create the “meeting” folder inside the “components” folder, and create the “MeetingHeader.js” file inside it. The full source code can be found here.
The Meeting Component
The Meeting Component
As mentioned above, after the users click on the “Start” button on any item of the meetings list or the users join a meeting. The users will be redirected to the meeting page. The Meeting component will use CometChat SDK to start the direct call and the CometChatMessages component from the CometChat React UI Kit. Please create the “Meeting.js” file inside the “meeting” folder. The full source code can be found here.
We need to start a direct call after the users have been navigated to the Meeting page. We will the CometChat SDK to achieve that. For more information about that feature, you can refer to this link. The below code snippet also demonstrates how we achieve that in the Zoom clone.
The Logout Feature
To log out from the application, the users can click on the “Logout” option on the header. Before redirecting the users to the login page, the application needs to do the clean-up actions such as call the logout function from the CometChat service, remove the authenticated from the local storage, reset the corresponding state. You can refer to the below code snippet for more information.
Wrapping Up
In conclusion, we have done an amazing job in developing an Zoom clone by leveraging React.js, Node.js, CometChat SDK, and React UI Kit. You’ve been introduced to the chemistry behind Zoom and how the CometChat SDK makes the Zoom clone buildable.
You have seen how to build most of the chat functionalities such as real-time messaging using CometChat. I hope you enjoyed this tutorial and that you were able to successfully add mentions into your React chat app. Jump into the comments and let me know your experience.
About the Author
Hiep Le is a software engineer. He takes a huge interest in building software products and is a full-time software engineer. Most of his work is focused on one thing - to help people learn.

Hiep Le
CometChat