This tutorial is outdated. We're currently working on an updated version. In the meantime, for instructions on building a chat app using CometChat, please visit our documentation.
WhatsApp is one popular social media application that many developers may never have thought of but it has found a way to give us a beautiful experience over the years. Now, many developers are trying to integrate it into their websites. But have you ever thought of building your own WhatsApp?
This tutorial will walk you through the process of building a WhatsApp clone. To demonstrate that this is possible using many languages/frameworks/libraries, I will be using PHP. This is what we will be creating:
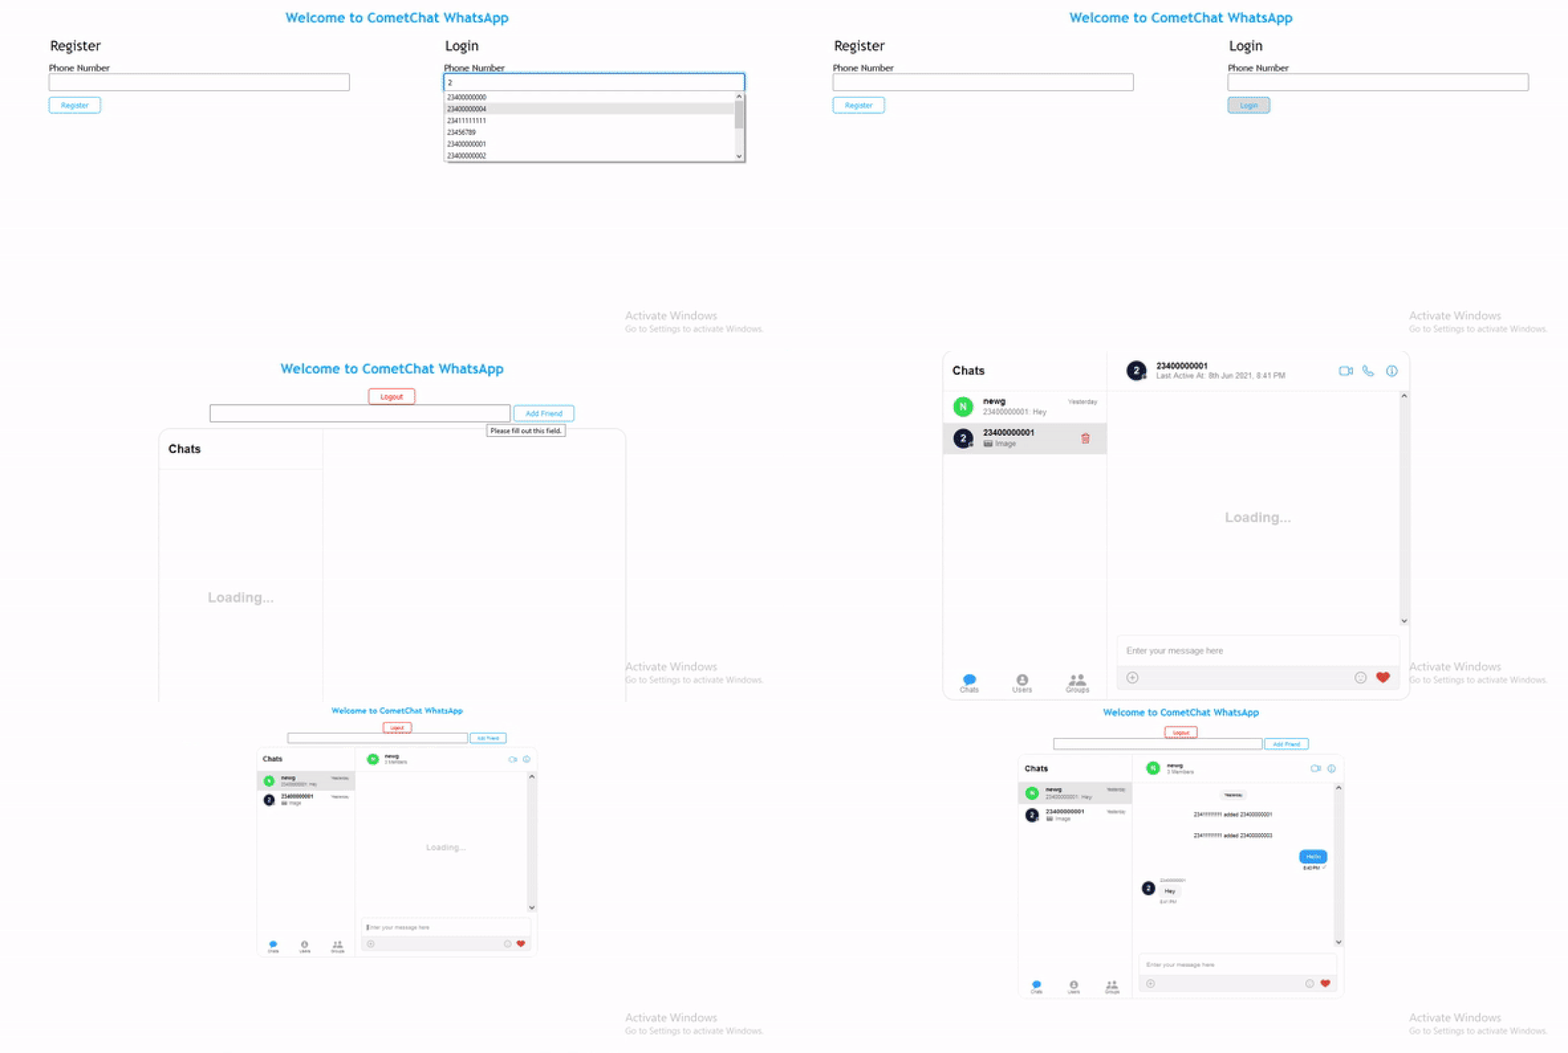
Demo to be built
I am using PHP because it is a programming language that many will call obsolete but interestingly, it is not. PHP still supports modern technologies such as CometChat which is the backbone of many chat applications on the internet today.
Prerequisite
This tutorial assumes that you already have a basic knowledge of PHP. PHP is short for Hypertext Preprocessor. It is a popular general-purpose scripting language that is especially suited to web development. It is fast, flexible, pragmatic, and powers everything from your blog to the most popular websites in the world.
PHP was originally created by Danish-Canadian programmer Rasmus Lerdorf in 1994.
You can catch up with the following link if you are new: https://www.php.net/
Now, let's have a closer look at CometChat.
CometChat
CometChat provides text chat & video calling solutions for websites and applications to quickly connect your users with each other - patients with doctors, buyers with sellers, teachers with students, gamers, community users, event attendees and more.
In this tutorial, we will be focusing on the CometChat Pro product. It houses highly customizable and easy-to-use SDKs, UI kits, extensions and plugins. It also supports more than 10 programming languages and platforms as you may see in the docs here.
With this information, you can see that what you can do with CometChat is only limited to your imagination. It could be solutions on social community, marketplace, dating, on demand, edu-tech, live stream, and so on.
To use CometChat in our application, we need to get a few things up and running.
Create a CometChat Pro Account
Create a CometChat Pro App
Create a CometChat Pro Chat Widget
The next steps will guide us step by step to setup all those:
1: Create CometChat Pro Account
Follow the next steps to quickly create a CometChat Pro account:
Visit https://app.cometchat.com/signup, signup and login
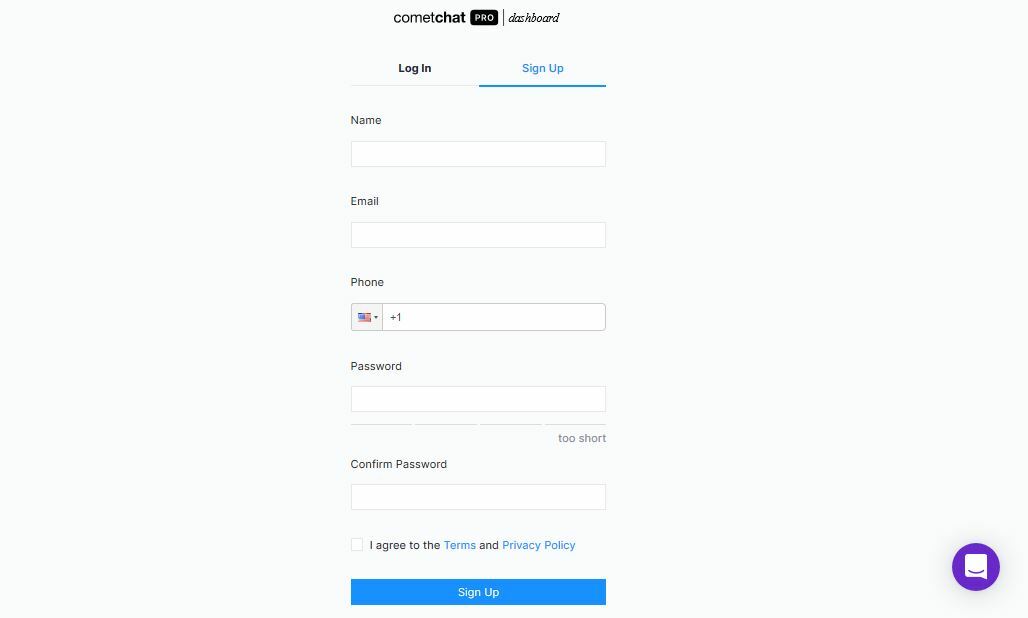
CometChat Pro Signup page
You should be on your dashboard like mine below:
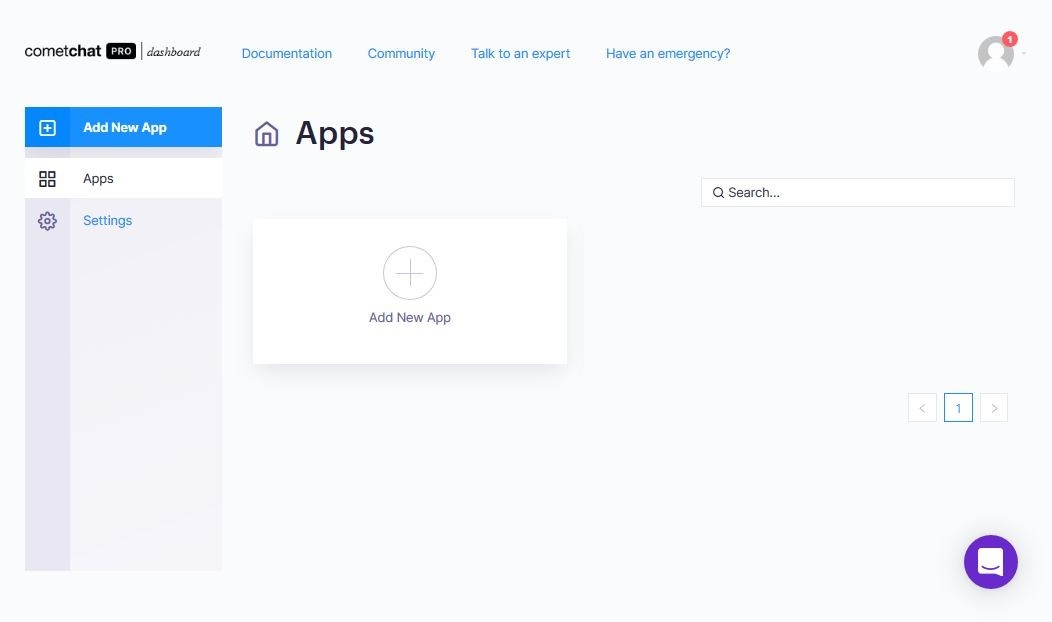
CometChat Pro dashboard
2: Create a CometChat Pro App
In your dashboard, click on the 'Add New App' button:
Add New App button
Fill out the screen that pops up and click on the 'Add App' button:
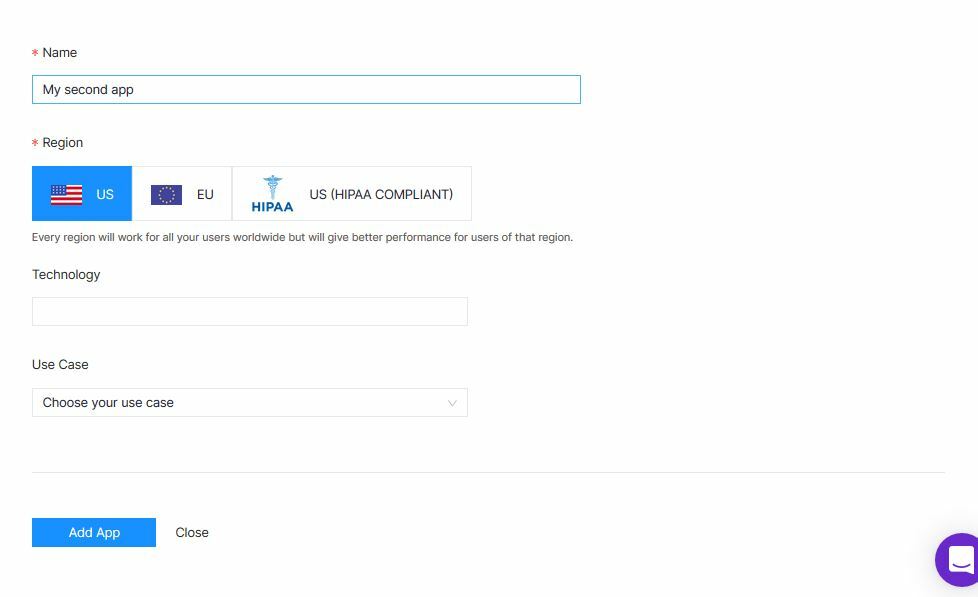
Create App Form
You should now be in that App's dashboard like so:
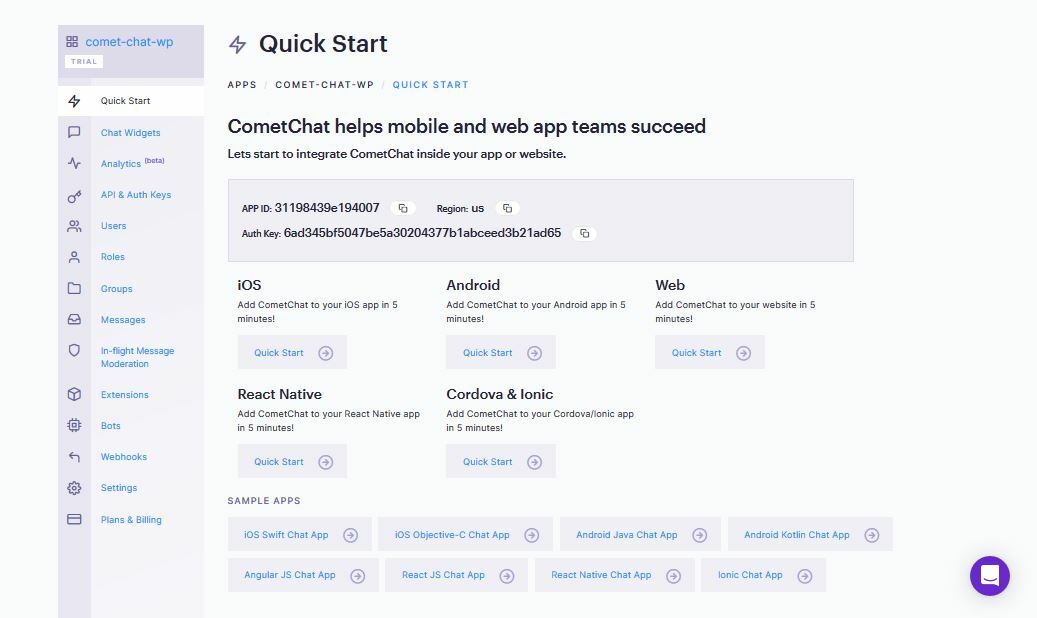
A CometChat App dashboard
3: Create a CometChat Pro Chat Widget
The chat widget helps us to configure CometChat in our application from our CometChat Pro dashboard so that we can control how the Chat functions on our application. On the left side of the App's dashboard you will find a side menu - a long list of menu items. Do the following:
Click on the 'Chat Widget' link:
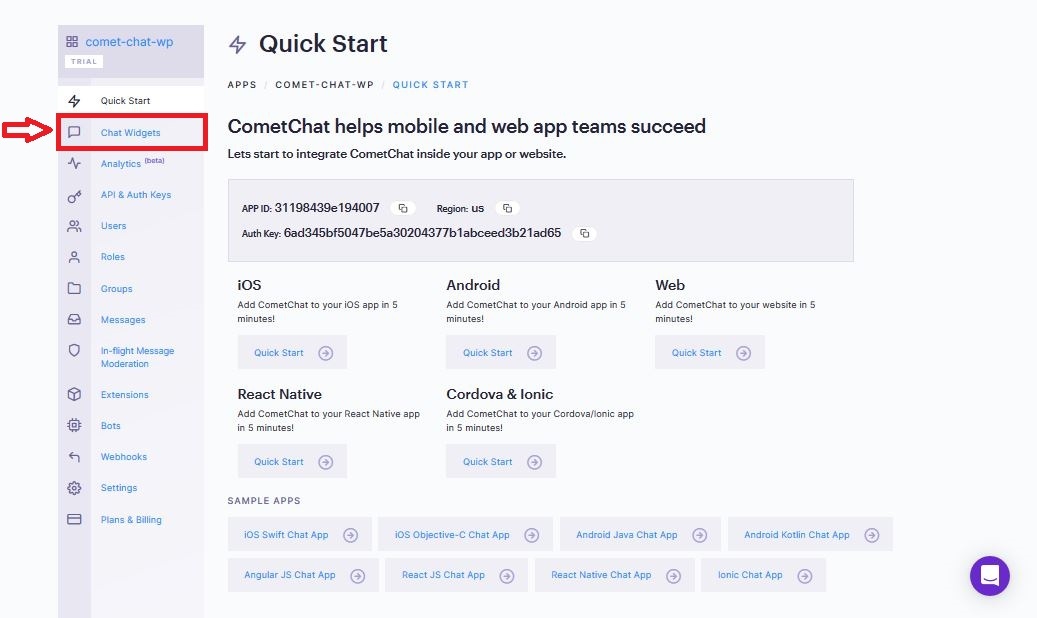
Chat Widget link
You should now be presented with a button on the page to add new Chat Widget. Click on the button
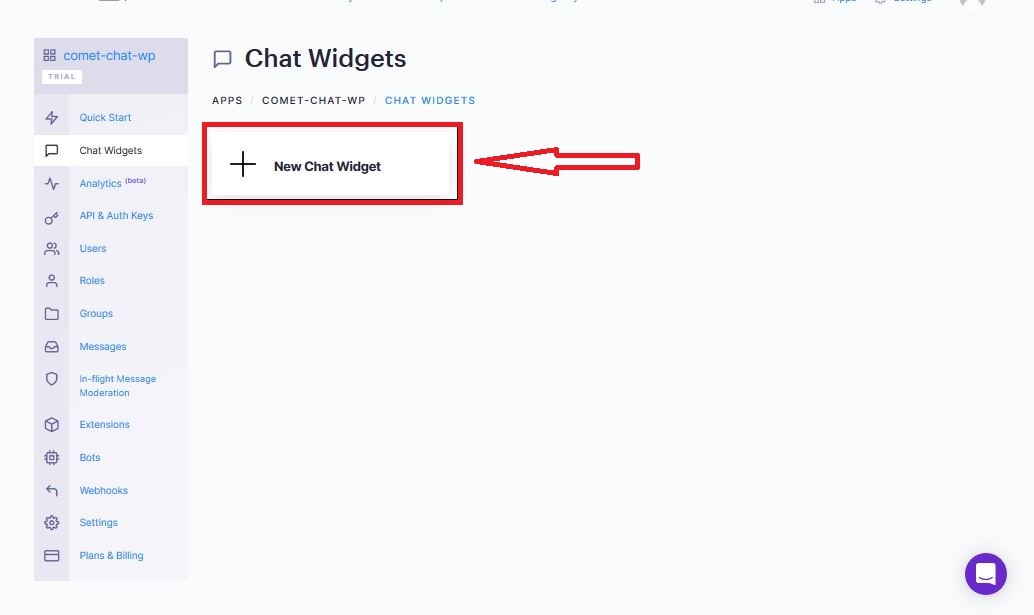
add new Chat Widget button
So, that is all that you need to create a Chat Widget, which has been created automatically with that one click.
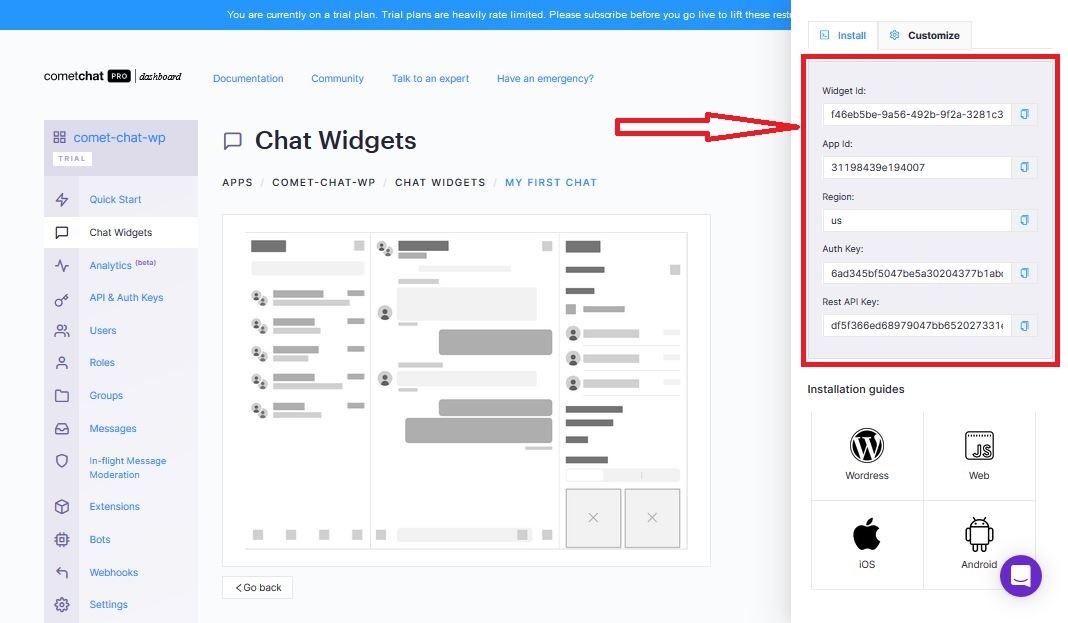
Chat Widget Configurations
However, note that it contains details for installation on the right side of the screen. We will be using that in a short while.
Build a WhatsApp Clone
With all those setup out of the way, we are starting the awesome application we have set out to build. To begin with, we need to do the following:
Create a new folder with the name CometChat-PHP-WhatsApp mkdir CometChat-PHP-WhatsApp
Create 4 files in the folder
a. index.php
b. init.js
c. functions.js
d. style.css
index.php
Enter the following code in the index.php file:
The code above renders 2 sections of the application. The authentication section is rendered when no user is logged in. It will be the default view when a user loads the page for the first time. The chat section, on the other hand, will contain the chat widget for users to chat and a form to add friend. This section will be displayed when a user is authenticated. Finally, we add the script files we need for this demo.
init.js
The following code will go into this file:
Ensure to replace appID, region and authKey with yours
To be able to use CometChat and the Chat Widget we created, we need to notify CometChat first so that they supply us all the things needed to make it happen. So the code above helps us to do that. It is automatically triggered.
style.css
This file contains the following code:
The CSS code above are all the styles we will be needing for this application.
You should now have the following view if you load the index.php file on your browser:

Welcome
functions.js
Enter the following code here:
We are capturing the 2 sections in the index.php file. We will manipulate each of them in a bit.
Add functionalities to the WhatsApp Clone
We will now be adding the following functionalities to give the application life:
a. Registration
b. Login
c. Add Friend
d. Logout
For this to happen, we need a <?php ?> block in the index.php file.
Registration
To allow a user register on the application, enter the following code in the <?php ?> block we just created.
// register
if (isset($_GET['register'])) {
    $phone = $_GET['phone'];

    $curl = curl_init();

    curl_setopt_array($curl, [
        CURLOPT_URL => "https://api-us.cometchat.io/v2.0/users",
        CURLOPT_RETURNTRANSFER => true,
        CURLOPT_ENCODING => "",
        CURLOPT_MAXREDIRS => 10,
        CURLOPT_TIMEOUT => 30,
        CURLOPT_HTTP_VERSION => CURL_HTTP_VERSION_1_1,
        CURLOPT_CUSTOMREQUEST => "POST",
        CURLOPT_POSTFIELDS => "{\"uid\":\"$phone\",\"name\":\"$phone\"}",
        CURLOPT_HTTPHEADER => [
            "Accept: application/json",
            "Content-Type: application/json",
            "apiKey: apiKey",
            "appId: appId",
        ],
    ]);

    $response = curl_exec($curl);
    $err = curl_error($curl);

    curl_close($curl);

    if ($err) {
        echo "cURL Error #:" . $err;
    } else {
        echo 'registration completed';
    }
}
Ensure to replace appID and apiKey with yours
After registering a user, we need to log the user in to use the application. So, go the functions.js file and enter the following Login code:
// login
const login = (phone) => {
  window.addEventListener(
    "DOMContentLoaded",
    (event) => {
      CometChatWidget.login({
        uid: phone,
      }).then(
        (response) => {
          chat_section.css("display", "");
          auth_section.css("display", "none");

          CometChatWidget.launch({
            widgetID: "widgetID",
            target: "#cometchat",
            roundedCorners: "true",
            height: "500px",
            width: "800px",
            defaultID: "superhero1", //default UID (user) or GUID (group) to show,
            defaultType: "user", //user or group
          });
        },
        (error) => {
          console.log("User login failed with error:", error);
          //Check the reason for error and take appropriate action.
        }
      );
    }
  );
};
Ensure to replace widgetID with yours
The login code above collects a phone number passed to it and logs in a user using the phone number as the uid. If it matches, the authentication section gets hidden and the chat section is displayed in the index.php file. At that moment, the chat widget we created is displayed for the user to be able to chat.
Now go back to the register function we were working on and replace this code: echo 'registration completed'; with this: echo '<script type="text/javascript">login(' . $phone . ');</script>';
The code above now calls the login function and passes the phone number entered by the user.
Login
Just below the registration function in the php block in index.php file, enter the following code:
When the login button is clicked, we collect the phone number entered and call the login function passing the phone number as an argument.
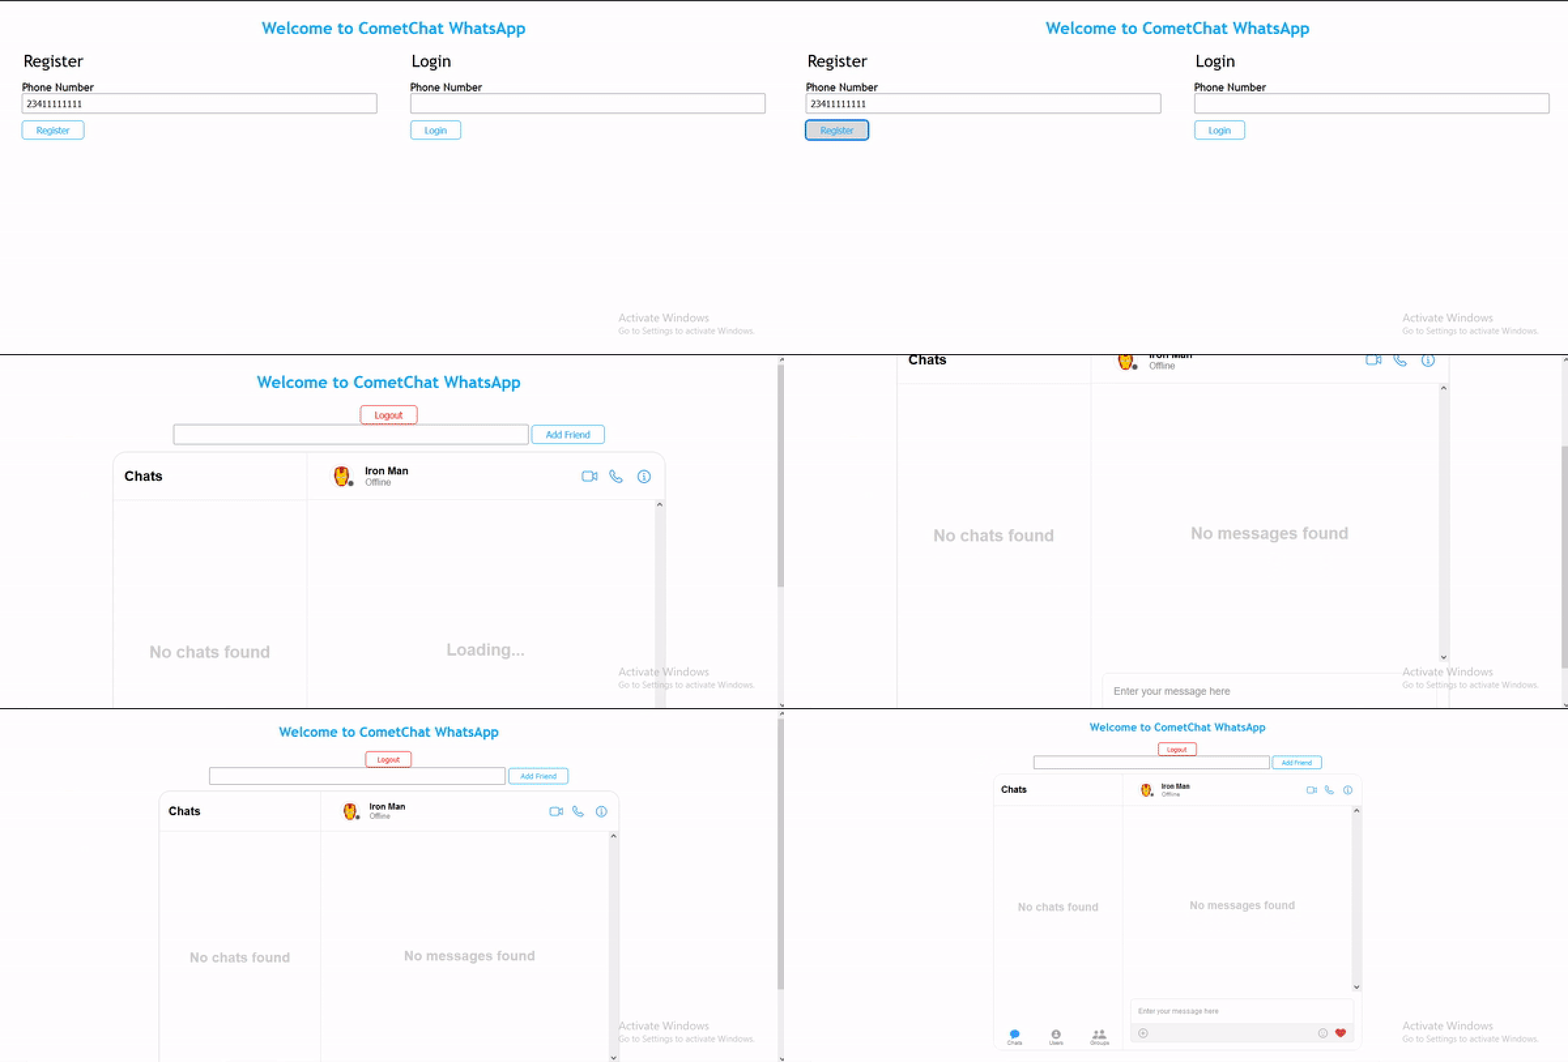
Registration
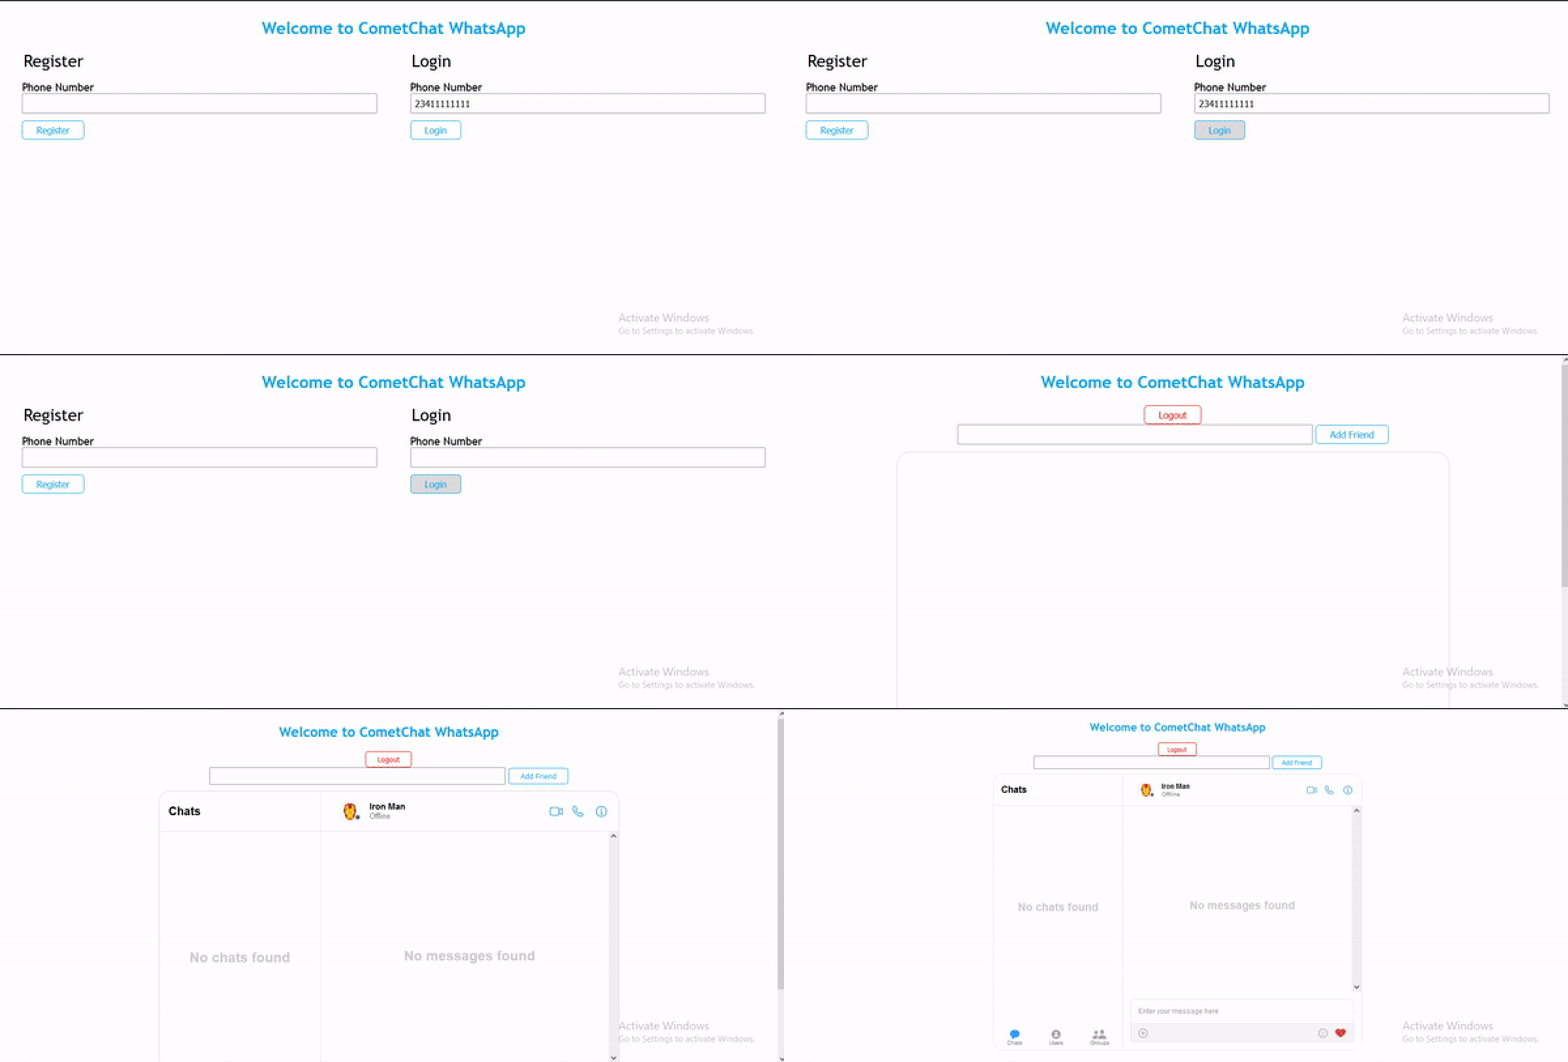
Login
Add Friend
The form you see above the chat widget is for adding a friend. Navigate to the the php block in index.php file and enter the following code just below the login function:
Ensure to replace appID and apiKey with yours
In the code above, the phone number of the friend to be added and the phone number of the user logged in is obtained as soon as the 'Add Friend' button is clicked. It is then processed and the friend is added to the list of the user's friends. You will see a feedback on the page once it is done. Just like you can only chat with someone on WhatsApp if they are already registered, the friend to be added here must be a friend already registered on the application.
To see the 'Add Friend' working, add a couple of users to the application, login one of them and try adding others as friends. See mine below:
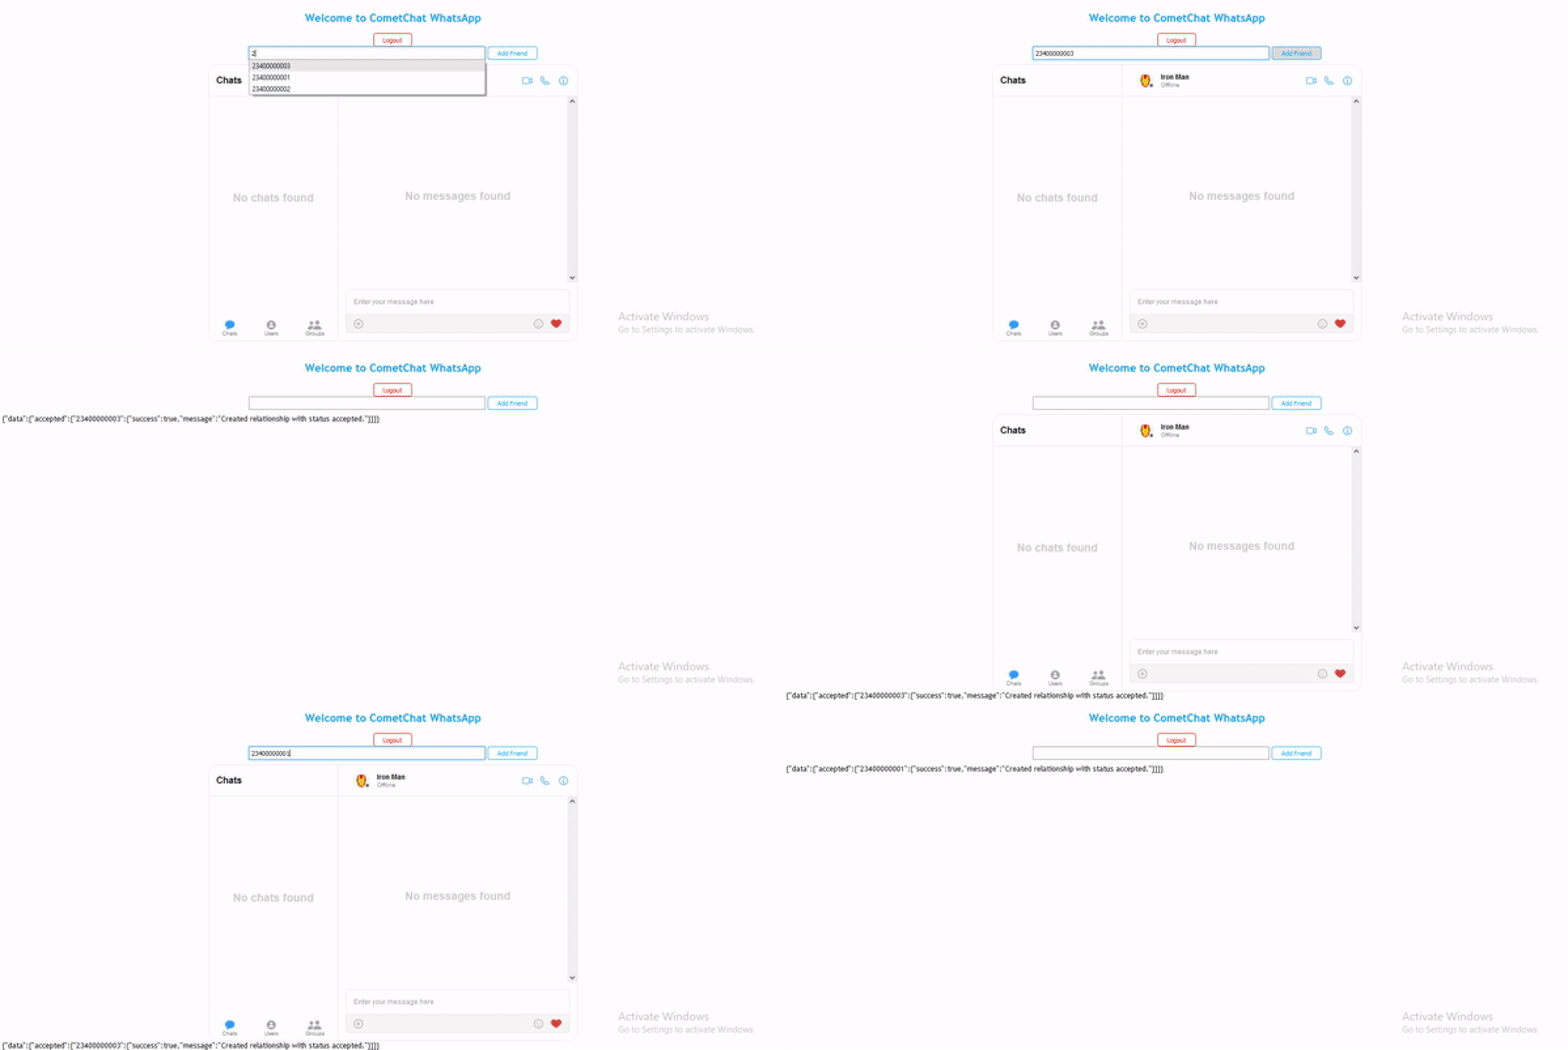
Add Friends
If you click on the 'Users' tab at the bottom of the chat widget, you will see a list of all the users in the application already.
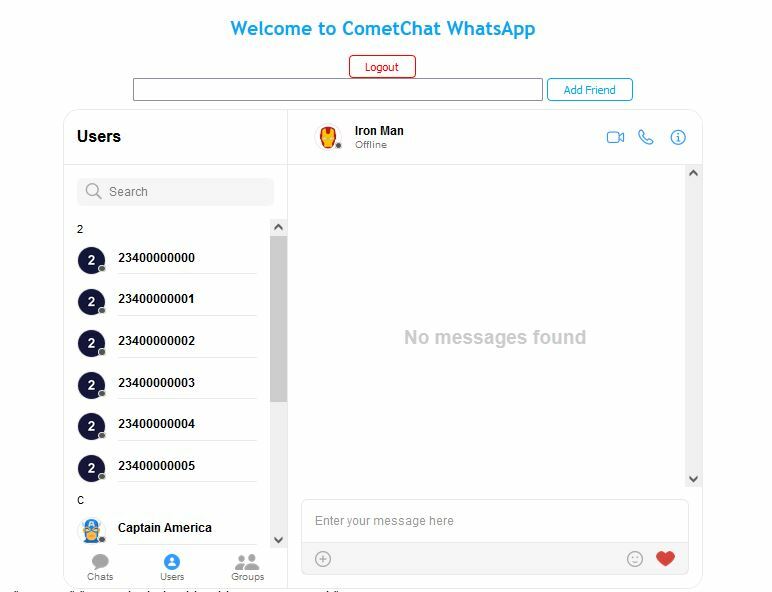
List
But that's not how WhatsApp works. On WhatsApp, you only chat with your contacts that you have added to your phone. So let's restrict the list of users to only friends on CometChat. Before we do that, let's talk a little more on the Chat Widget.
We created that widget so that we can control the chat on our website from our CometChat dashboard. So, we will need to go back to the Chat Widget dashboard and see how to make some adjustments.
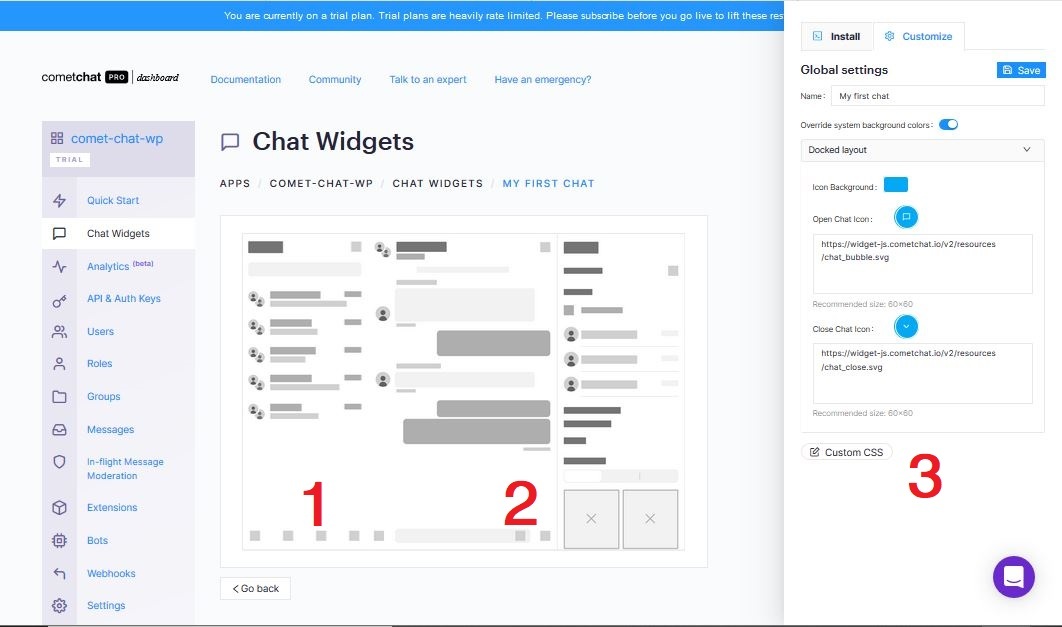
Chat Widget
Note that we have switched from installation to customization in section 3.
This is where you customize the Chat Widget to look and feel as you desire. The part labelled 1 represents the sidebar and navigation and the part labelled 2 represents the main body of the chat. When you click either of those sections, the settings are displayed in section 3 (Customization) and you can then make required changes. There is also the general settings - we can change the color of the toggle button for the docked chat layout there.
Let's make our users see only friends they have added
Click on the section 1 of our chat widget
Click on the customization tab in section 3
Click on Users accordion tab
Select Friends in the show options
Click on the Save & Done button above
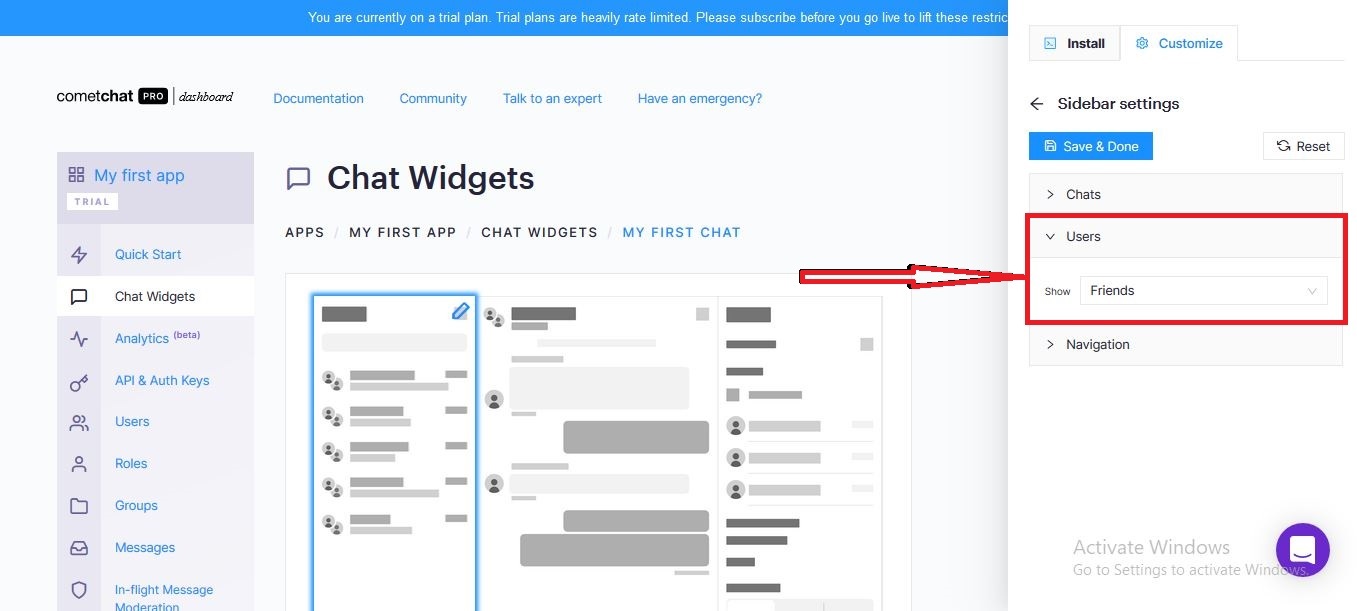
See Friends
We also don't have to show a default user or group. So you can remove the following lines from the login function in the functions.js file
defaultID: "superhero1", //default UID (user) or GUID (group) to show,
defaultType: "user", //user or group
You should now have only the friends you have added when you refresh the page:
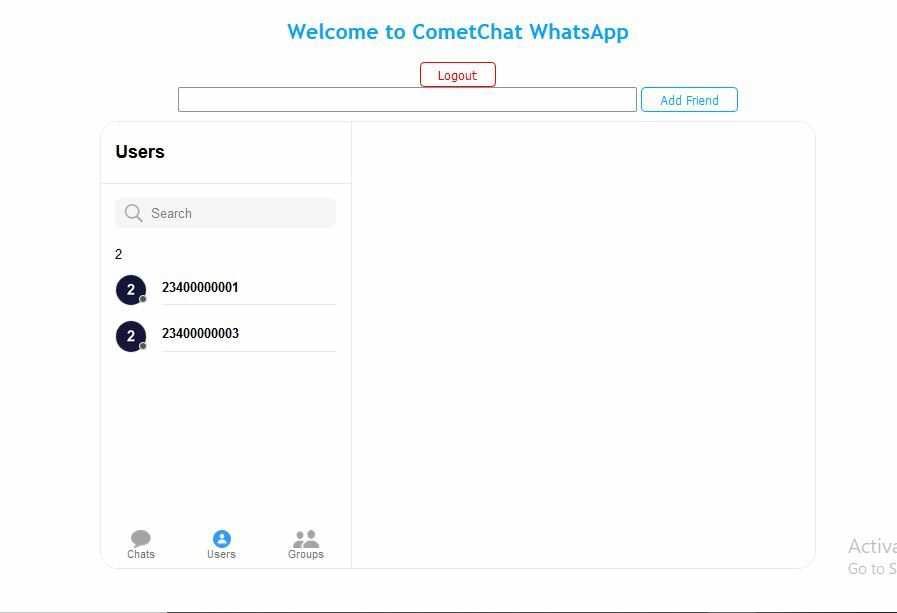
Awesome!!!
Logout
This final part is to be done in the functions.js file. Enter the following code just beneath the login function:
In the code above, we are logging out the user from our application, hiding the chat section, showing the authentication section and redirecting to the home page as soon as the 'Logout' button is clicked. With this, our application is complete. You have just built your own WhatsApp with PHP and CometChat.
Try this
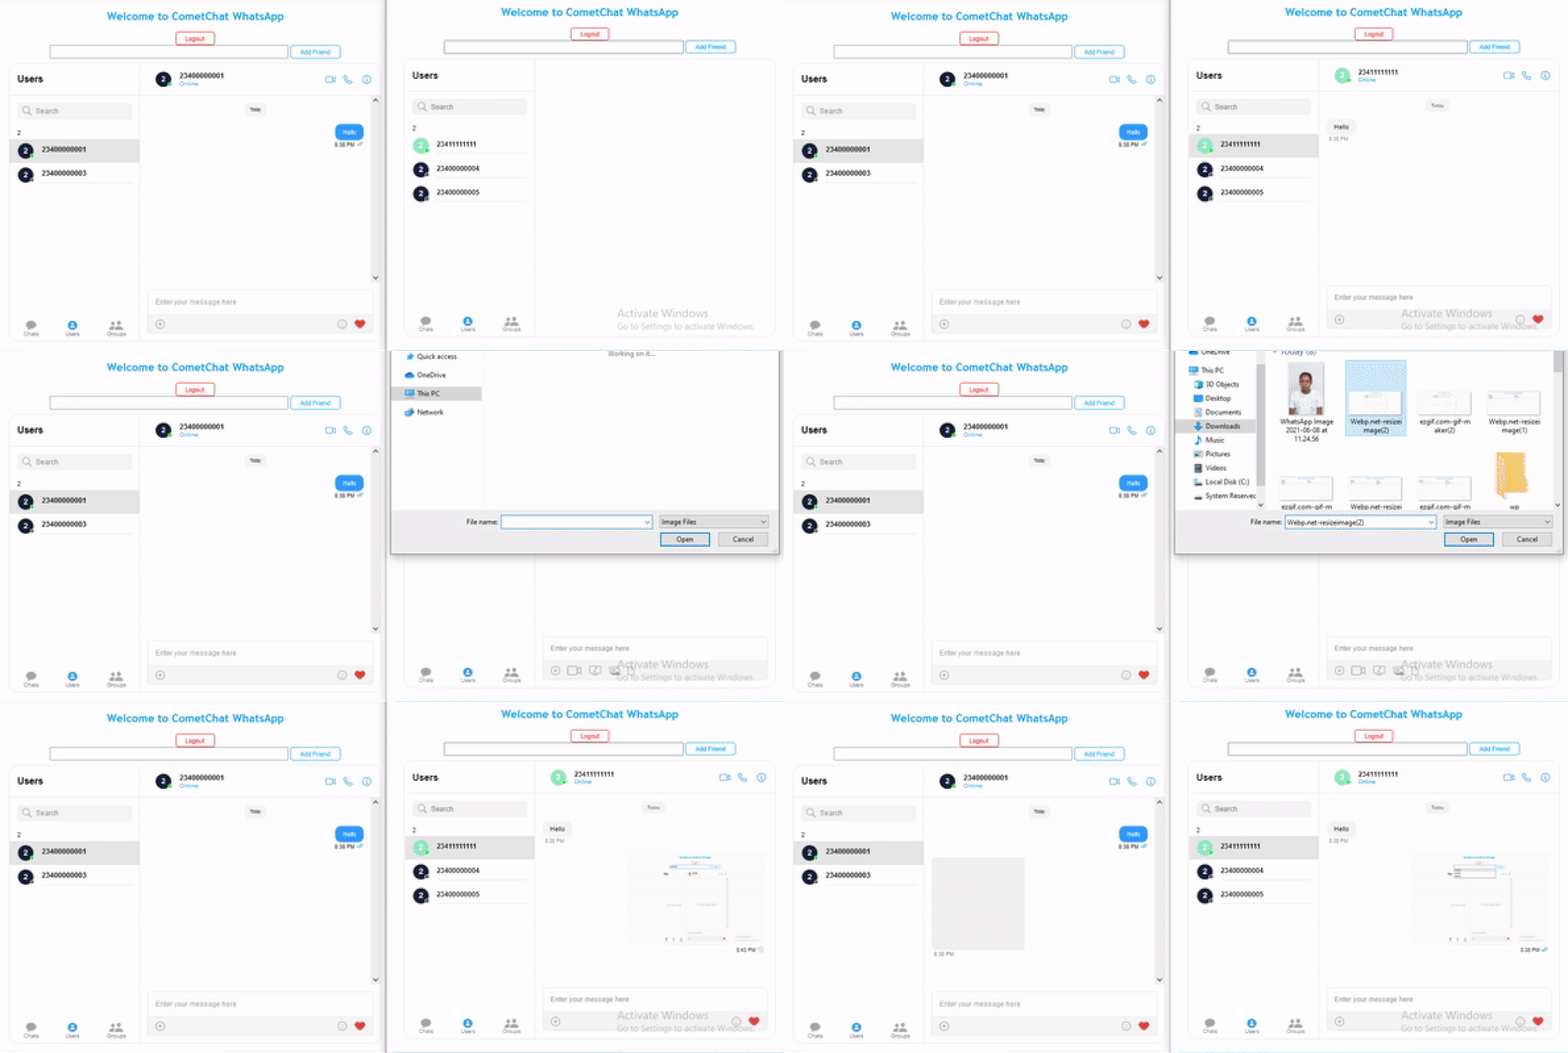
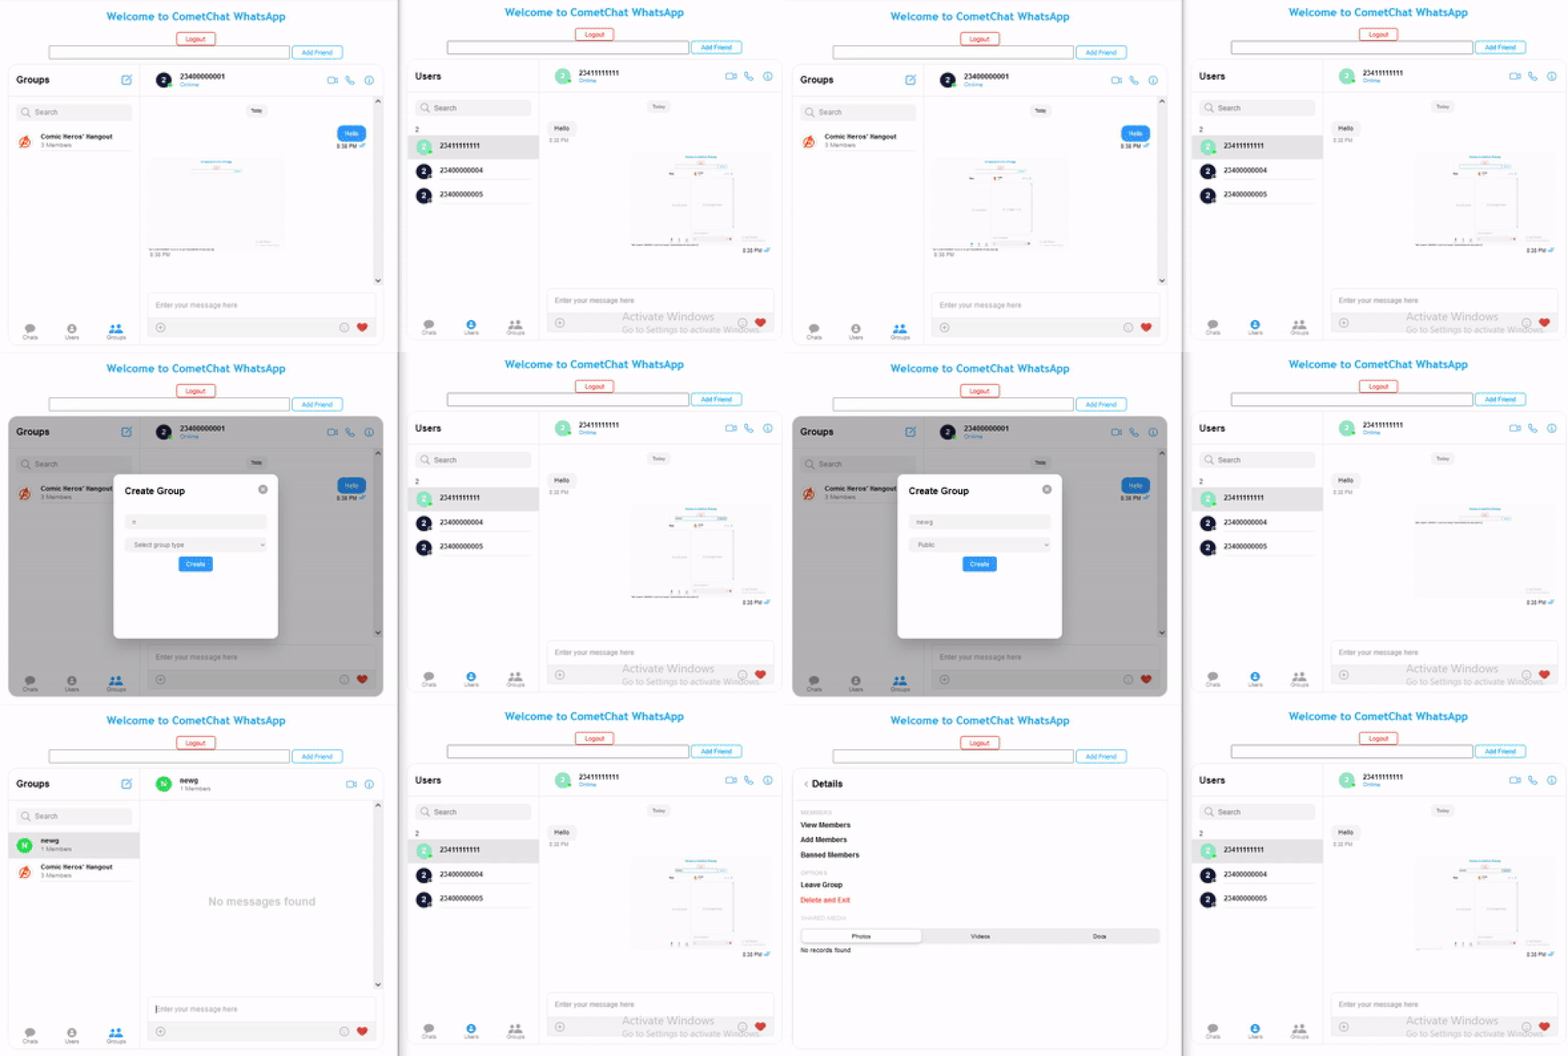
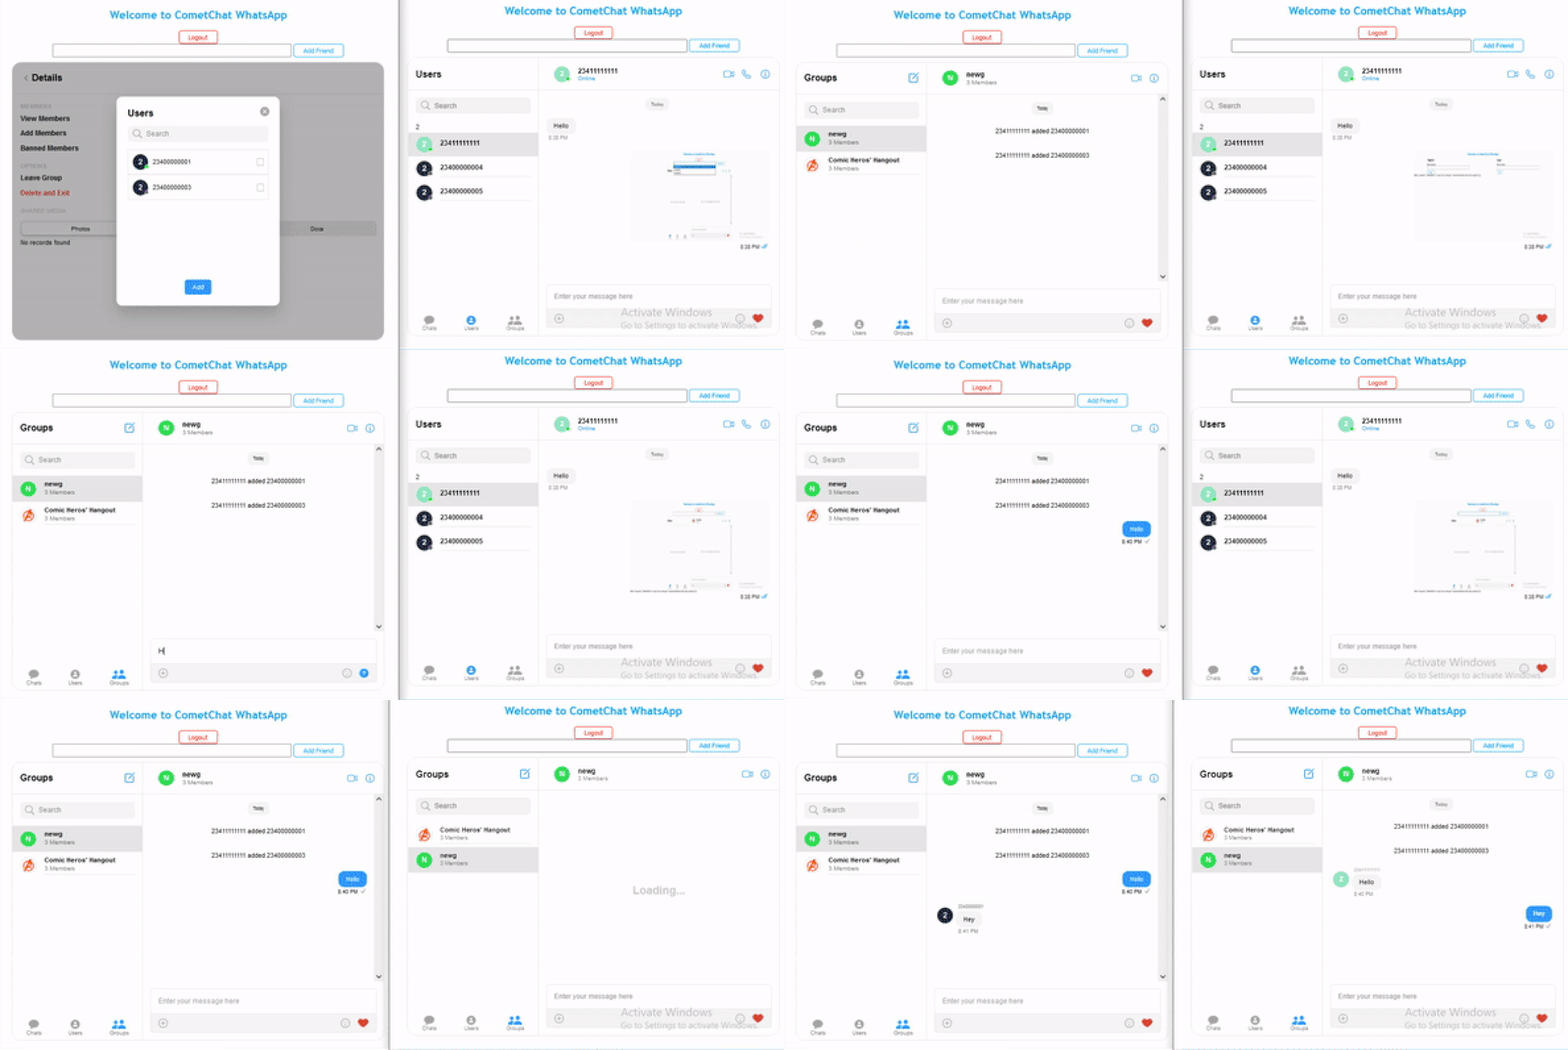
Log in with 2 different accounts on different browsers and try the following:
User to User Chat
Create Group:
Add Group Member(s) and Chat:
Conclusion
We set out to build a WhatsApp clone using PHP and the CometChat Widget to show how possible it is to build our own chat application irrespective of the programming language, framework or library we use in building the website.
We were able to build such clone in just a short time because we leveraged CometChat which provides a lot of features outside the box. We saw how to authenticate users, add friend, chat and even logout with a cool user interface.
I want you to try to change the name of the users to their preferred user name using the API endpoint found here: https://prodocs.cometchat.com/reference#updateuser and try your hands more on the customization.
About Author
Njoku Samson Ebere is a software engineer who is interested in building solutions to real world problems and teaching others about the things he knows. Something he really enjoy doing asides writing codes and technical articles is body building.

Njoku Samson Ebere
CometChat