This tutorial is outdated. We're currently working on an updated version. In the meantime, for instructions on building a chat app using CometChat, please visit our documentation.
Buying and selling require communication, if you check most of the e-commerce sites you will notice very few have an implementation of such. In this tutorial we will be exploring this feature by taking Etsy as a case study. We will be implementing a chat feature between the customer and the seller. Using some of CometChat’s features and components, this implementation will be flawless and fast. we will be using React for our frontend and Node.js for the backend.
The image below shows our end result.

.gif)
.gif)
Prerequisite
Initializing React application using create-react-app.
Basic knowledge of Express and Mysql.
Mysql Database setup.
Setting up a CometChat account and creating an App.
Add real-time chat with minimal effort using CometChat
Setting up CometChat SDK
After initializing a new react application, we will setup our CometChat SDK. To do that, navigate to the application folder and run the code below to install the SDK
To install SDK, Run the command below:
npm install @cometchat-pro/chat --save
Before diving into the main functionality we need to first set our needed constants and folder structure. To do that navigate to the src folder and create these folders; view folder(this will handle all our components in the project), assets(this will house all our images and other files need for the project), constant(this will store all constant in the project(APP_ID, AUTH KEY) ). To set our constant file , navigate to the constant folder and create a “Constant.js” and paste the code below.
NOTE: Don’t forget to replace the APP_ID, `AUTH_KEY` and REGION placeholders with your credentials.
After installing our dependency and setting up our constants and folder structure, we need to initialize CometChat by incorporating it at the initial stage of our application. To do this, open the "index.js" file and add the following content to the file.
NOTE: Don’t forget to replace the APP_ID and REGION placeholders with your credentials.
Creating home component
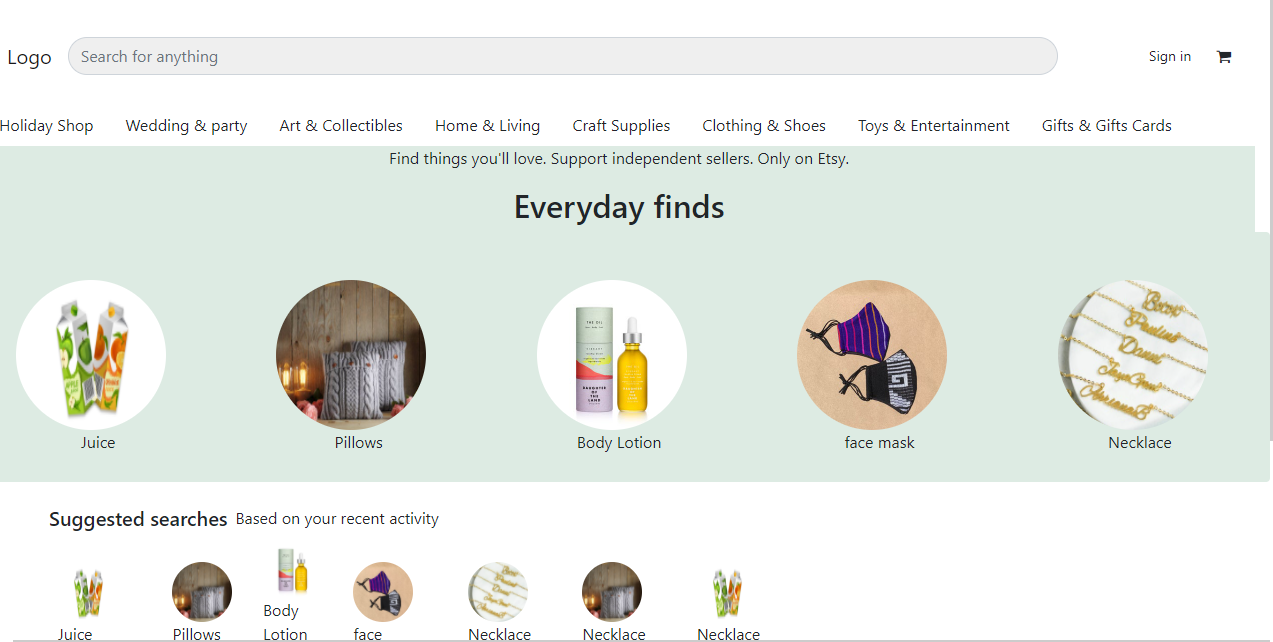
Since we are building an marketplace clone, once our application is set, we will first set our display product interface for users to view the list of products in our market. To do that navigate to the view folder and create home component “Home.js” and paste the code below.
On mount of this component we call our getProduct function. This function makes a call to our backend to get the list of all the products created. We will explain the backend feature later in this tutorial.
Creating register/login component
Now that our constant and products display components are all set, we can navigate to our view folder and create a login component “Login.js” so that we will be able to allow our users and vendors manage their products and orders.
Paste the following code in the “Login.js” file.
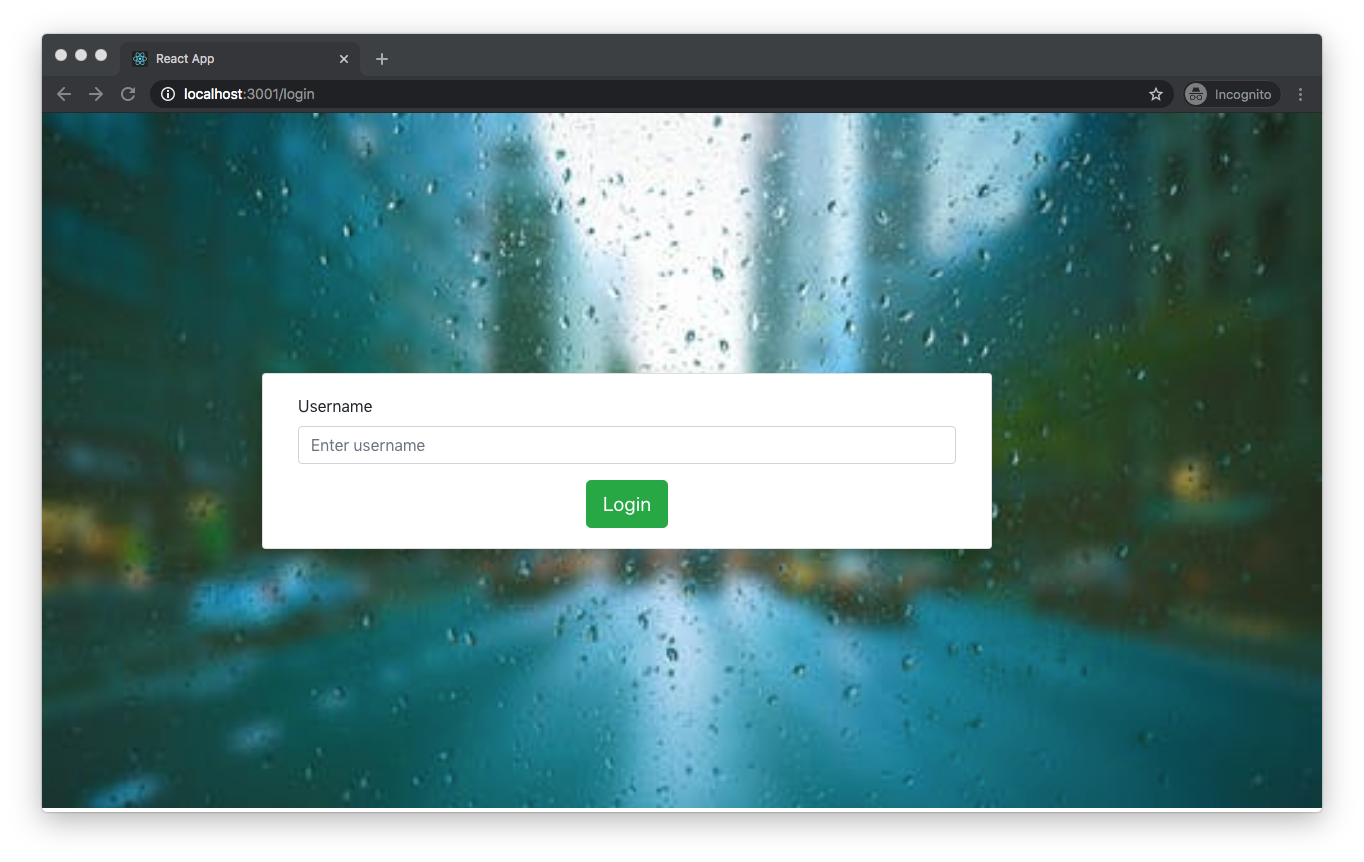
On submit of our Login form, we call our formsubmit() function which handles the logic of creating and logging in of users. We first initiate the CometChat function for creating a user CometChat.createUser(), this function also checks if the user exists before creating a new user. Upon successful creation of a user, the CometChat.login() is called, which then indicates if the user already exists. Hence, they will automatically be authenticated.
The image below shows the login and registration interface.

Create product and view products components
Once a user is authenticated, we allow the authenticated user to create product or shop on the platform, to create product navigate to view folder and create “Create_Product.js” file.
Paste the code below in the newly created file.
In our Create_Product.js file, we are handling the create product by sending our input values (name, description, quantity, price) to our backend (Express.js). We then call the createProduct() on submitting the form, this function sends our input values to the backend for creating a product. To ensure communication with the backend we used the javascript Fetch api which handles sending and receiving of data from the backend.
View product/chat Component
Usual e-commerce allows us to view, see reviews and description of a single product, to achieve this feature navigate to view folder and create “Product.js” file then paste the following code.
The main aim of this tutorial is to demonstrate a user vendor chat, this implementation is handled by this component. On mount of this component we send a request to the backend to get the specific product by id. The chat() function in this component handles the redirect of our chat by checking if the authenticated user is the vendor of the product as such we redirect the user to “Chat.js” components. While, if the authenticated user is not the vendor of the product we display a section for him to chat with the vendor of the product.
On this chat section we have a form with an input field which accept our message, upon submit of this form we trigger the sendMessage(), in this function we set our necessary parameter(receiverID, messageText, receiverType) for the CometChat.sendMessage() which sends our message to the specified receiverID.
This CometChat function in this component opens a channel “UNIQUE_LISTENER_ID” and listens for any message send to it. This is a unique listener id, that will receive any real-time message sent.
Chat component
Before creating our chat component, we will need to setup our CometChat UI Kit. To do that clone the repository below.
git clone https://github.com/cometchat-pro/cometchat-pro-react-ui-kit
Once this is done, copy the CometChat folder to your source folder. Next is for us to install all the needed dependency for the CometChat UI Kit, to do that, copy the dependency below to your package.json file.
"emoji-mart": "^3.0.0",
"node-sass": "^4.12.1",
"twemoji": "^13.0.1",
"@emotion/core": "10.0.35",
"react-html-parser": "^2.0.2",
"dateformat": "4.5.1",
For more details click the link
As stated earlier we redirect an authenticated user to the chat component if the user is the vendor of the product, navigate to the view folder and create “Chat.js” file and paste the code below.
This is where we introduced our CometChat SDK for smooth and fast implementation. The CometChatUserListWithMessages component imported from CometChat displays the list of users and also give us a ready made display of message area with all implementations.
Updating our “App.js” file
Lastly, we will update the “App.js ”, Open the “App.js” file and paste the following code.
Express setup
To setup our express backend, create a folder called etsy-backend and navigate to it. The next step is to initialize npm and to do that, run the code below.
npm init
NOTE: This creates our “package.json” file in the folder.
We will need to install some packages that will help us access our database and also enable us to run our code smoothly, to do that paste the following code into our backend “package.json” file.
"express": "^4.17.1",
"sequelize": "^6.3.5",
"mysql": "^2.18.1",
"mysql2": "^1.7.0",
"nodemon": "^1.19.4",
"body-parser": "^1.19.0",
"cors": "^2.8.5"
NOTE: We used nodemon package for development to help with running our application continuously. Although, this should not be used in production.
After the above, run the code below:
npm install
After installing our packages, the next step is to set up our backend entry point. The entry point will contain our express server connection, some of the necessary setup (like initializing bodyparser and cors) and our API path. Then we create a server.js file and paste the code below:
Setting up database connection
As stated in our prerequisite, we need to be able to install MySQL on our machine and set the necessary configurations (username, password, and port). Furthermore, we need to create a database called ecommerce and also a table called ecommerce in our database.
The next step is to set up database connection, to do that create a database/db.js file and paste the code below:
We are using sequelize to setup our database with our backend. Replace the database name, username, password, and port with the parameters in the new Sequelize() function.
The next step is to set up our ecommerce database models, create models/product.js file and paste the code below:
Thus, this is where we define our database tables in our application and any other relationships.
Setup express routes
The express routes handles our CRUD operation for the events which involves creating and retrieving of products. Create routes/products.js file and paste the following code:
We used the express.route() to define our API path and to also initialize the database model in order to have access to the database.
Testing our application
To test our application, run the following command to start up our frontend engine:
npm run start
This will run our application on port 3000. Navigate to your browser and open http://localhost:3000 to access the application.
For our backend, before starting the server navigate to the backend “Package.json” file and add the below code to the script.
"dev": "nodemon server.js"
the above code points our script to the server.js file when the command below is initiated.
npm run dev
This will run our backend on port 5000 as indicated in our “server.js” file.

Conclusion
With such implementation and ease in providing a more user friendly feature to ecommerce platform, utilizing the CometChat SDK and UI kit we are able we able to shade more light to ecommerce platforms.
Hope you find this tutorial helpful and don’t forget to check the official documentation of CometChat to explore further and add more features to your app. The complete source code to this tutorial is available on GitHub.
About the Author
Umar is a software enthusiast skilled in PHP, Javascript, Python and other frameworks. Has a strong engineering professional background with a Bachelor’s Degree in computer engineering technology.
Umar Elbelel
CometChat