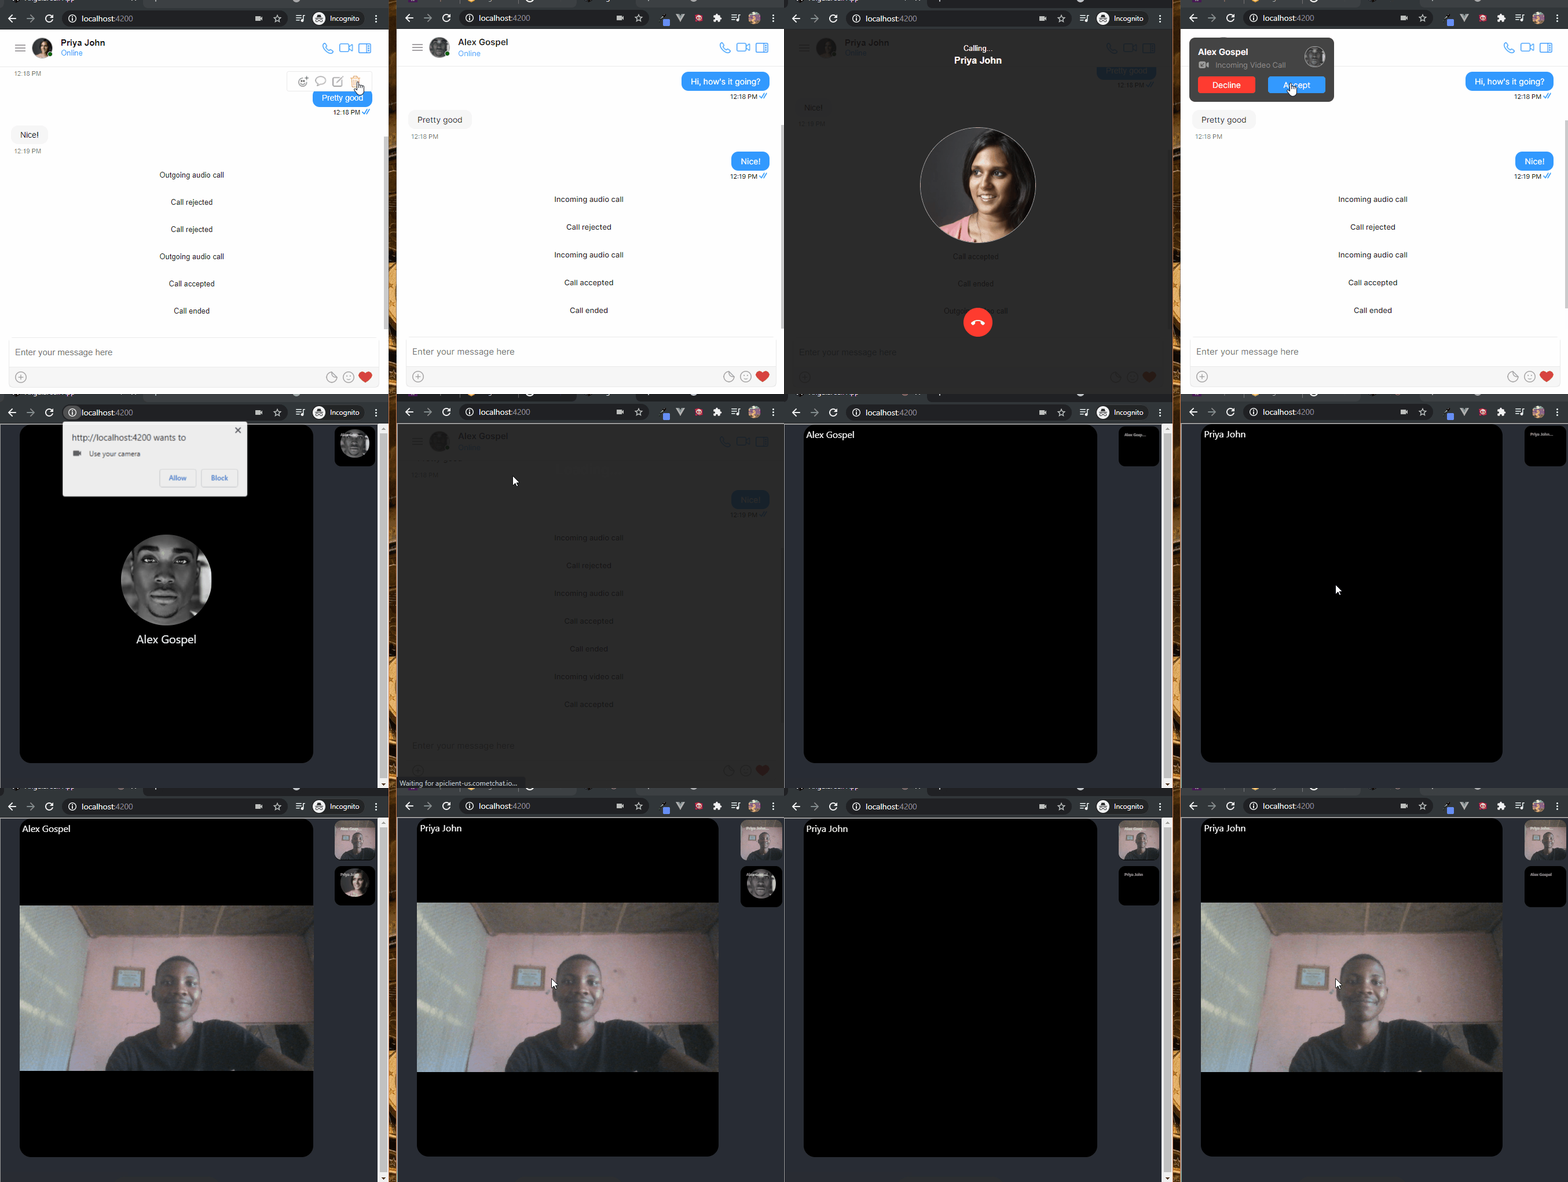
This tutorial is outdated. We're currently working on an updated version. In the meantime, for instructions on building a chat app using CometChat, please visit our documentation.
Have you ever wondered how real-time chatting is integrated on websites and applications? Do you wish to be among the top-notch developers who know how to incorporate these technologies into their products? Or are you facing a new challenge on how to add texting, audio, or video communications features to your application? If your answer is yes to any of the above questions, then you are in the right boat. In this tutorial, you will learn how to add voice and video calling functionalities to your applications or websites using CometChat's video calling SDK and UI Kit.
Prerequisites
To benefit from this tutorial, you must possess at least a rudimentary experience of the workings of the Angular framework. That will facilitate your comprehension of this tutorial.
Installing The App Dependencies
First, you need to have NodeJs installed on your machine; you can go to their website to do that.
Second, you need to also have the Angular-CLI installed on your computer using the command below.
npm install -g @angular/cli
Next, create a new project with the name angular-call-app.
ng new angular-call-app
The ng new command prompts you for information about features to include in the initial app. Accept the defaults by pressing the Enter or Return key.
The Angular CLI installs the necessary Angular npm packages and other dependencies. This can take a few minutes.
Now, install these essential dependencies for our project using the command below.
ng add @angular/fire
Now that we're done with the installations, let's move on to building our one-on-one-chat-app solution.
Installing CometChat SDK
Head to CometChat Pro and create an account.
Add real-time chat with minimal effort using CometChat
From the dashboard, add a new app called "one-on-one-chat-app".
Select this newly added app from the list.
From the Quick Start copy the APP_ID, REGION and AUTH_KEY. These will be used later.
Navigate to the Users tab, and delete all the default users and groups leaving it clean (very important).
Get the Angular CLI installed on your machine by entering this command on your terminal. npm install -g @angular/cli
Open the "environment.ts" file in the project.
Import and inject your secret keys in the app.config.ts file containing your CometChat and Firebase below on the next heading.
Copy the same settings into the "environment.prod.ts" as well.
Run the following command to install the CometChat SDK.
Make sure to exclude app.config.ts in your gitIgnore file from being exposed online.
Run the code below on the terminal.
npm install @cometchat-pro/chat@2.3.0 --save
The Environment Variables
The setup below spells out the format for configuring the environment.ts files for this project.
The App Config File
The snippet below illustrates how to set up the app.config.ts file for proper integration into our project. Make sure you create this file in the src directory before pasting the codes below.
Setting Up CometChat UI Kit
Clone this repository _git clone https://github.com/cometchat-pro/cometchat-pro-angular-ui-kit.git_
Copy the cloned repository into your project src folder.
Import the Components in the respective module where the component will be used. _npm i @ctrl/ngx-emoji-mart@1.0.6_
Add this styles to your `angular.json`
styles": [
  "node_modules/@ctrl/ngx-emoji-mart/picker.css",
  "src/cometchat-pro-angular-ui-kit/CometChatWorkspace/projects/angular-chat-ui-kit/src/css/styles.scss"
]
Wrap all the selectors in a `div` with `class=responsive` as shown in next step
So, that’s all we need for now; let’s proceed to the other settings.
Setting Up Firebase Project
Head to Firebase, create a new project, and activate the email and password authentication service.
To begin using Firebase, you’ll need a Gmail account.
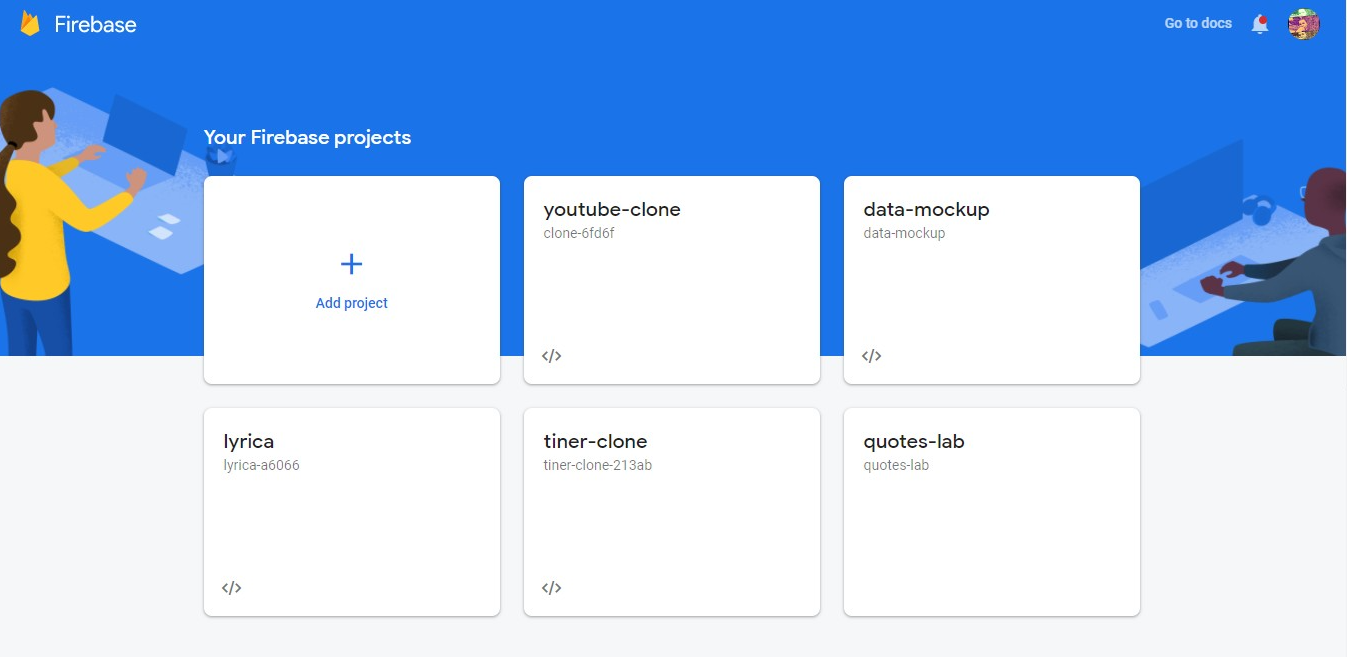
Firebase Console Create Project
Firebase provides support for authentication using different providers. For example, Social Auth, phone numbers, as well as the standard email and password method. Since we’ll be using the email and password authentication method in this tutorial, we need to enable this method for the project we created in Firebase, as it is by default disabled.
Under the authentication tab for your project, click the sign-in method and you should see a list of providers Firebase currently supports.
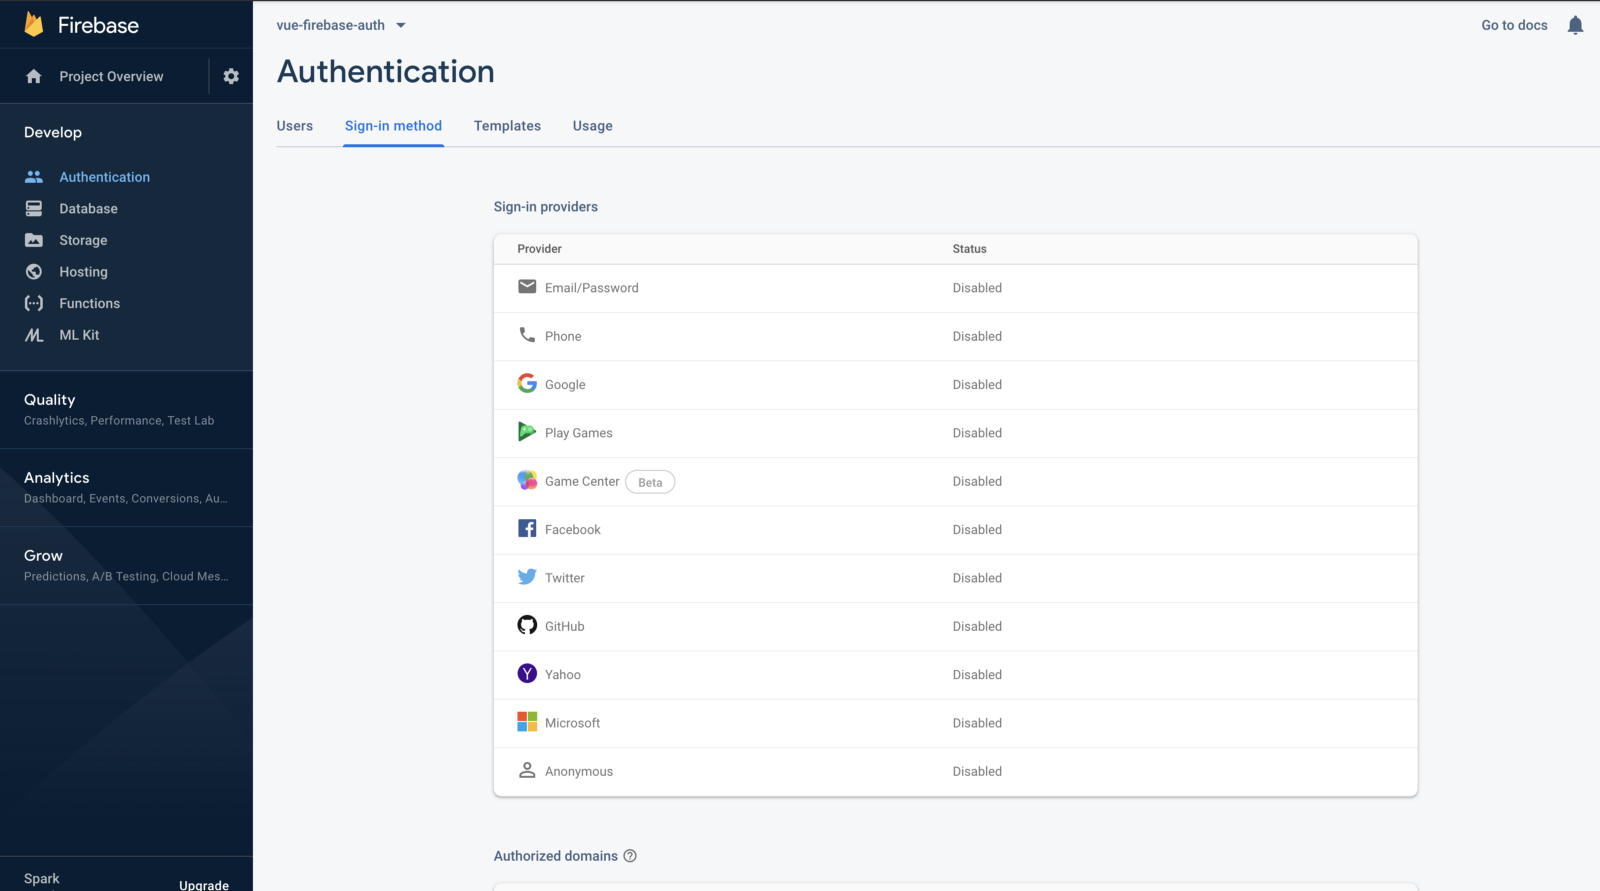
Firebase Authentication Options
Next, click the edit icon on the email/password provider and enable it.
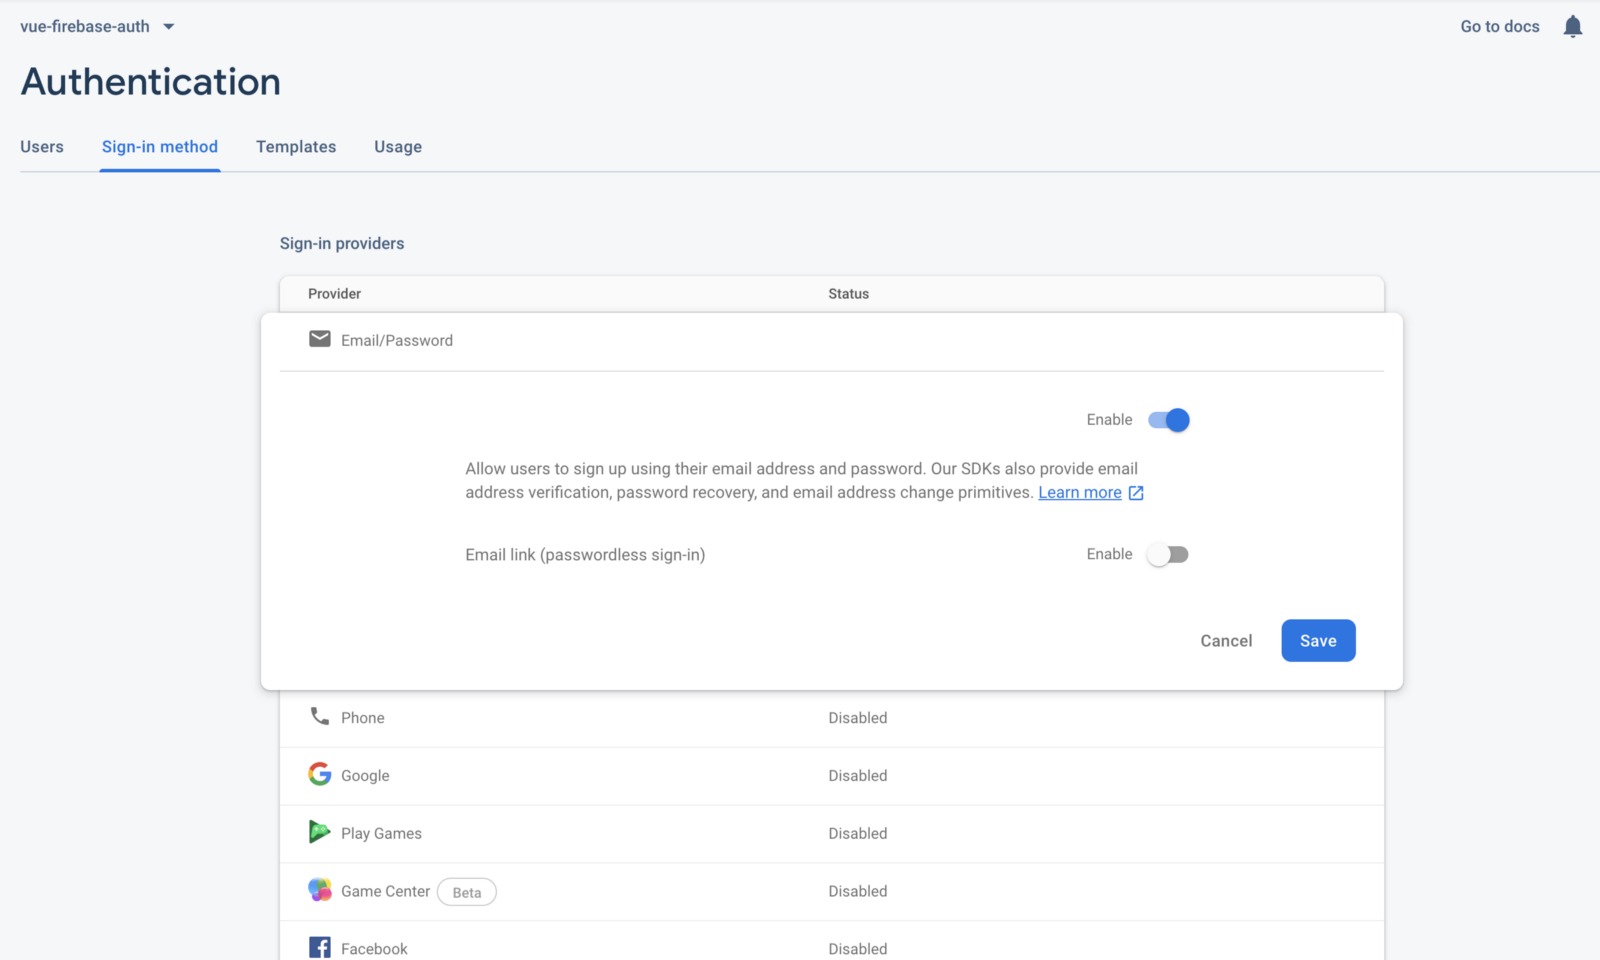
Firebase Enabling Authentication
Now, you need to go and register your application under your Firebase project. On the project’s overview page, select the “Add App” option and pick web as the platform.

One-on-One-Chat-App Project Page
Once you’re done registering into the application, you’ll be presented with a screen containing your application credentials. Take note of the second script tag as we’ll be using it shortly in our Angular application.
Now that you're done with the installations, let's do some configurations.
Setting Up The Router
The app-routing.module.ts file contains the routes associated with our app along with their security rules.
Project Structure
The image below displays the project scaffoldings. Make sure you see the folder arrangement before proceeding.
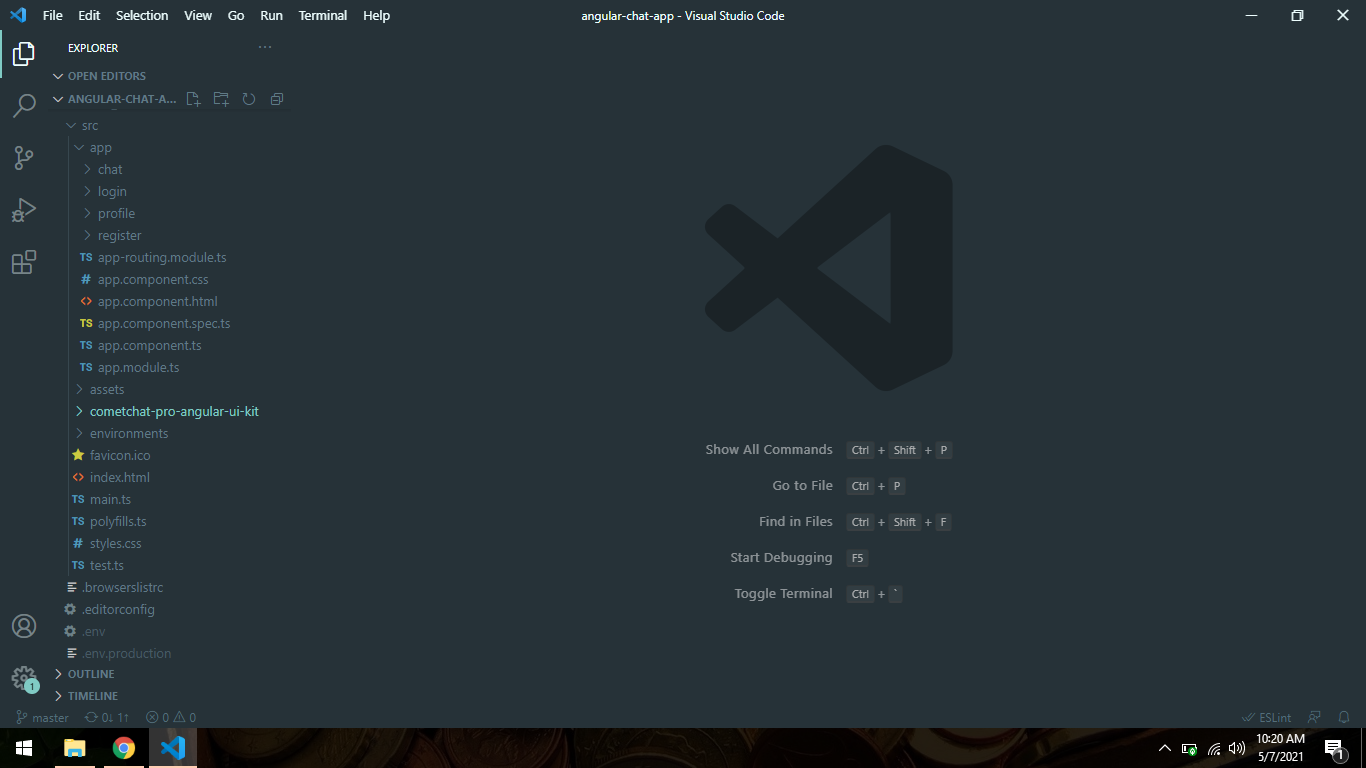
Project Structure
Now let's make the rest of the project components as seen in the image above.
The App Component
The codes below serve as a container around our app with the angular-router enabling quick navigation. For each route, this component moves our app to the appropriate URL.
Replace everything in the app.component.html file with <router-outlet></router-outlet> and remove every styles from the app.component.css.
The App Module
Copy and paste the codes below in your app.module.ts file; this is a very vital file that bundles all the components for the development and production of our application.
The Registration Component
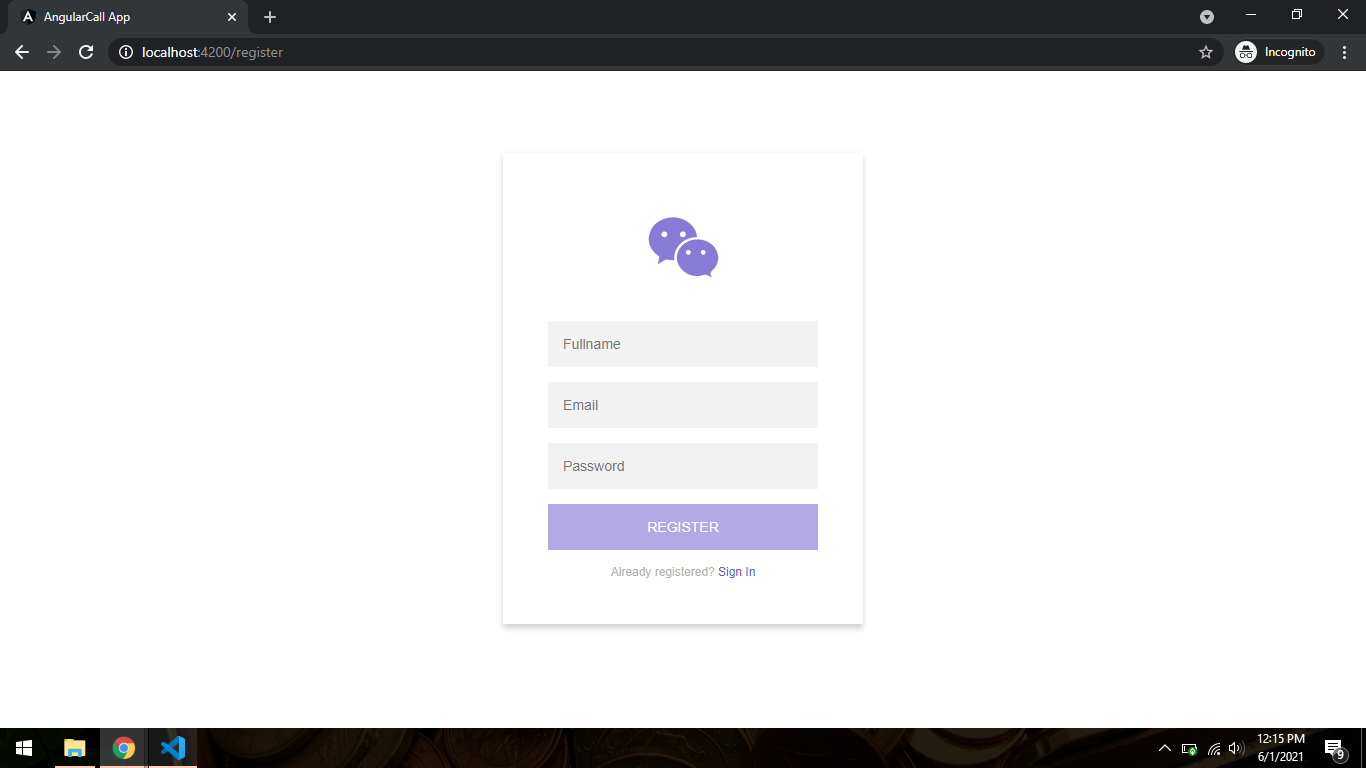
The Registration Component
This component unites the power of the Firebase authentication service and CometChat such that whenever a new user signs up for our app, the user’s information is stored on Firebase and also registered on our CometChat account. Here is the snippet responsible for this behavior.
Whenever a user registers in our app, simultaneously, he or she is registered on our CometChat account. The snippet below explains it all.
Next, we’ll jump into the Login component and its underlining functionalities.
The Login Component
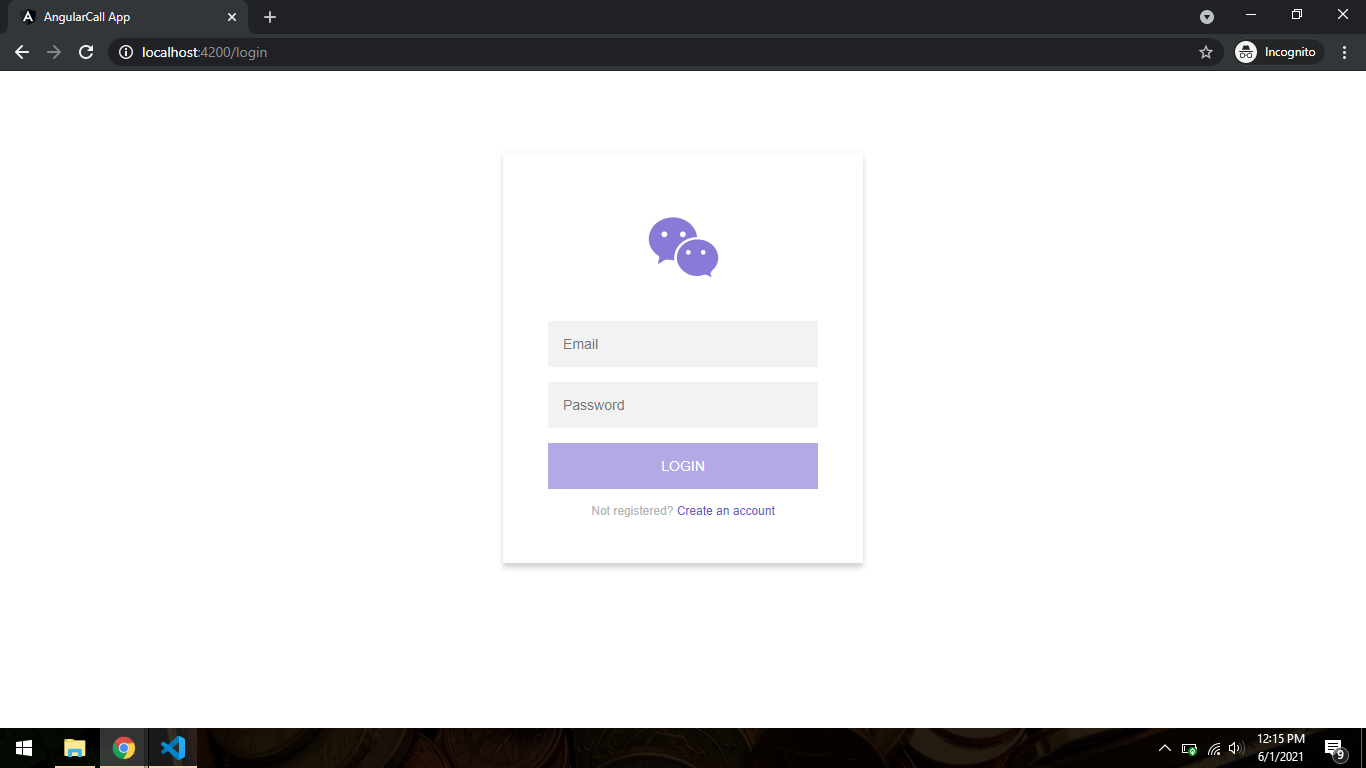
The Login Component
The Login component copies the behaviors of the Registration component. For instance, when Siva (as a user) registers on our app, he is then directed to the login page to sign in. Since CometChat also has his details, he will be signed in by CometChat the moment he logs into our app. The piece of code below demonstrates this process better.
Once Siva is successfully logged in, he is then redirected to the home page. The route-guard within the app.routing-module.ts will ensure that only authenticated users are permitted to access the home page. The code snippet below describes the overall operations of the login component.
The Profile Component
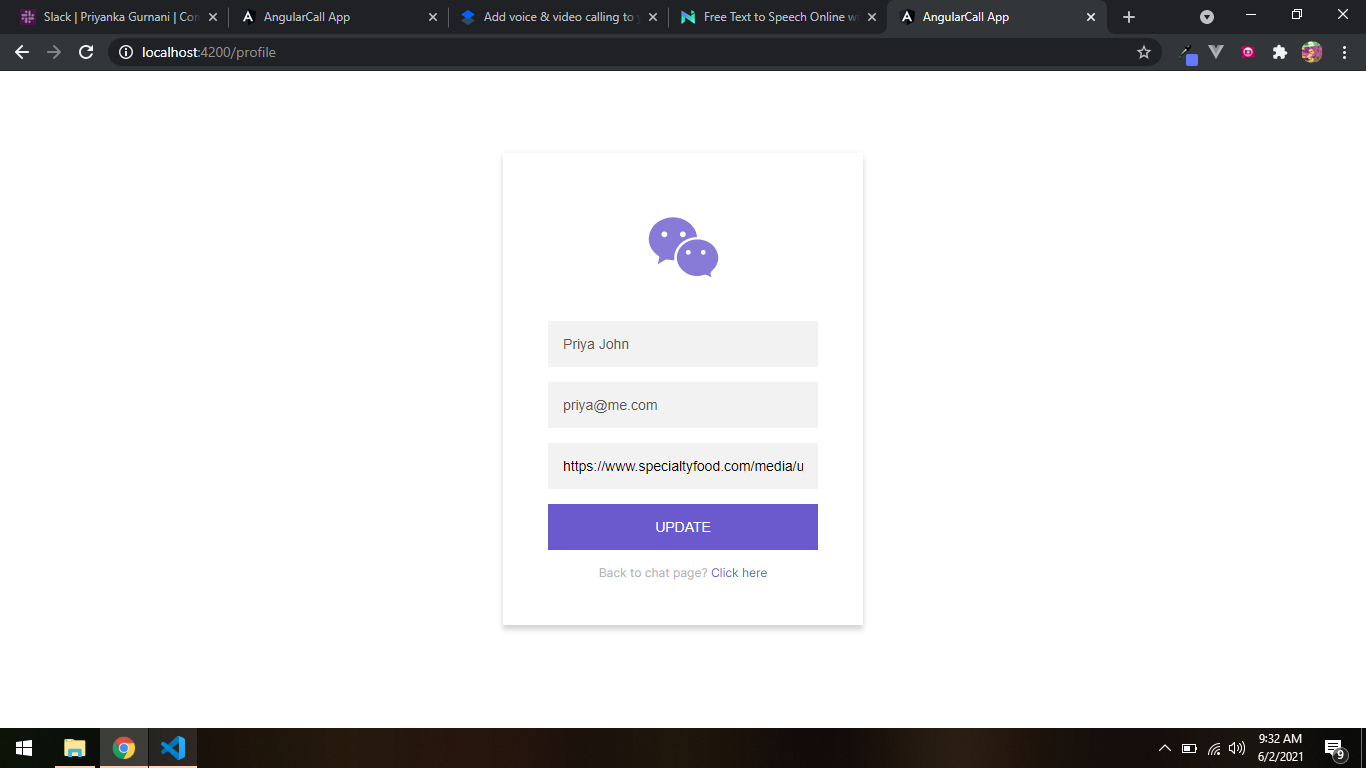
The Profile Component
The profile component which can be accessed by hovering your mouse in the right-center direction of the chat screen is ordained with the task of updating user data. One of the primary tasks of this component is to change a user's profile.
In the registration component, once a user signs up, we generated a placeholder avatar for him using the initial of his name. The profile component allows a user to update their avatar to their preferred choice. Here is the full code performing this operation.
The Chat Component
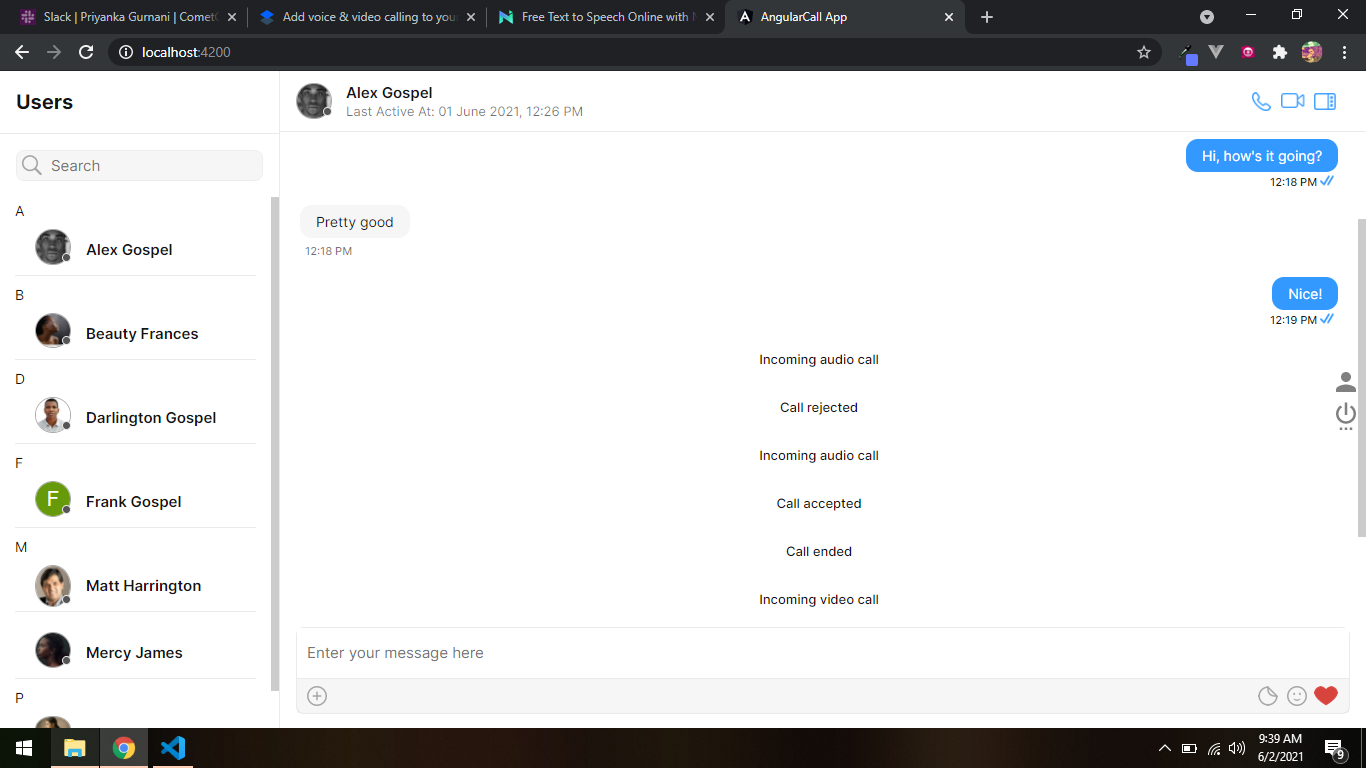
The Chat Component
The chat component is the center of attention for this application as it contains the CometChat UI Kit. Other than its gorgeous design, it brings out the full power of the CometChat communication features such as texting, audio, and video calling capabilities.
Please note that the profile and power buttons have been given the ability to only appear when you hover your mouse in that direction as shown in the image above.
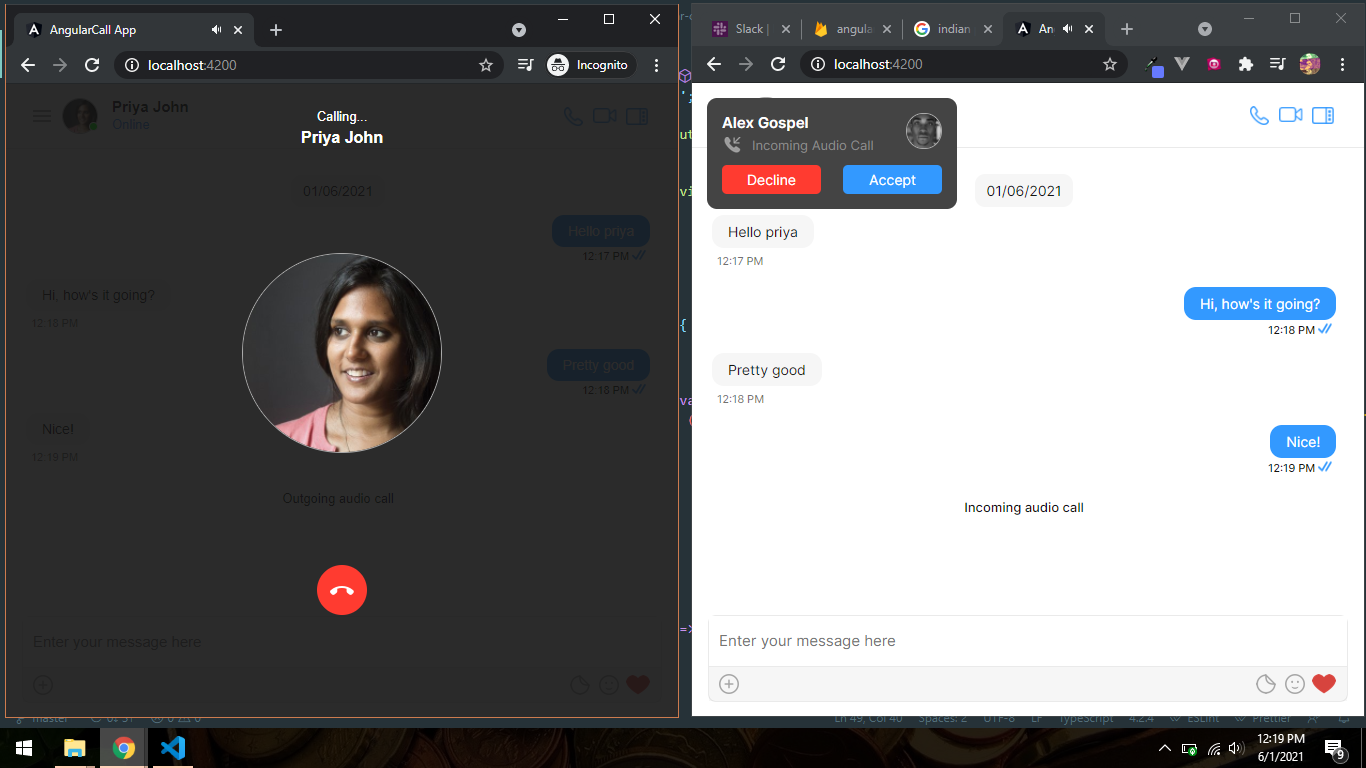
The Chat Component
Just follow the script below and you'll be mind-blown about the power of this kit.
Once you are done pasting the codes as directed, save and run the command below to start your application.
ng serve --open
After a few seconds of building in the terminal, your app should be up and running.
Congratulations, you just built an angular audio and video calling chat app; what a terrific job!!!
Conclusion
To conclude, the CometChat SDK and UI-Kit have immensely facilitated the process of incorporating a high-end chat app that caters to both audio and video calling on your application. As a developer, you don't need to reinvent the wheel, you can start fraternizing with the CometChat documentation and you will be on flight no sooner than later.
From this tutorial, you have learned how to add voice and video calling functionalities to your applications using the CometChat SDK. It's time you crack your knuckles and start developing full-blown applications.
About Author
Gospel Darlington is a remote full-stack web developer, prolific in Frontend and API development. He takes a huge interest in the development of high-grade and responsive web applications. He is currently exploring new techniques for improving progressive web applications (PWA). Gospel Darlington currently works as a freelancer and spends his free time coaching young people on how to become successful in life. His hobbies include inventing new recipes, book writing, songwriting, and singing.

Gospel Darlington
CometChat
