This tutorial is outdated. We're currently working on an updated version. In the meantime, for instructions on building a chat app using CometChat, please visit our documentation.
Introduction
If you are reading this, there is a high possibility that you are someone who wants to add chat functionality to your app. Maybe you want to create a full-fledged Chat Application itself or you already have an application and want to add a Chat feature to it. Maybe this… Maybe that…
The only thing that matters is you want the Chat feature! Whatever your need, if it revolves around Chat, then CometChat has got you covered. From a full-fledged chat app to customizing and adding every single component like Group Chat, One-on-One Chat, Users, Friends. etc. CometChat supports it all!
In this tutorial, I’ll explain the 3 ways that you can quickly add Chat to your Swift app. UI Unified, UI Screens, UI Components, all of them with a varied set of controls and customizations, but super easy to set up and get going. We’ll also discuss the practical applications of each method and you can decide for yourself which best suits your needs
Before we move ahead, it is important to understand how CometChat actually works! The Key Concepts page of CometChat documentation can help you with that.
Initial Setup
Before diving into the code, we’ll need to setup CometChat in our application. CometChat Quick Start document does a wonderful job in explaining those steps in detail.
We’ll just outline the steps from the above document -
Add the CometChat Dependency in your Application by adding its Pod
Create your user and log into CometChat!
I’ll just elaborate on the 5th step where you need to create your User in CometChat -
You're either integrating this Chat into your existing application which is already connected to some back-end service or you are creating a full-fledged Chat application. Even for a complete Chat application, you’ll either need your back-end where all the users would be stored or you would be using Firebase or some other back-end. The point is, there is someremote database where all your users exist.
So, a typical flow would be →
The user opens your app’s registration page. When the user clicks submit →
You would call your back-end API to register the User in your database.
After a successful response from your API, you would then write this short CometChat code to create the user in CometChat’s database:
Voila! You can now view your User in the CometChat Dashboard too!
Completed all the above steps? Now we have 3 different ways that we can add Chat to our application. Let’s see all 3 of them, one by one:
UI Unified
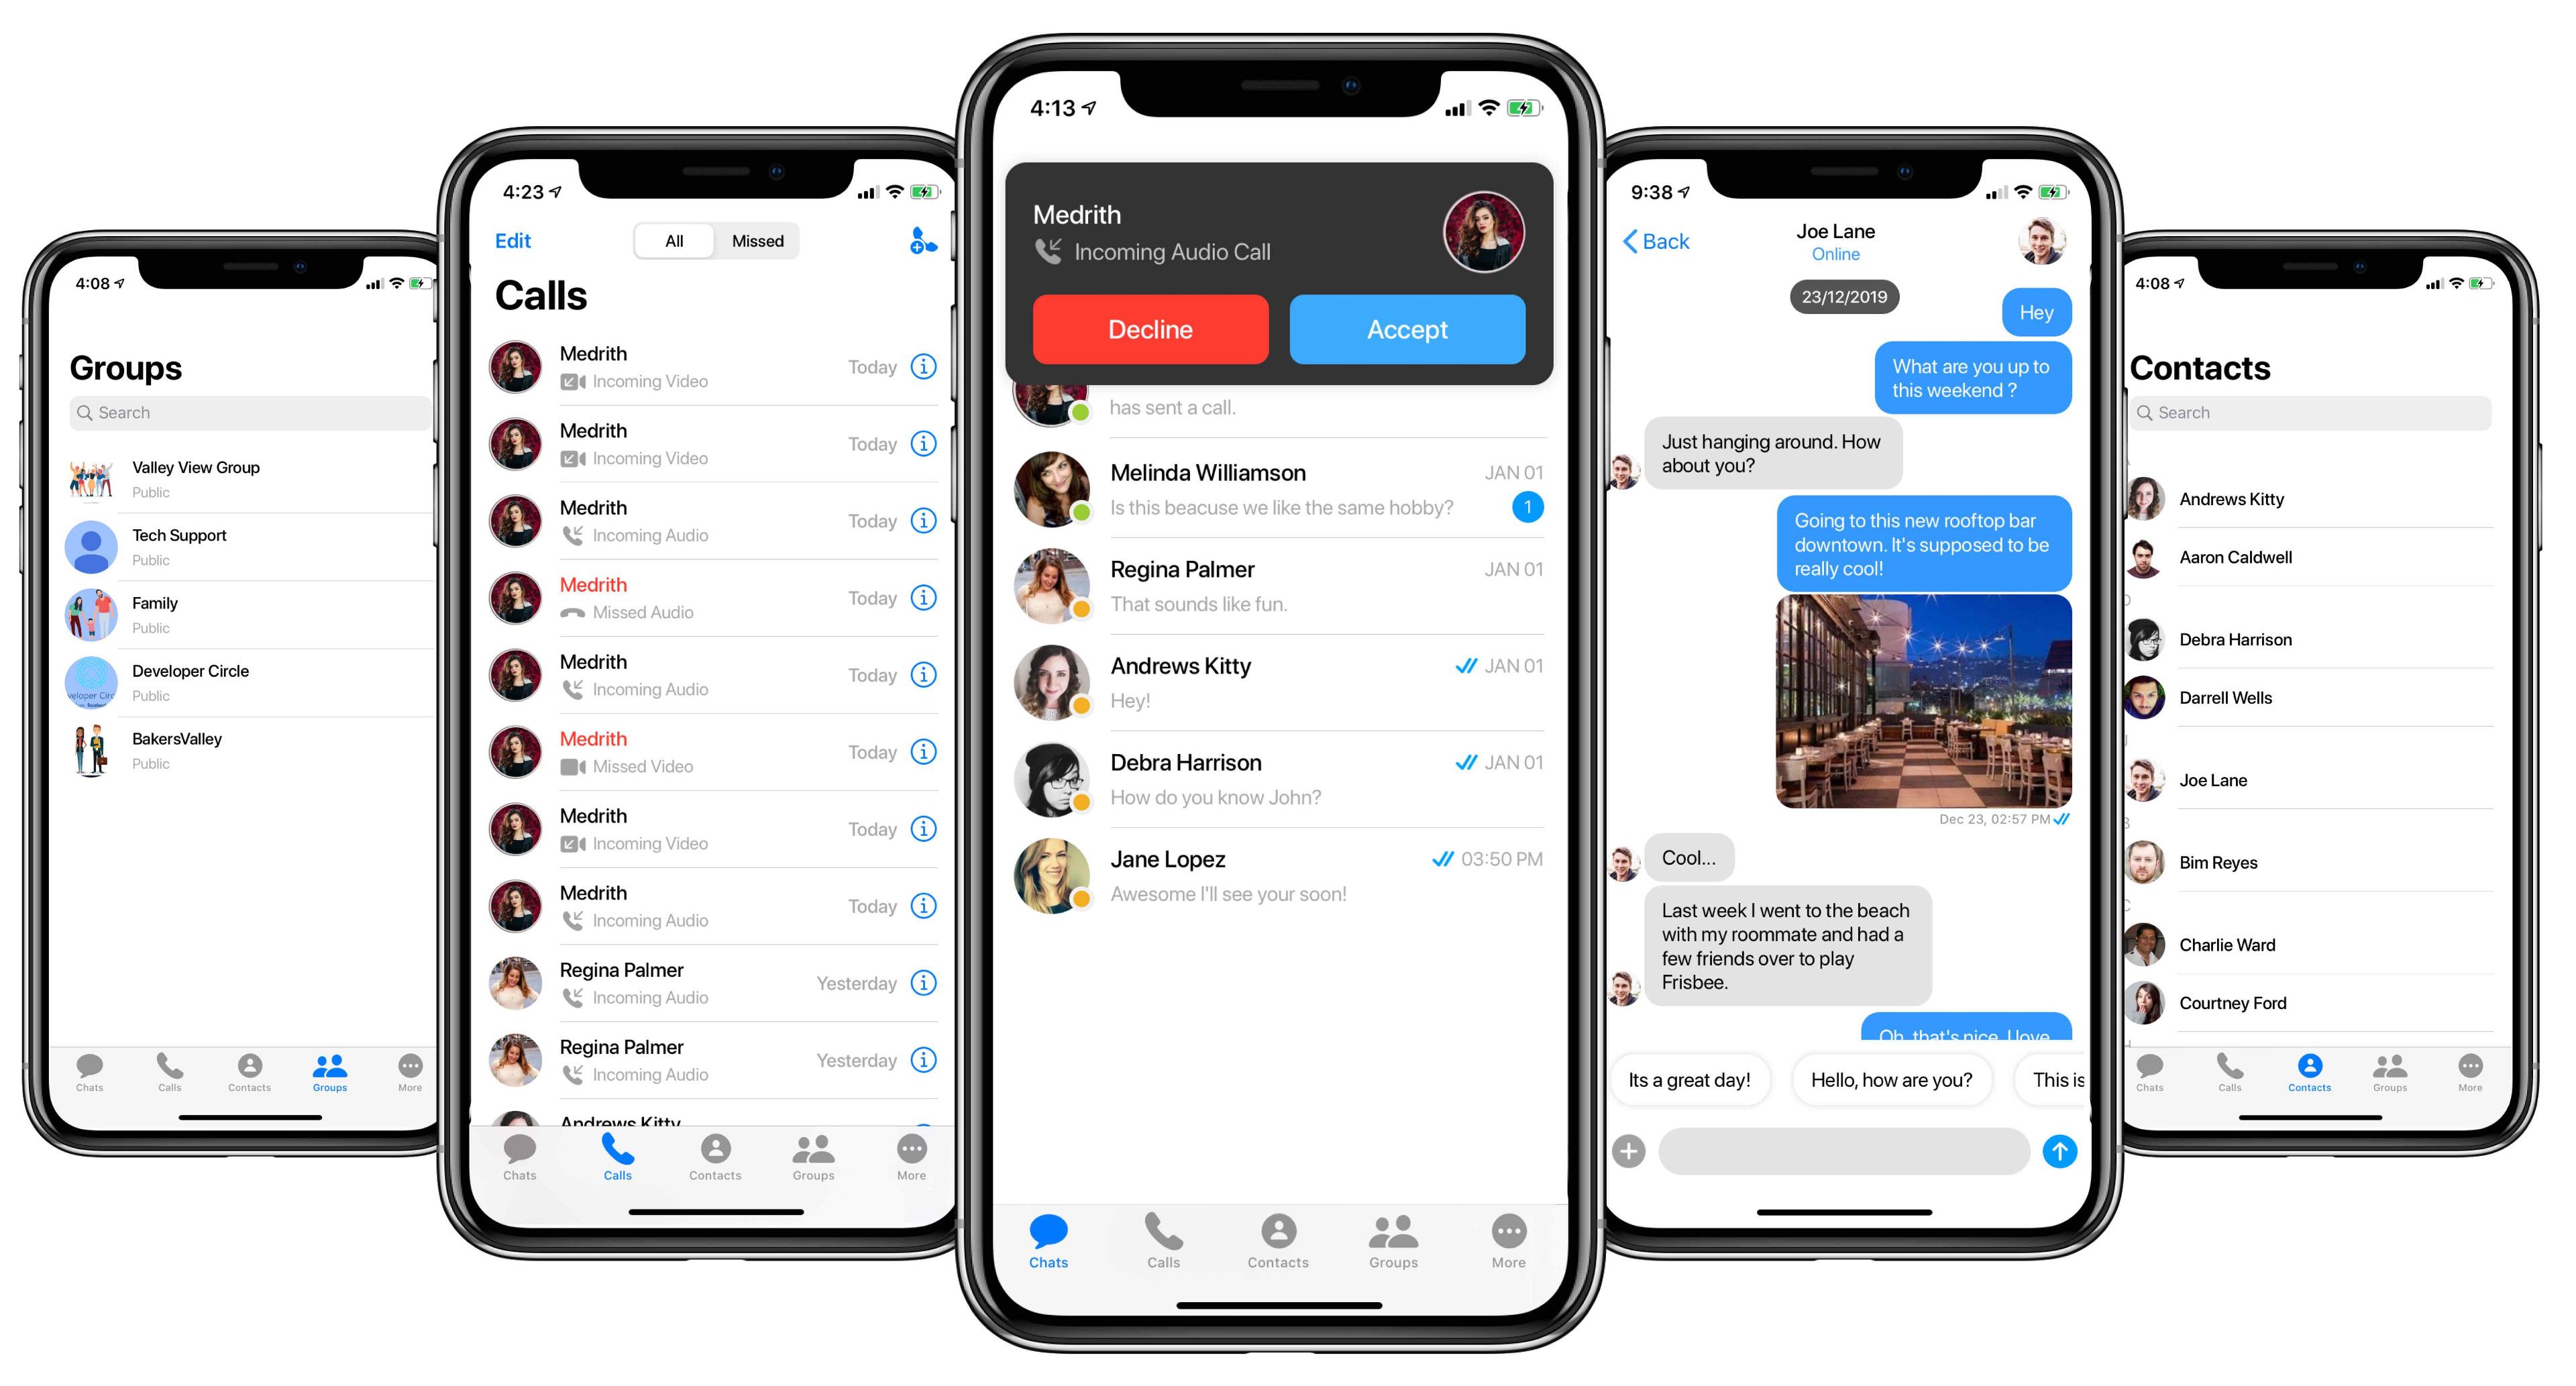
This is the easiest way to add a full-fledged chat feature to your app. Read the next sentence very carefully-
It takes only 3 lines of code to add entire chat functionality to your app.
3 lines, just 3 lines!!! This blew me away! You get your conversation list, your groups, your messages, your friends, your calls list - everything with just these 3 lines!
No need to write any APIs to fetch users, groups, conversations or to send or receive a message - nothing! CometChat’s UI-Unified screen takes care of everything.
Implementation Details
These are the 3 magic lines of code that does everything for you:
If you’ve followed all the steps and implemented this in your app, then you should see all the screens as displayed in the above screenshot. However, there won’t be any users or chats or groups in these screens. That’s because CometChat doesn’t provide user management, as mentioned in the Key Concepts article I shared above.
Hence to test this in your app, you would have to add more users. You can do this by either→
Installing the app on different simulators or devices and creating new users from those devices
Directly adding the users from your CometChat dashboard.
Once you do that, you’ll be able to view the users on the User’s Screen in the UI-Unified view and start chatting.
In the production application, you won’t need to add friends via the Dashboard. As soon as people start registering, new users will be created in CometChat, thanks to the user creation code that we wrote in the initial setup stage.
When to Use - When to Avoid?
You don’t want to manage the Chat screens, the API Calls and the data flow on your own. You are fine with a section of your app having a different look and feel. You have no intention of modifying the styles or themes. You don’t want any control over the screens. You want a working solution in minutes → UI-Unified is your option.
If you want even a little control over the screens, when each type of screen is displayed, when you need to blend the Chat experience within your app’s existing experience and modify the styles and themes to match your brand → UI-Unified might not be the best option for you. In that case, keep reading!
UI Screens
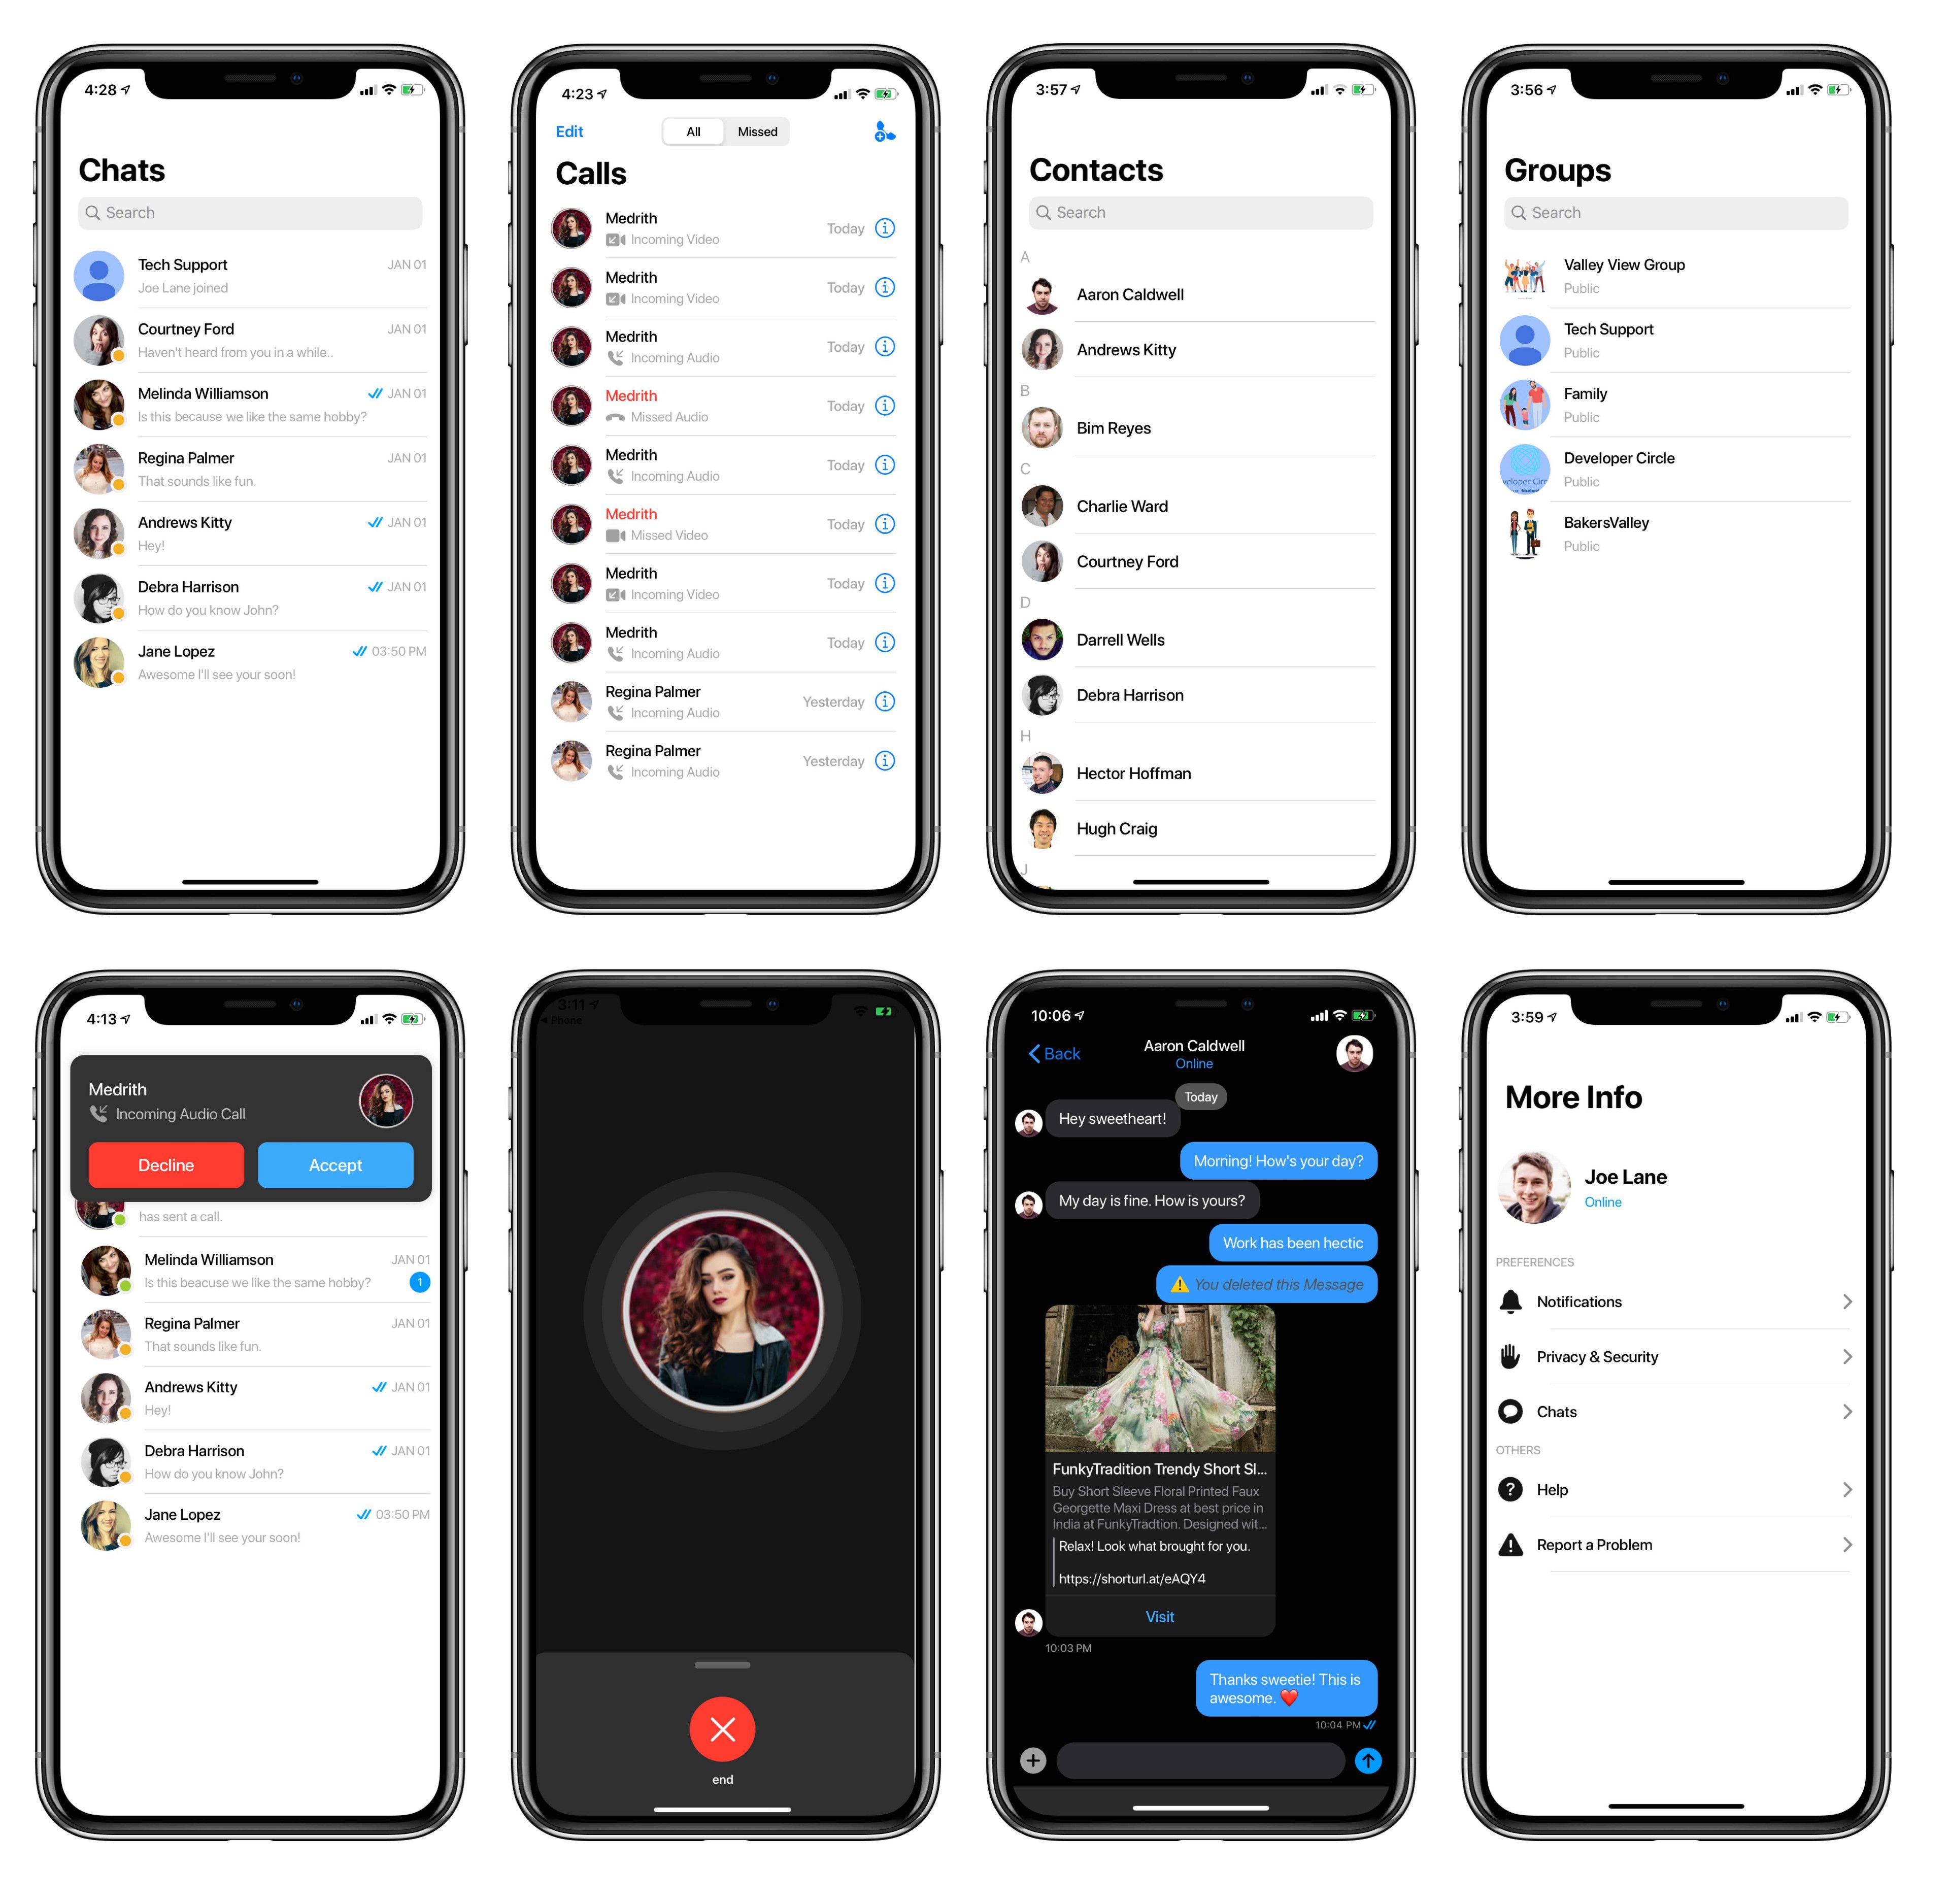
This is my favorite option, as it has a good balance between a completely rigid solution and a fully customizable one. The Screens are super easy to plug into your existing code and more importantly, you can incorporate them into your app’s existing flow. You can then decide which CometChat screen will be opened from where.
A typical example would be → You have a screen with a list of Friends. This screen can be a custom one consisting of a UITableView. You can configure the didSelectRowAt of the UITableView to call CometChatMessageList screen, and the chat screen between you and the selected friend will open. Woah! That’s what I call a seamless transition!
Let’s go through each screen and the code required to launch that screen.
CometChat User List
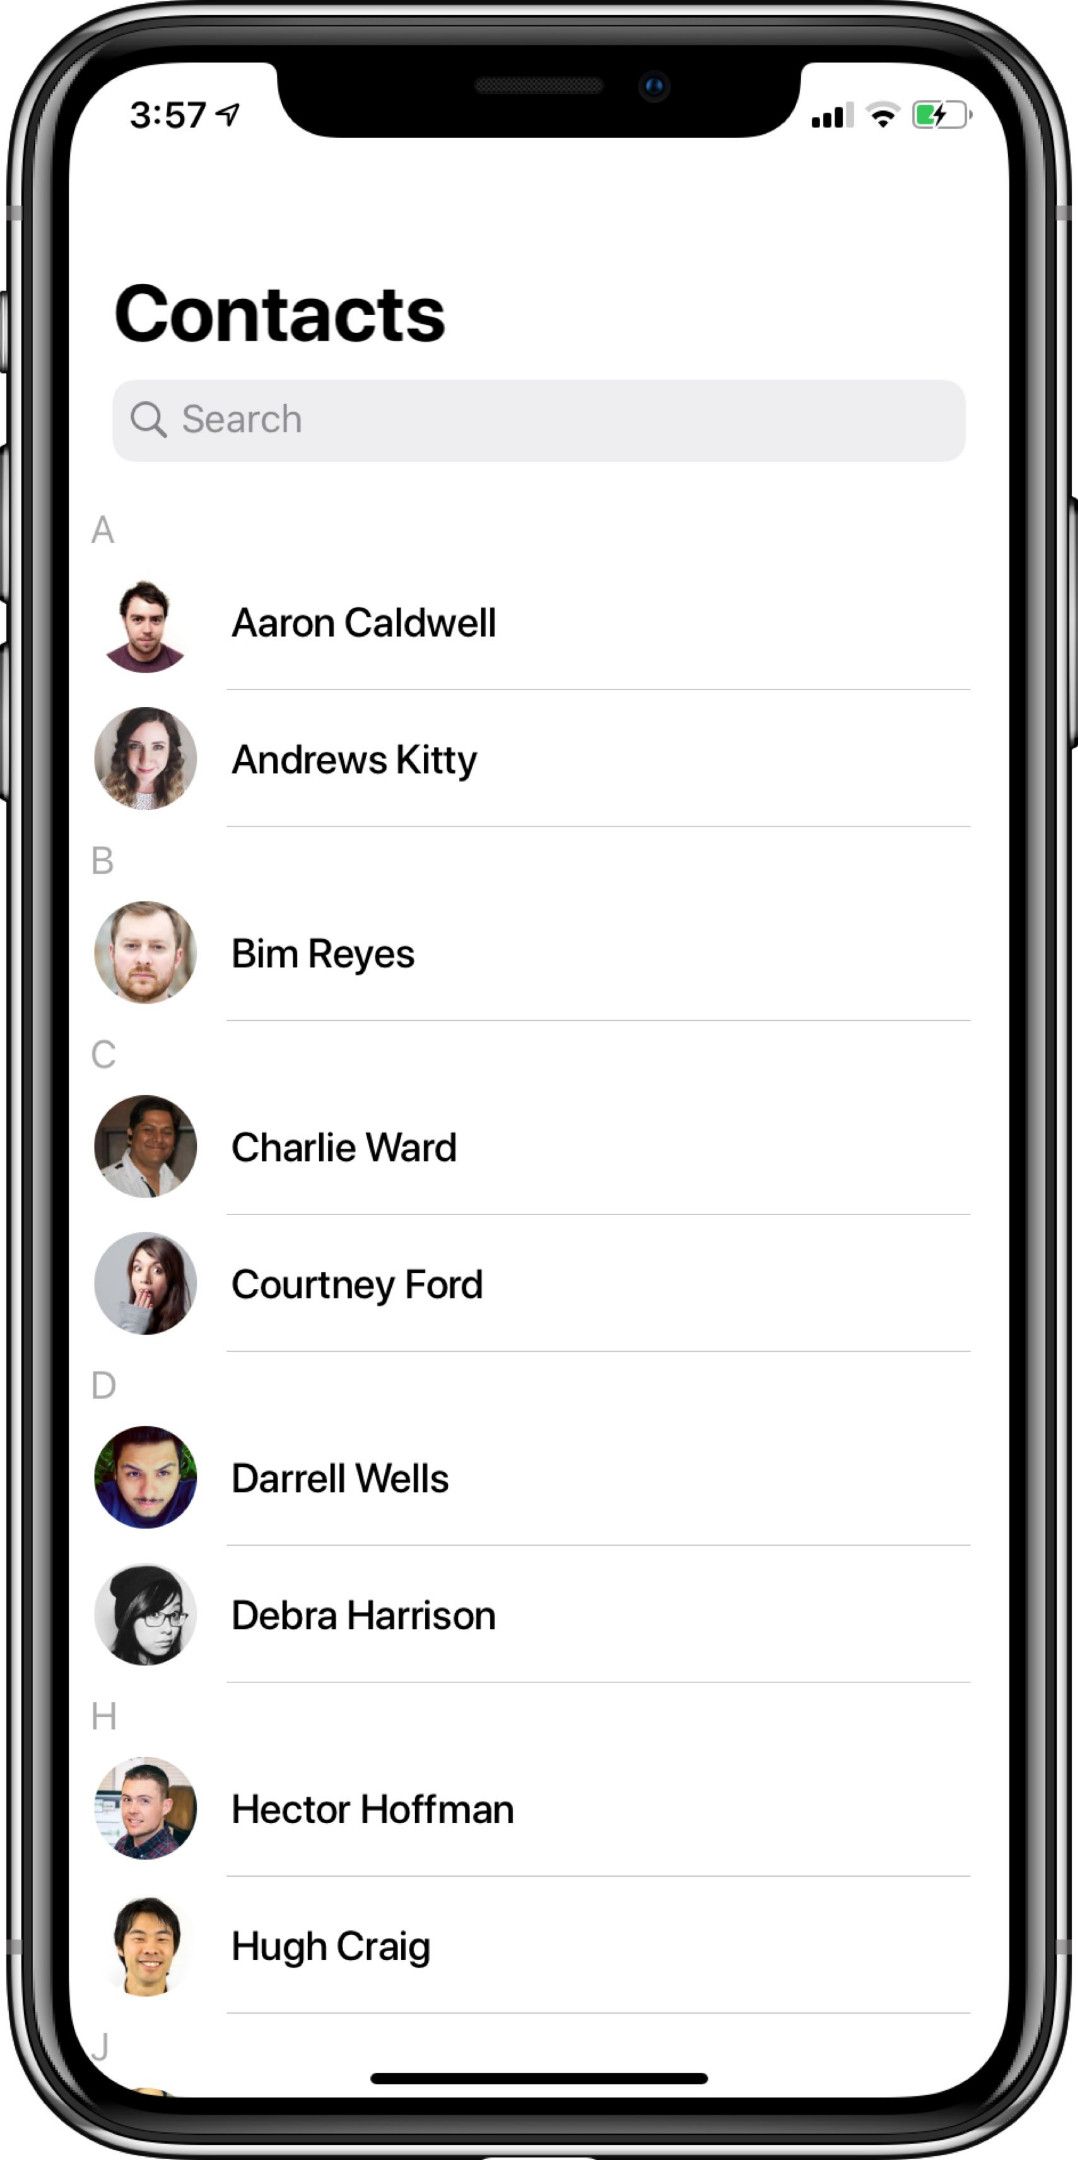
This is a screen containing a list of all the users who have registered with your application. CometChat provides 2 ways that you can plug this screen into your application.
Launch CometChatUserList View Controller directly from your existing screen-
This is the preferred method when you don’t want to customize the behavior of user-item selection i.e. when the user selects an item from the list, the app would by default route to the Chat Message Screen.
Assign CometChatUserList to a View Controller in your app-
This is the preferred method when you want to control the behavior of the user-item selection. For example, when you click an item, you want the user info details screen to open instead of the message chat screen. You can customize this behavior in the UserListDelegate delegate provided, for example:
CometChat Group List
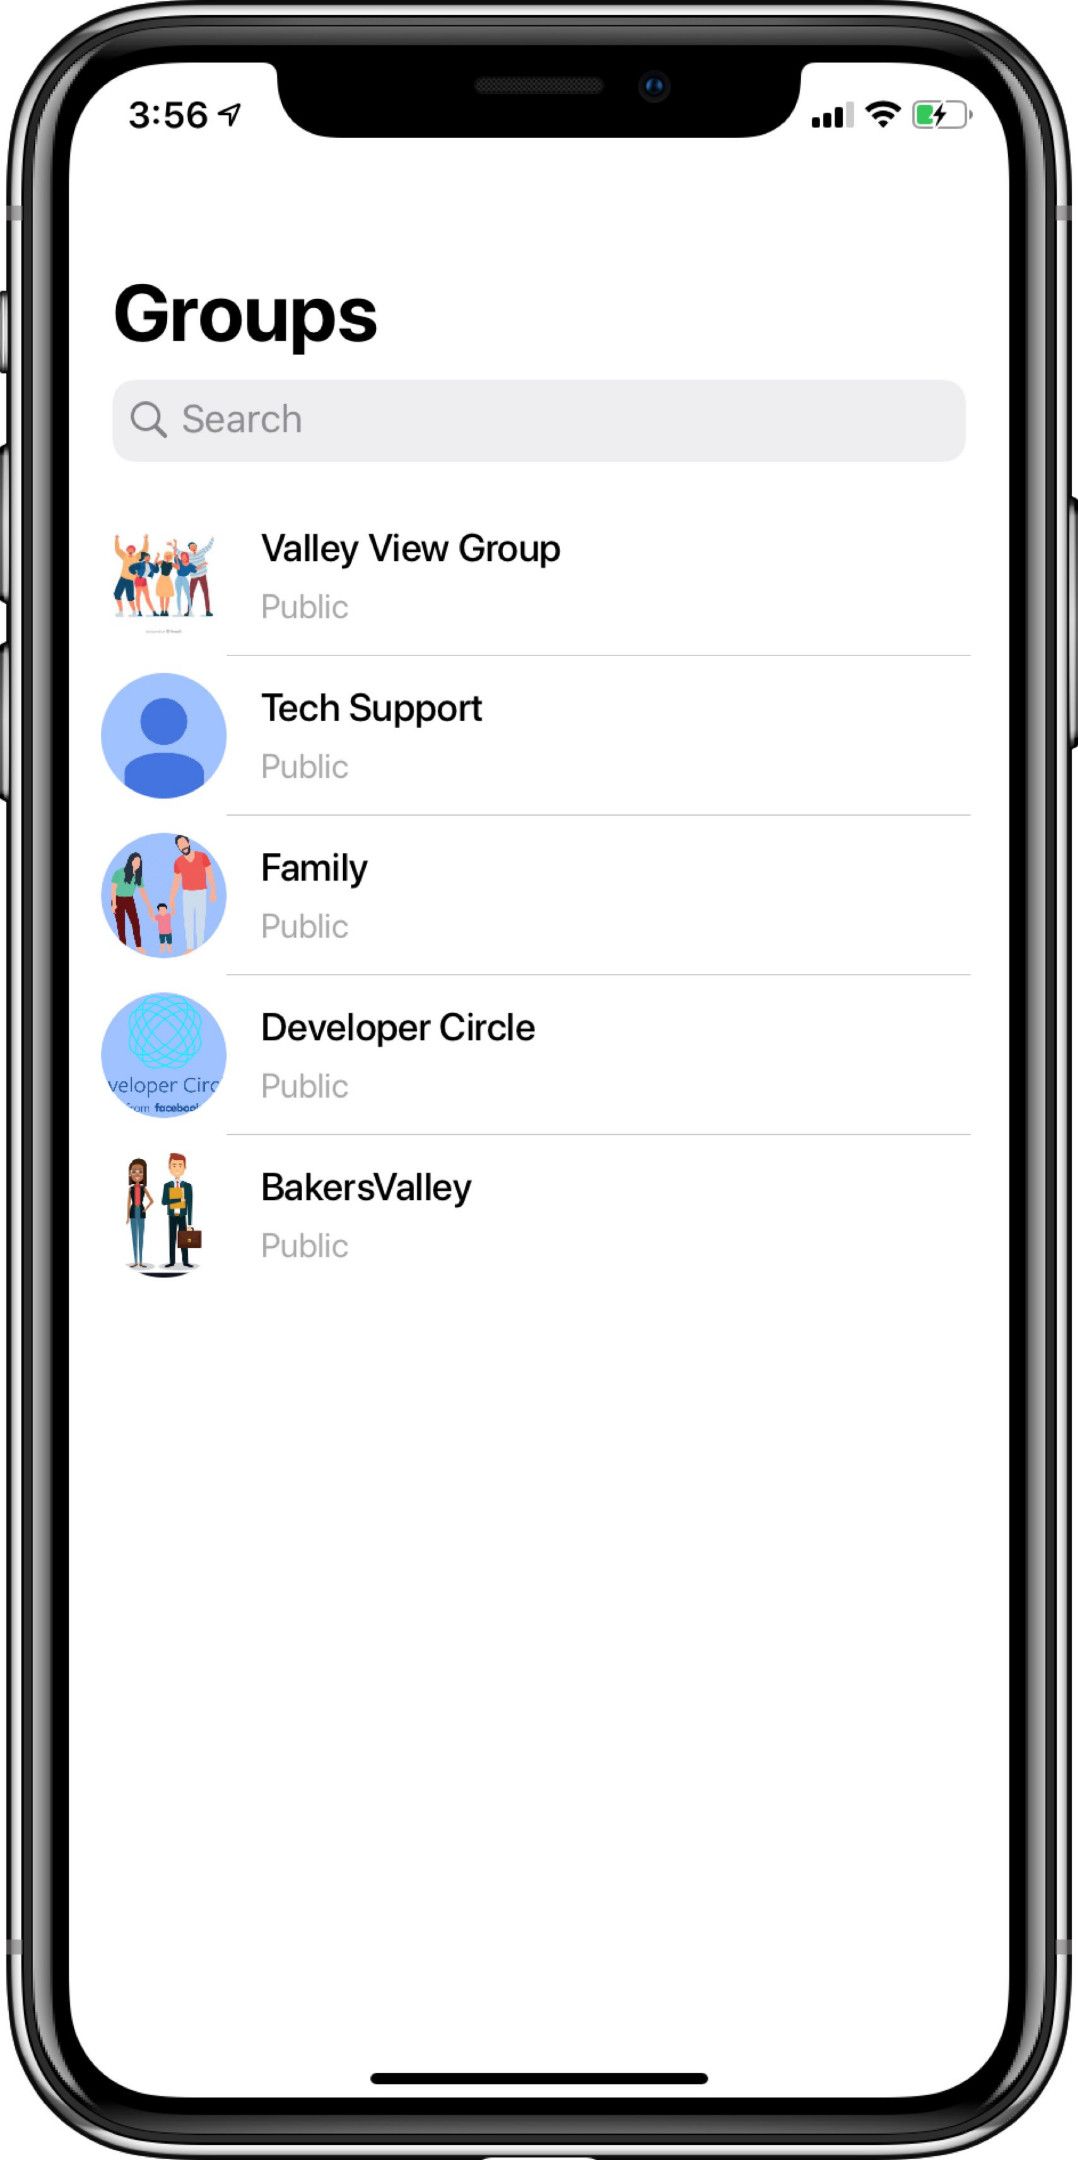
This screen contains a list of all the groups that you have created or joined. CometChat again provides 2 methods to plug this screen into your application.
Launch CometChatGroupList View Controller directly from your existing screen-
This is the preferred way when you don’t want to customize the behavior of the group item selection i.e. when the user selects a group from the list, the app would by default route to the Chat Message Screen.
Assign CometChatGroupList to a View Controller in your app-
This is the preferred way when you want to control the behavior of the group item selection in the list. For example, when you click on the item, you want the group details screen to open instead of the group chat screen. You can customize this behavior in the GroupListDelegate delegate provided, for example:
CometChat Conversation List
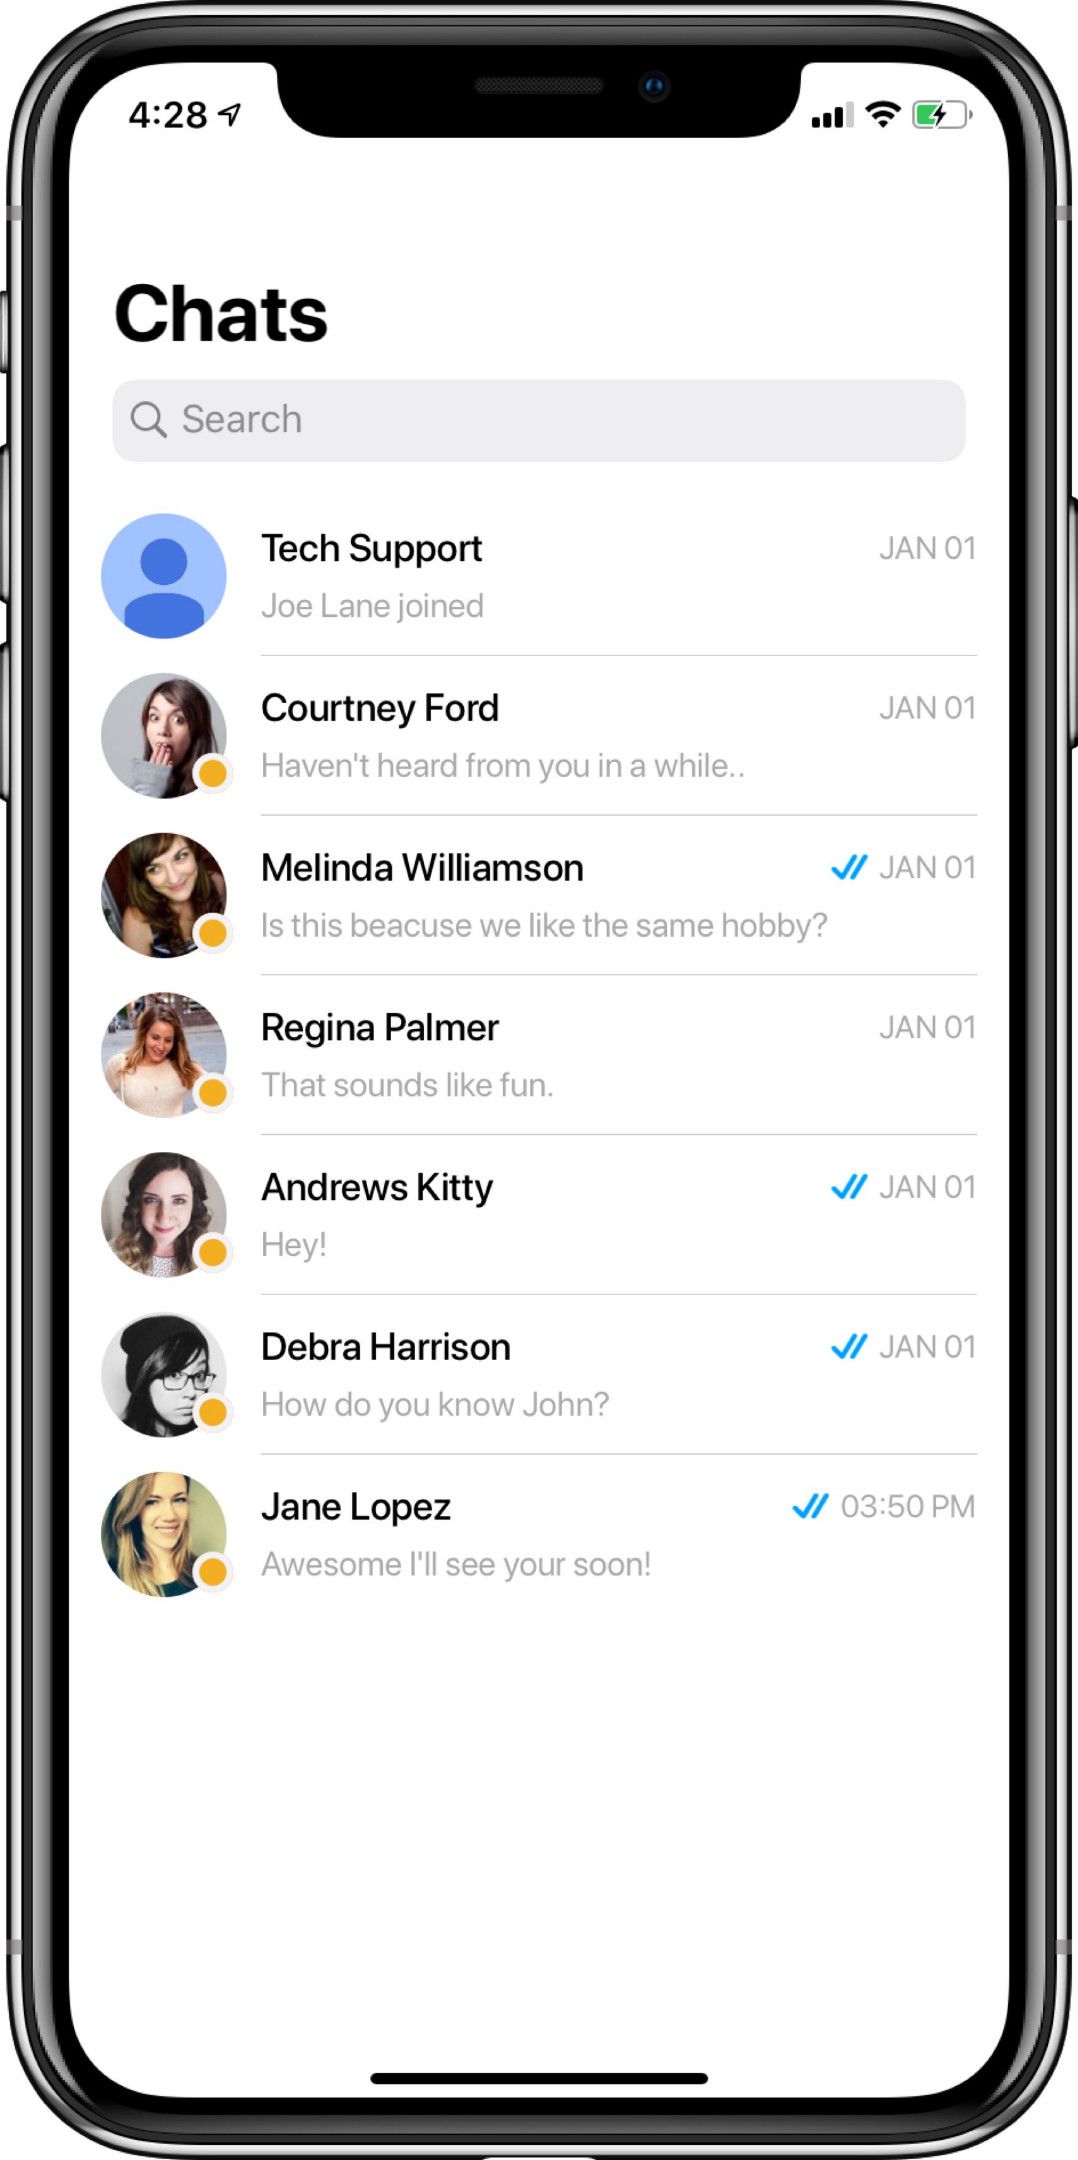
This screen contains a list of all your one-to-one and group conversations. CometChat again provides 2 methods to plug this screen into your application.
Launch CometChatConversationList View Controller directly from your existing screen-
This is the preferred way when you don’t want to customize the behavior of the conversation item selection i.e. when the User selects a conversation item from the list, the app would by default route to the Chat Message Screen.
Assign CometChatConversationList to a View Controller in your app-
This is the preferred way when you want to control the behavior of the conversation item selection in the list. For example, when you click on an item, you want the group or the user details screen to open instead of the conversation chat screen. You can customize this behavior in the ConversationListDelegate delegate provided, for example:
CometChat Message List
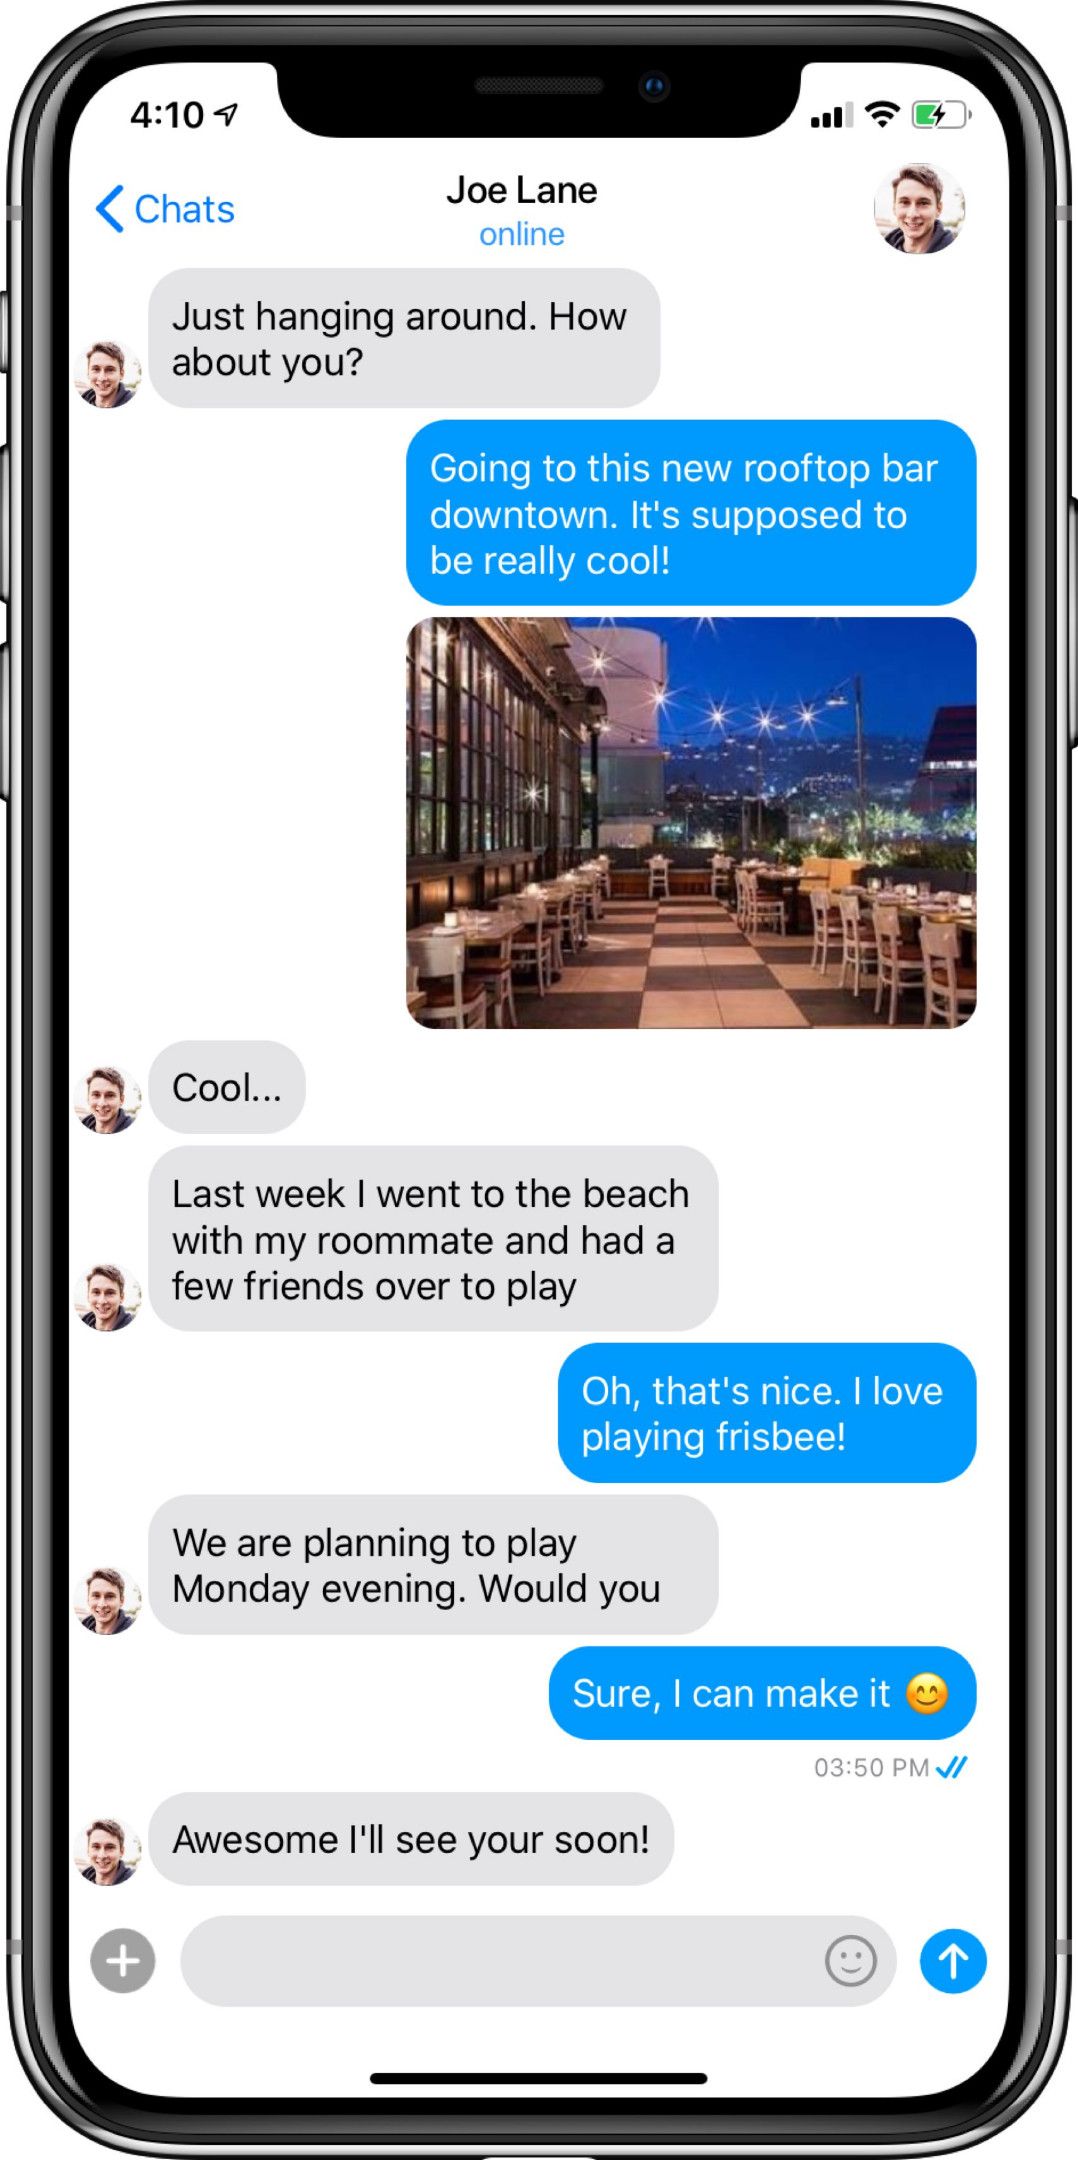
This screen contains a list of all the messages, images and the entire chat with a particular person or a group.
The key thing to note is that, this single screen handles both one-to-one chat messages as well as group chat messages. Hence while calling this screen, we need to pass the type of Chat we want to open i.e. User or Group and the actual object i.e. User object or the Group object.
First, we need to retrieve the User or the Group whose message list we need to view.
We can do this using the below code-//To Fetch a particular User
Then, while launching the CometChatMessageList we need to set the type and the conversationWith object with the code below:
CometChat again provides 2 methods to plug this screen into your application.
Launch CometChatMessageList View Controller directly from your existing screen-
Once you fetch the user or the group, you can launch the CometChatMessageList screen by adding the below code to your existing UIViewController:
Assign CometChatMessageList to a View Controller in your app-
This is the preferred way when you want to customize the screen or want to add some customized behavior to the screen. Even if you are not modifying anything and you’ve maintained a structure of creating your View Controllers and assigning the CometChat Screens to them, I would suggest doing the same for this screen to maintain consistency across the app. It won’t affect the end UI result but will certainly look good in the code.
CometChat Calls List
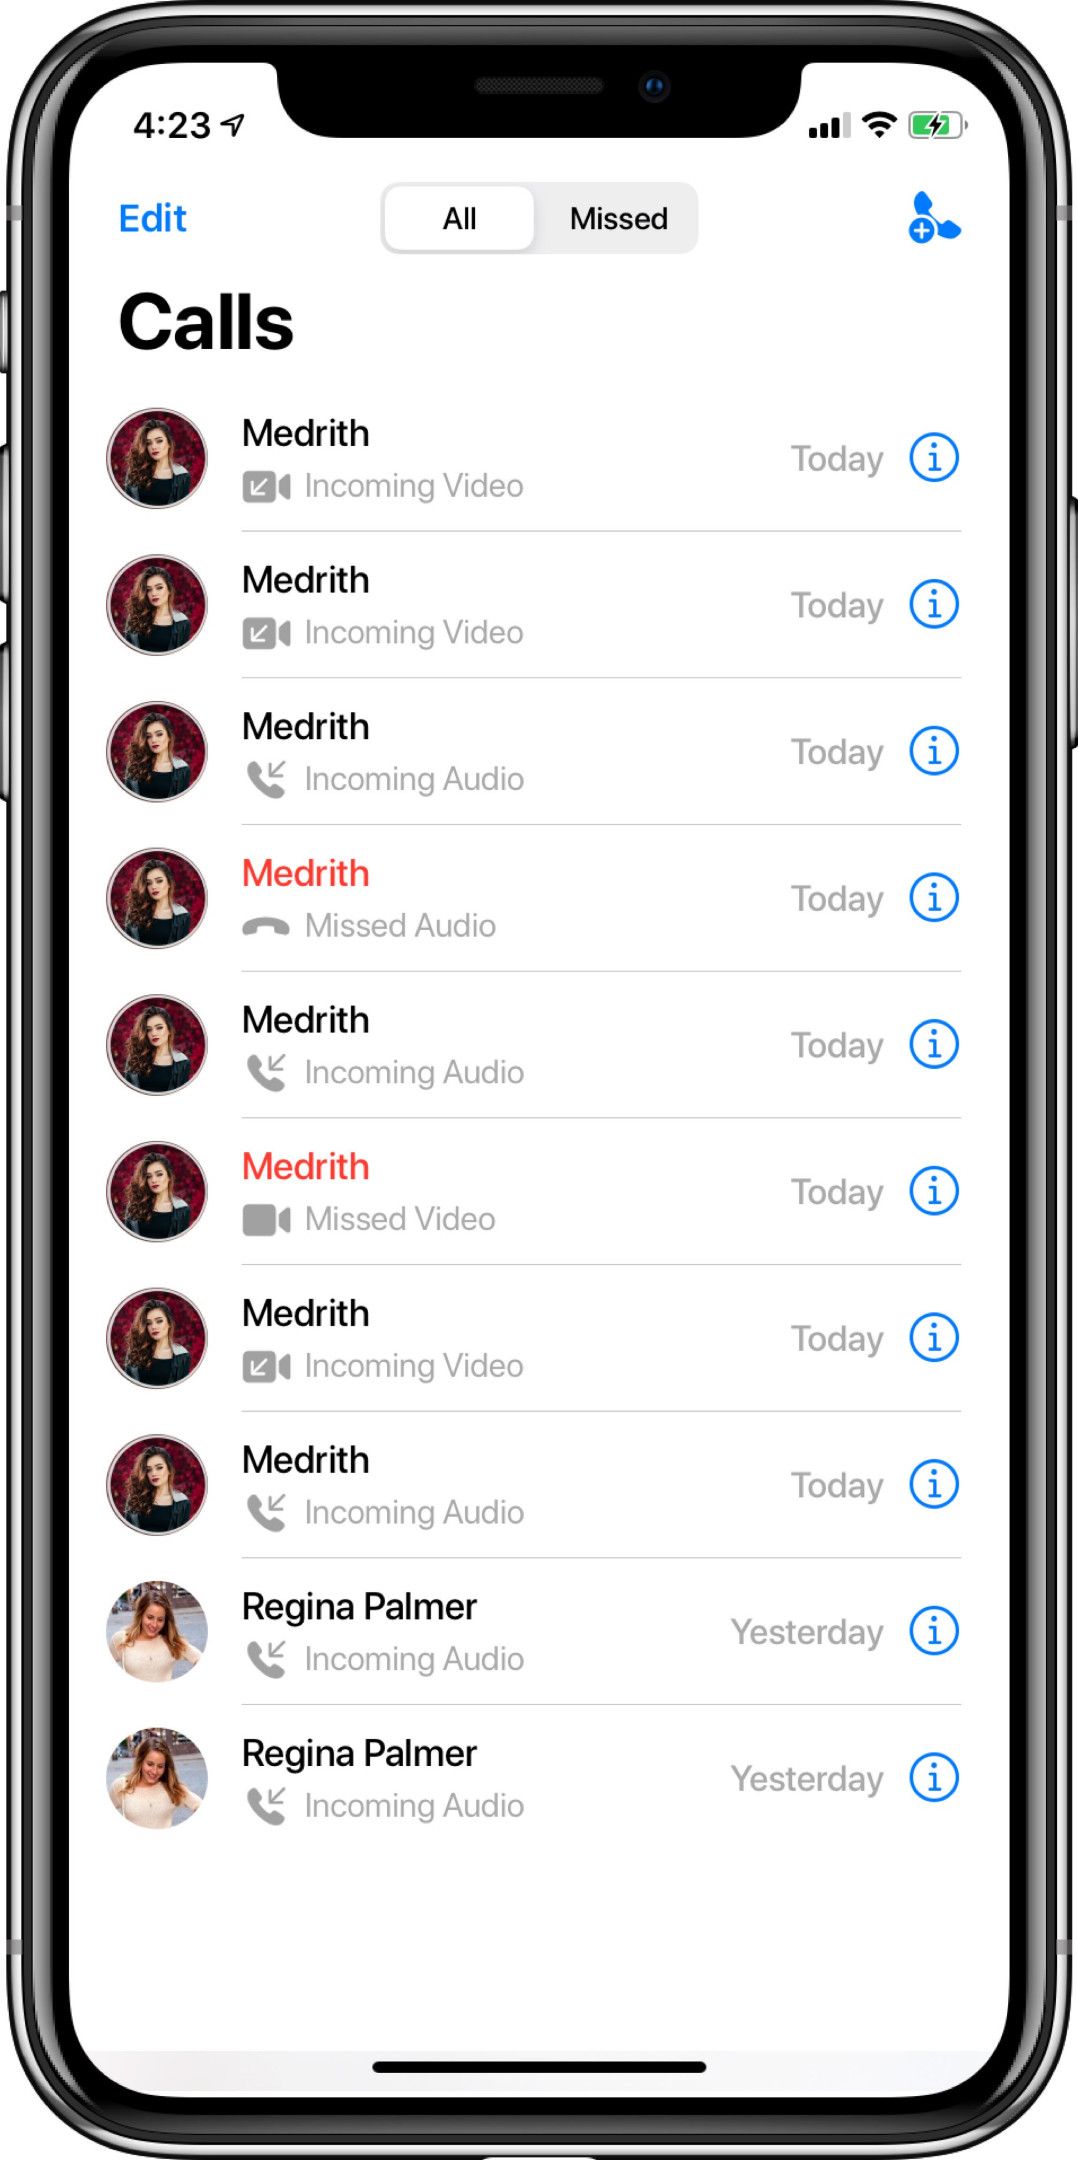
This screen contains a list of recent calls of the user. You can again access this screen in 2 ways -
Launch CometChatCallsList View Controller directly from your existing screen-
Assign CometChatUserInfo to a View Controller in your app-
CometChat User Info Screen
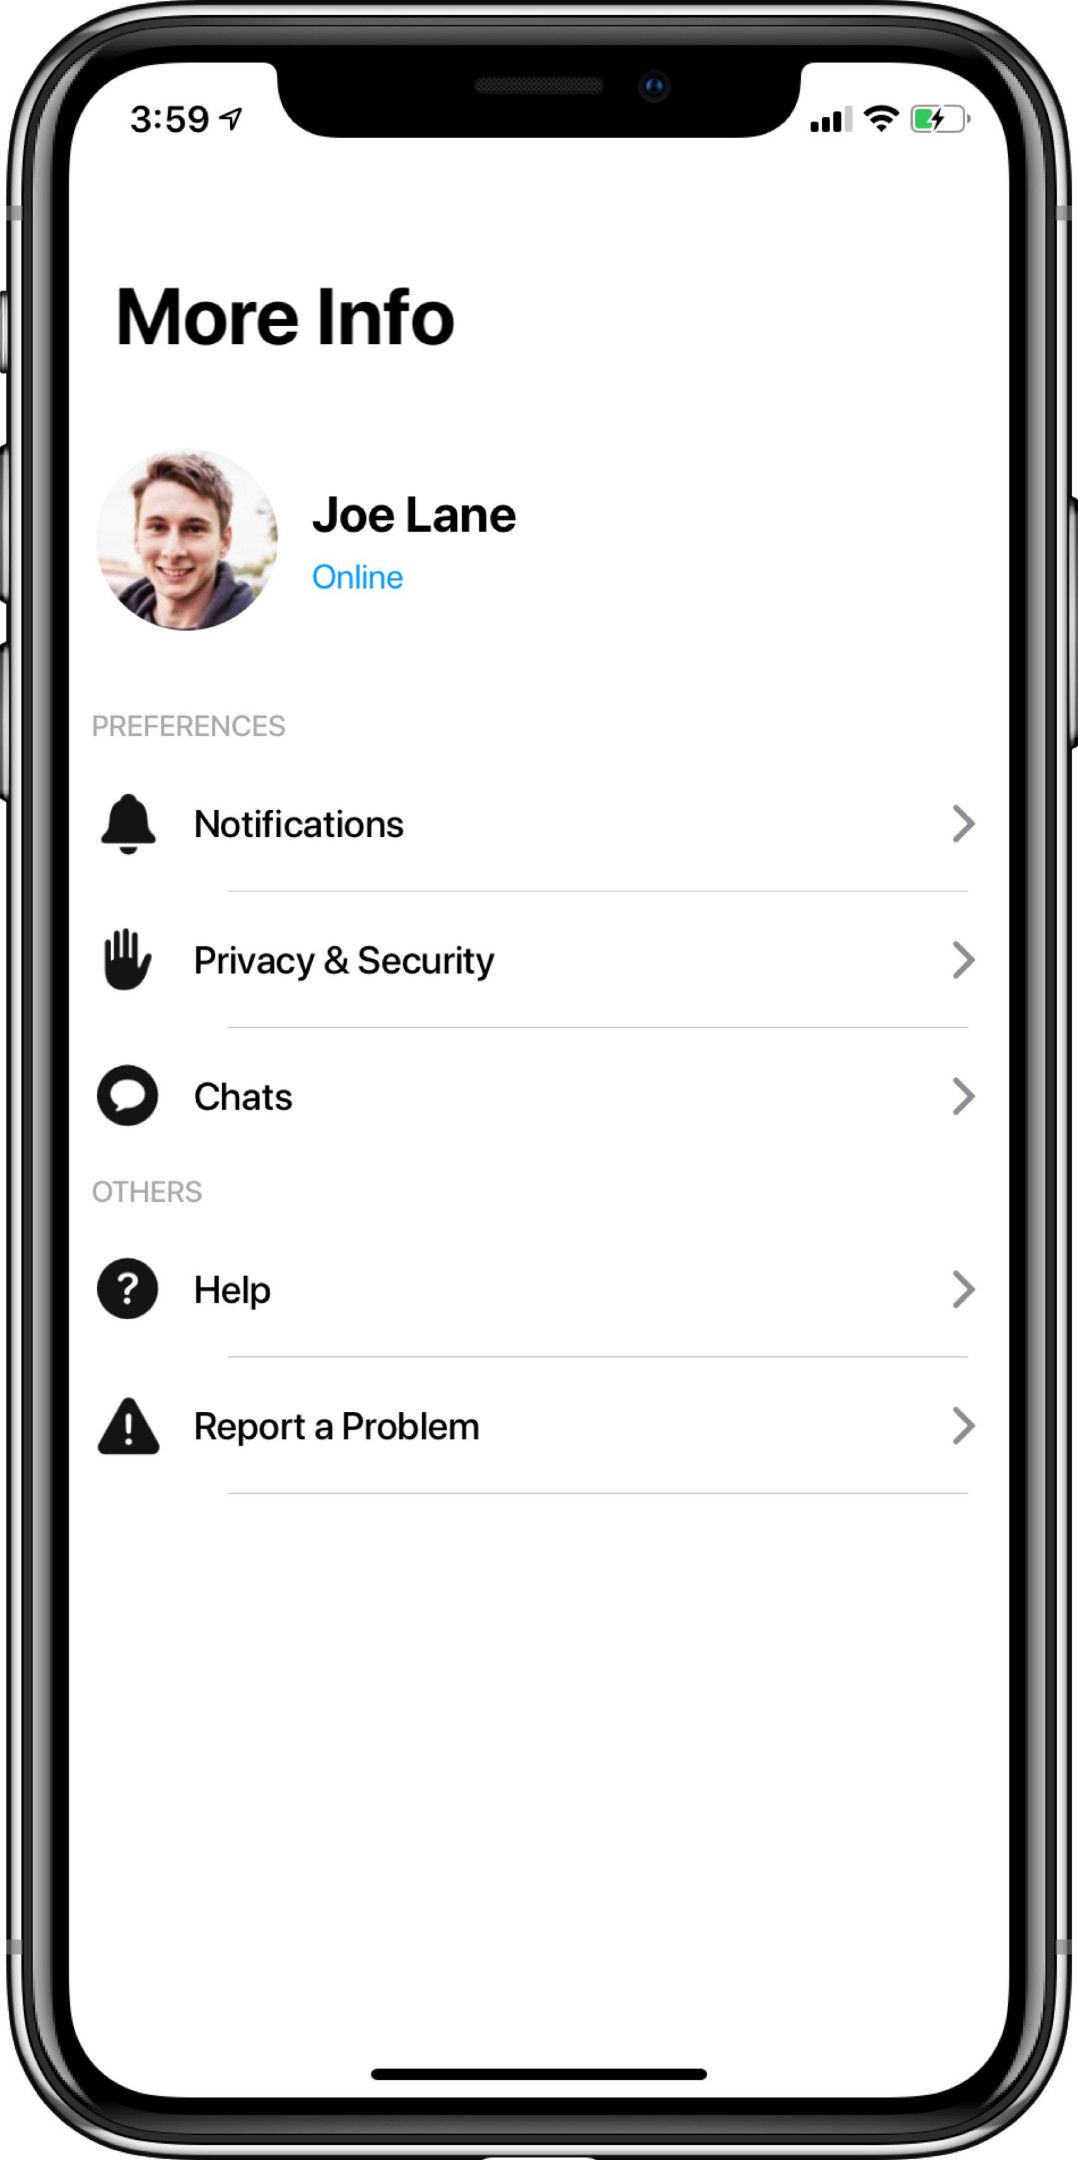
This screen contains user information and a list of dummy cells for settings that developers can use in their app. You can again access this screen in 2 ways -
Launch CometChatUserInfo View Controller directly from your existing screen-
Assign CometChatUserInfo to a View Controller in your app-
When to Use - When to Avoid?
If you want the presentation of these individual screens mentioned above, in your control but don’t want to change the details within those screens → UI-Screens is your option.
If you want more granular control over the look and feel of each component inside these screens, then keep reading!
UI Components
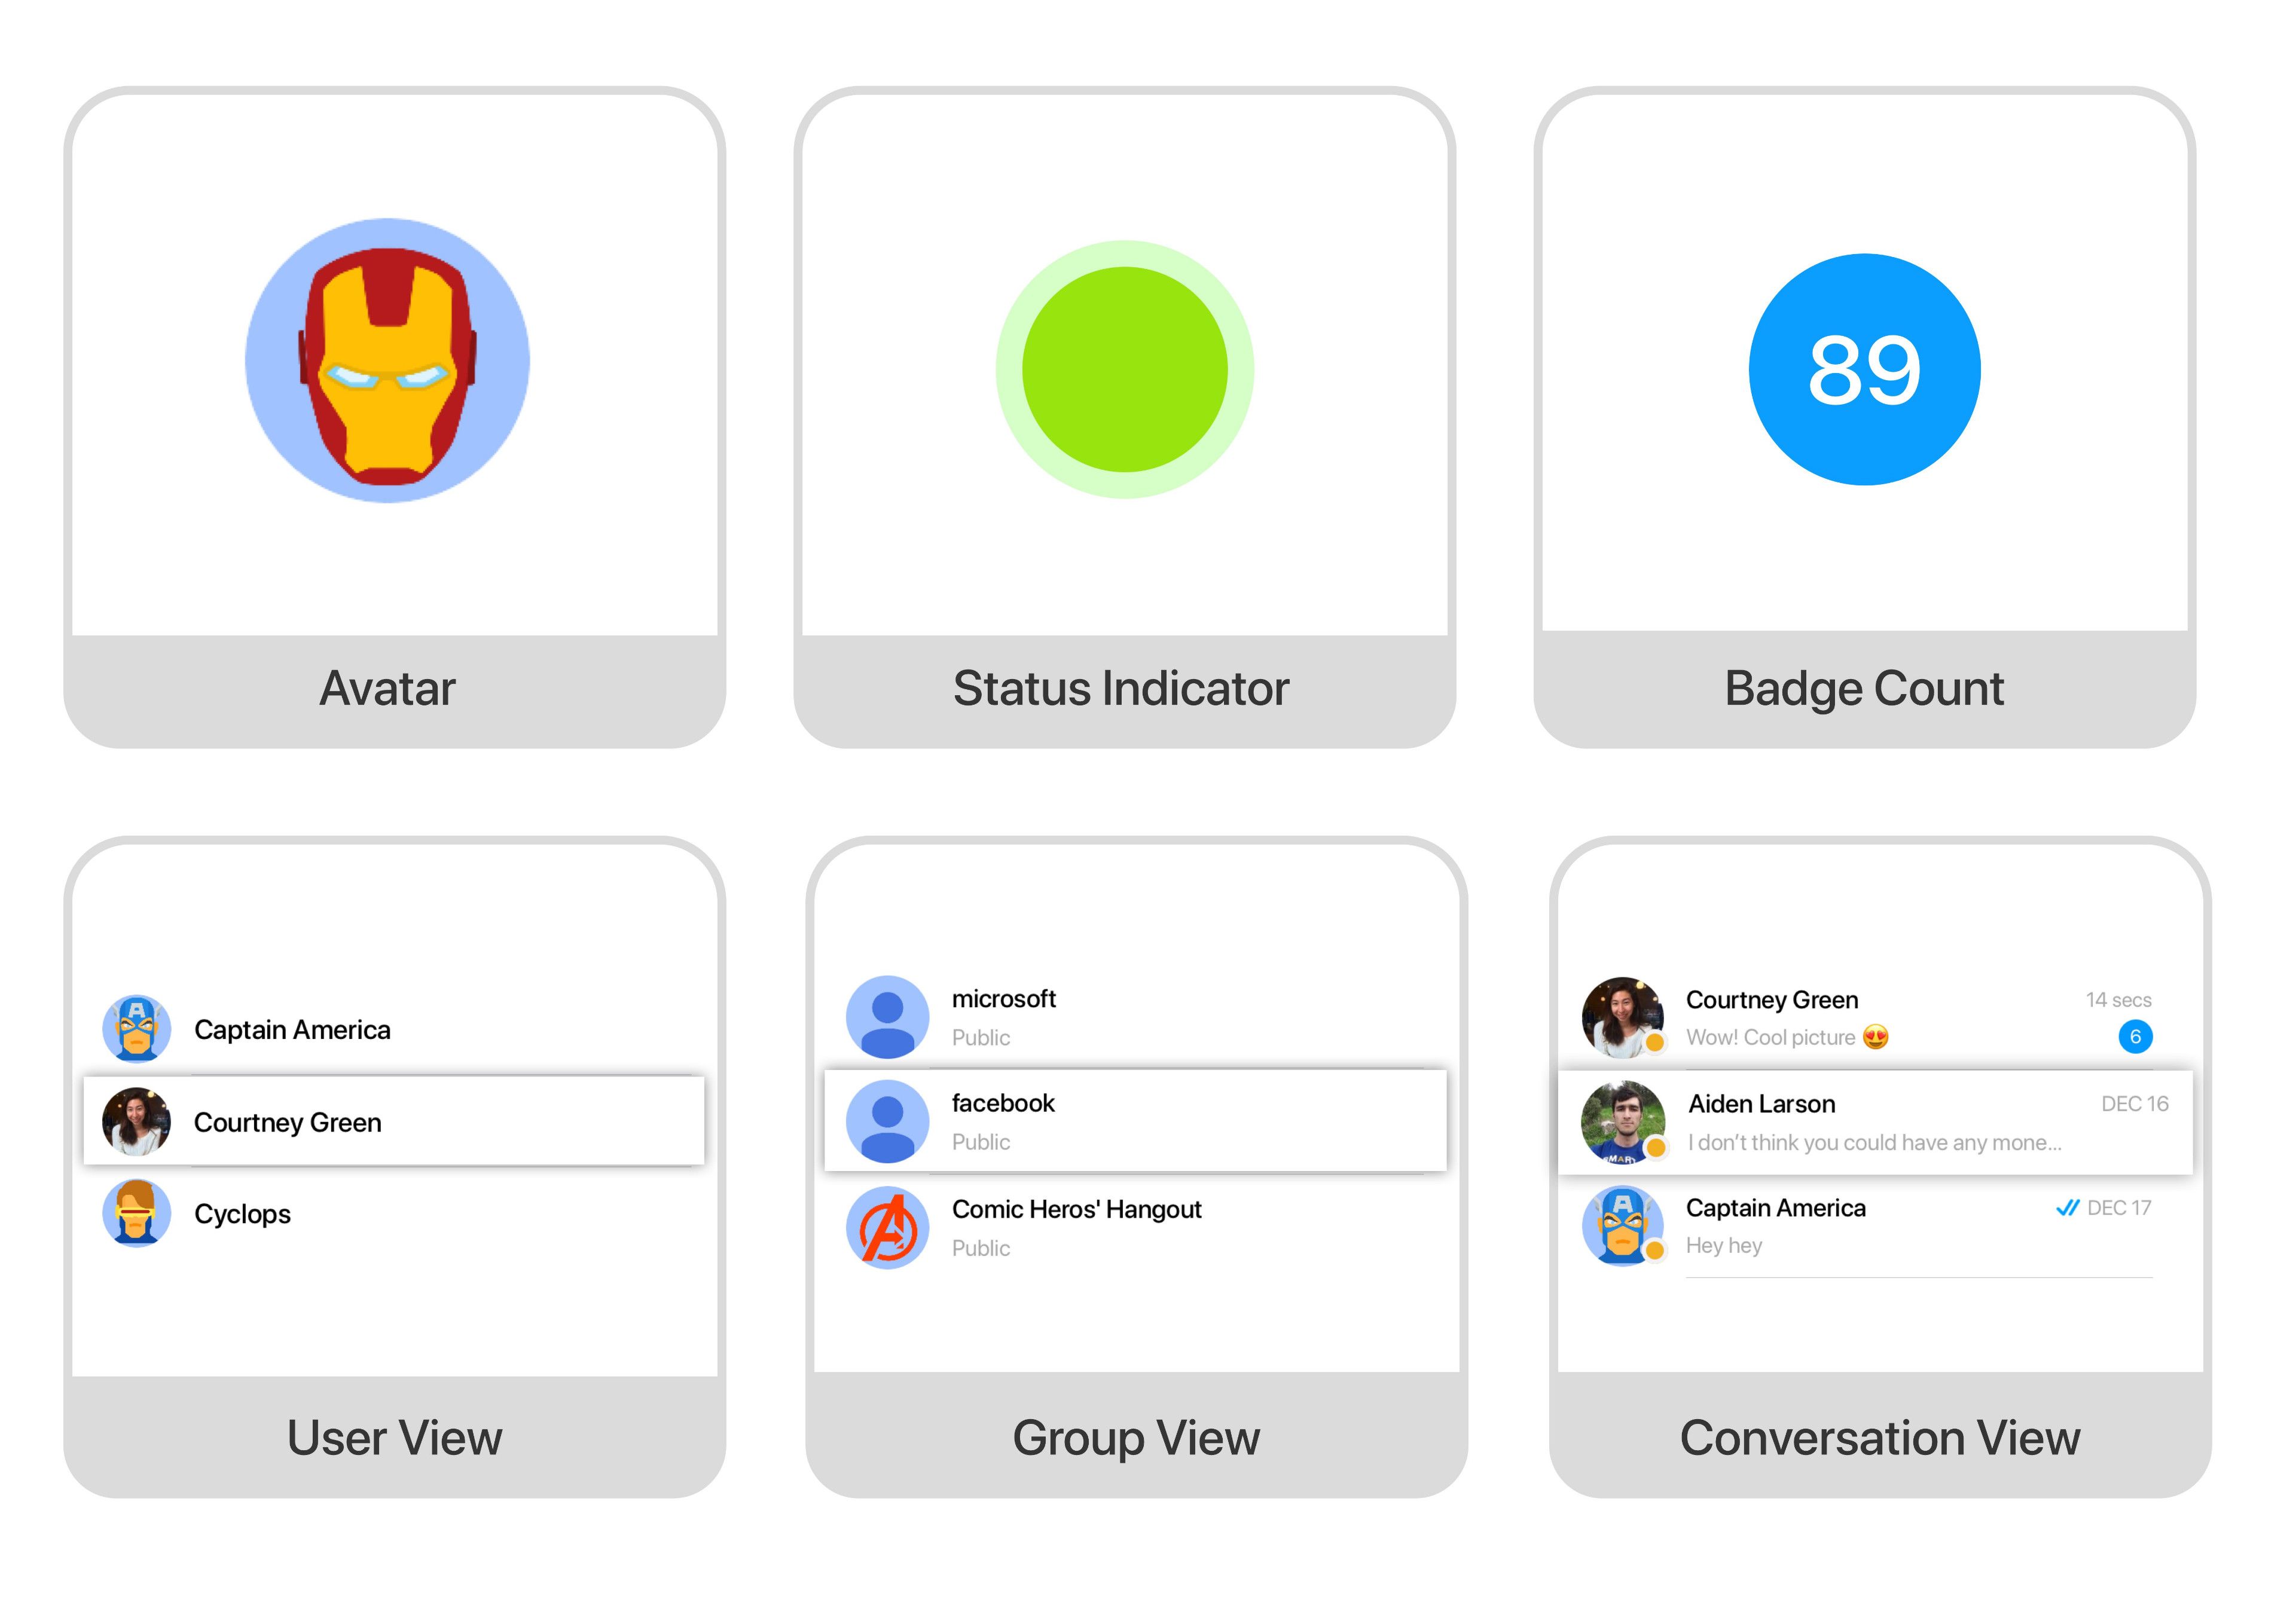
This option is recommended for a very, very granular control over each component in your app. You would be the one styling the components and performing all the API calls to fetch users, messages, groups, conversations, etc.
This option is great when you have some time on your hands and need in-depth control over each and every thing in your app. The chat functionality can be customized and blended into your existing app without the user even noticing a difference between the chat and your app’s existing interface.
CometChat Components
UI Components are the building blocks of CometChat's UI Kit. These are a set of custom classes specially designed to build a rich chat app. You can use these UI components to achieve high customization while building your app.
CometChat provides 6 components that you can customize and use in your app. I like to call the three of them as the low-level components - Avatar, Status Indicator and Badge Count. The other 3 - User View, Group view and Conversation view, would be the high-level components.
I called User View, Group View and Conversation View "high-level components" since they're made up of Avatar, Status Indicator, Badge Count and other details. These high-level components are UITableViewCell views and you can directly plug these components into your app by simply registering them to the UITableView.
Now let’s discuss how you can modify these components and use them in your app -
If you plan to update the look and feel of these components, then you would want to start with the low-level components first since they are the building blocks of other components.
Tip: If you would like to maintain consistency in your application, then you should consider writing the customization of these components in a single function. So that, by utilizing the power of Swift Extensions, you can apply the same customization wherever you use these components.
First, let’s dive into the customization code that CometChat provides for these components and then we'll take a look at how to utilize these while building our actual chat app.
Avatar
This component is a class of UIImageView which is customized to display Avatar.
Status Indicator
This component is a class of UIImageView which is customized to display the user’s status.
Badge Count
This component is a class of UILabel which is customized to display the unread message count.
User View
This component is a class of UITableViewCell. You can use this in your UITableView by registering the cell in viewDidLoad() as shown below:
Then, dequeue the cell in cellForRowAt and pass the user object:
Group View
This component is also a class of UITableViewCell. You can use this in your UITableView by registering the cell in viewDidLoad() as shown below:
Then, dequeue the cell in cellForRowAt and pass the group object:
Conversation View
This component is also a class of UITableViewCell. You can use this in your UITableView by registering the cell in viewDidLoad() as shown below:
Then, dequeue the cell in cellForRowAt and pass the conversation object-
Calls View
This component is also a class of UITableViewCell. You can use this in your UITableView by registering the cell in viewDidLoad() as shown below:
Then, dequeue the cell in cellForRowAt and pass the calls object-
Implementation Details
Now let’s see how we can utilize these components to build our actual chat screens. We’ll take 1 screen at a time and discuss the steps required to build that screen.
User Screen
Implement a UITableView on the screen where you want to display your User List
Plug the CometChatUserView with the UITableView as shown above.
Retrieve the list of your users using CometChat’s API -
Refresh the UITableView to show the results!
Note: CometChat’s UsersRequestBuilder offers various options while building the request: you can find the entire list here.
Group Screen
Implement a UITableView on the screen where you want to display a list of your Groups.
Plug the CometChatGroupView with the UITableView as shown above.
Retrieve the list of your groups using CometChat’s API -
Refresh the UITableView to reflect the results!
Note: CometChat’s GroupsRequestBuilder offers various options while building the request, you can find the entire list here.
Conversation Screen
Implement a UITableView on the screen where you want to display your list of latest conversations.
Plug the CometChatConversationView with the UITableView as shown above.
Retrieve the list of conversations using CometChat’s API -
Refresh the UITableView to show the results!
Note: CometChat’s ConversationRequestBuilder offers various options while building the request: you can find the entire list here.
Also if you are using Components to build your Conversation view, you’ll also have to implement sending and receiving of messages manually. You can find the complete implementation details here.
Adding Calls Feature Manually
CometChat has built the complete workflow to help users make calls, receive calls as well as accept/reject calls. You can find the complete workflow along with code snippets explained here.
When to Use - When to Avoid?
After reading through the above implementation details one thing you’ll have noticed is, every screen related to the chat functionality needs to be implemented manually when going with the UI Components approach. So to conclude, UI Components in the perfect use case →
When you have enough time to handle the implementation of each screen along with the API and data handling.
When blending the Chat screens with your styles and theme of the app is of utmost importance.
When you need more granular control over each and every screen, components and their placement across your app.
Final Notes
Every app and every company has different requirements. CometChat has done a wonderful job in providing various options for implementing the chat feature in your app - From the easiest - quickest - but rigid option to the most flexible - but time-consuming. I would advise you to think through your use case thoroughly, compare it to the “When to Use - When to Avoid” section for each type of implementation mentioned above and decide which approach suits the needs of your app. You should consider how much flexibility each approach offers and the time required to add the chat feature, compared to the amount of flexibility your app requires.
To sum up the 3 methods -
UI Unified → Incredibly quick but rigid
UI Screens → Nice balance between speed and flexibility
UI Components → Build your own screens for complete control while still getting a head start

Nabil Kazi
CometChat