Overview
This guide demonstrates how to add chat to an iOS application using CometChat. Before you begin, we strongly recommend you read the Key Concepts guide.
I want to integrate with my app
I want to explore iOS sample apps.
Import the app into Xcode and follow the steps mentioned in the README.md file.
Get your Application Keys
Signup for CometChat and then:
- Create a new app
- Head over to the API & Auth Keys section and note the Auth Key, App ID & Region
- Xcode 12 or above
- iOS 11 or higher
Add the CometChat Dependency
CocoaPods
We recommend using CocoaPods, as they are the most advanced way of managing iOS project dependencies. Open a terminal window, move to your project directory, and then create a Podfile by running the following command.
- CometChat SDK supports installation through Cocoapods only. Currently, we are supporting Xcode 12 or above versions of Xcode.
- CometChat SDK includes video calling components. We suggest you run on physical devices to avoid errors. :::
- Swift
$ pod init
Add the following lines to the Podfile.
- Swift
platform :ios, '12.0'
use_frameworks!

target 'YourApp' do
  pod 'CometChatSDK', '9'
end
And then install the CometChatSDK framework through CocoaPods.
- Swift
$ pod install
If you're facing any issues while installing pods then use the below command.
- Swift
pod install --repo-update
Always get the latest version of CometChatSDK by command.
- Swift
$ pod update CometChatSDK
Swift Packages
To install Swift Packages you can use Xcode package manager .
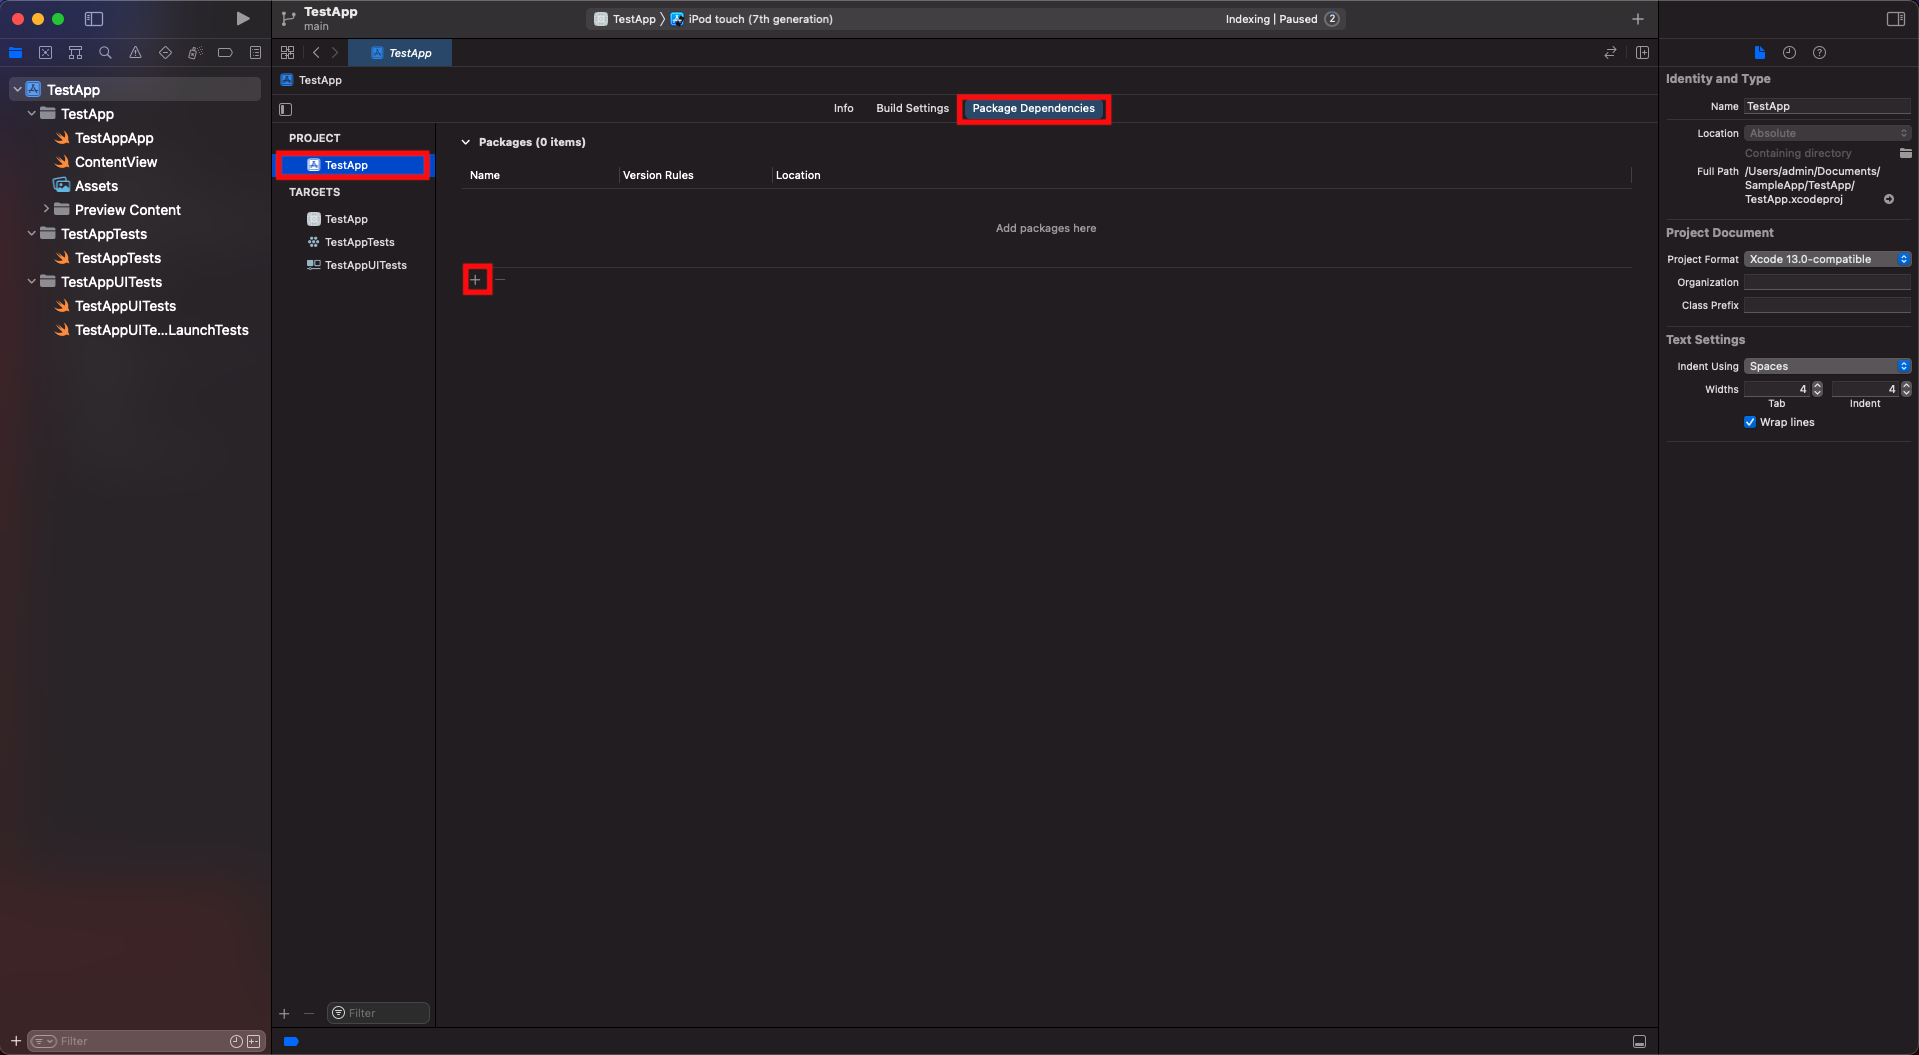
- Open Xcode, go to the project's General settings tab and select the project under Project in the left column.
- Go to the Swift packages tab and click on the + button.
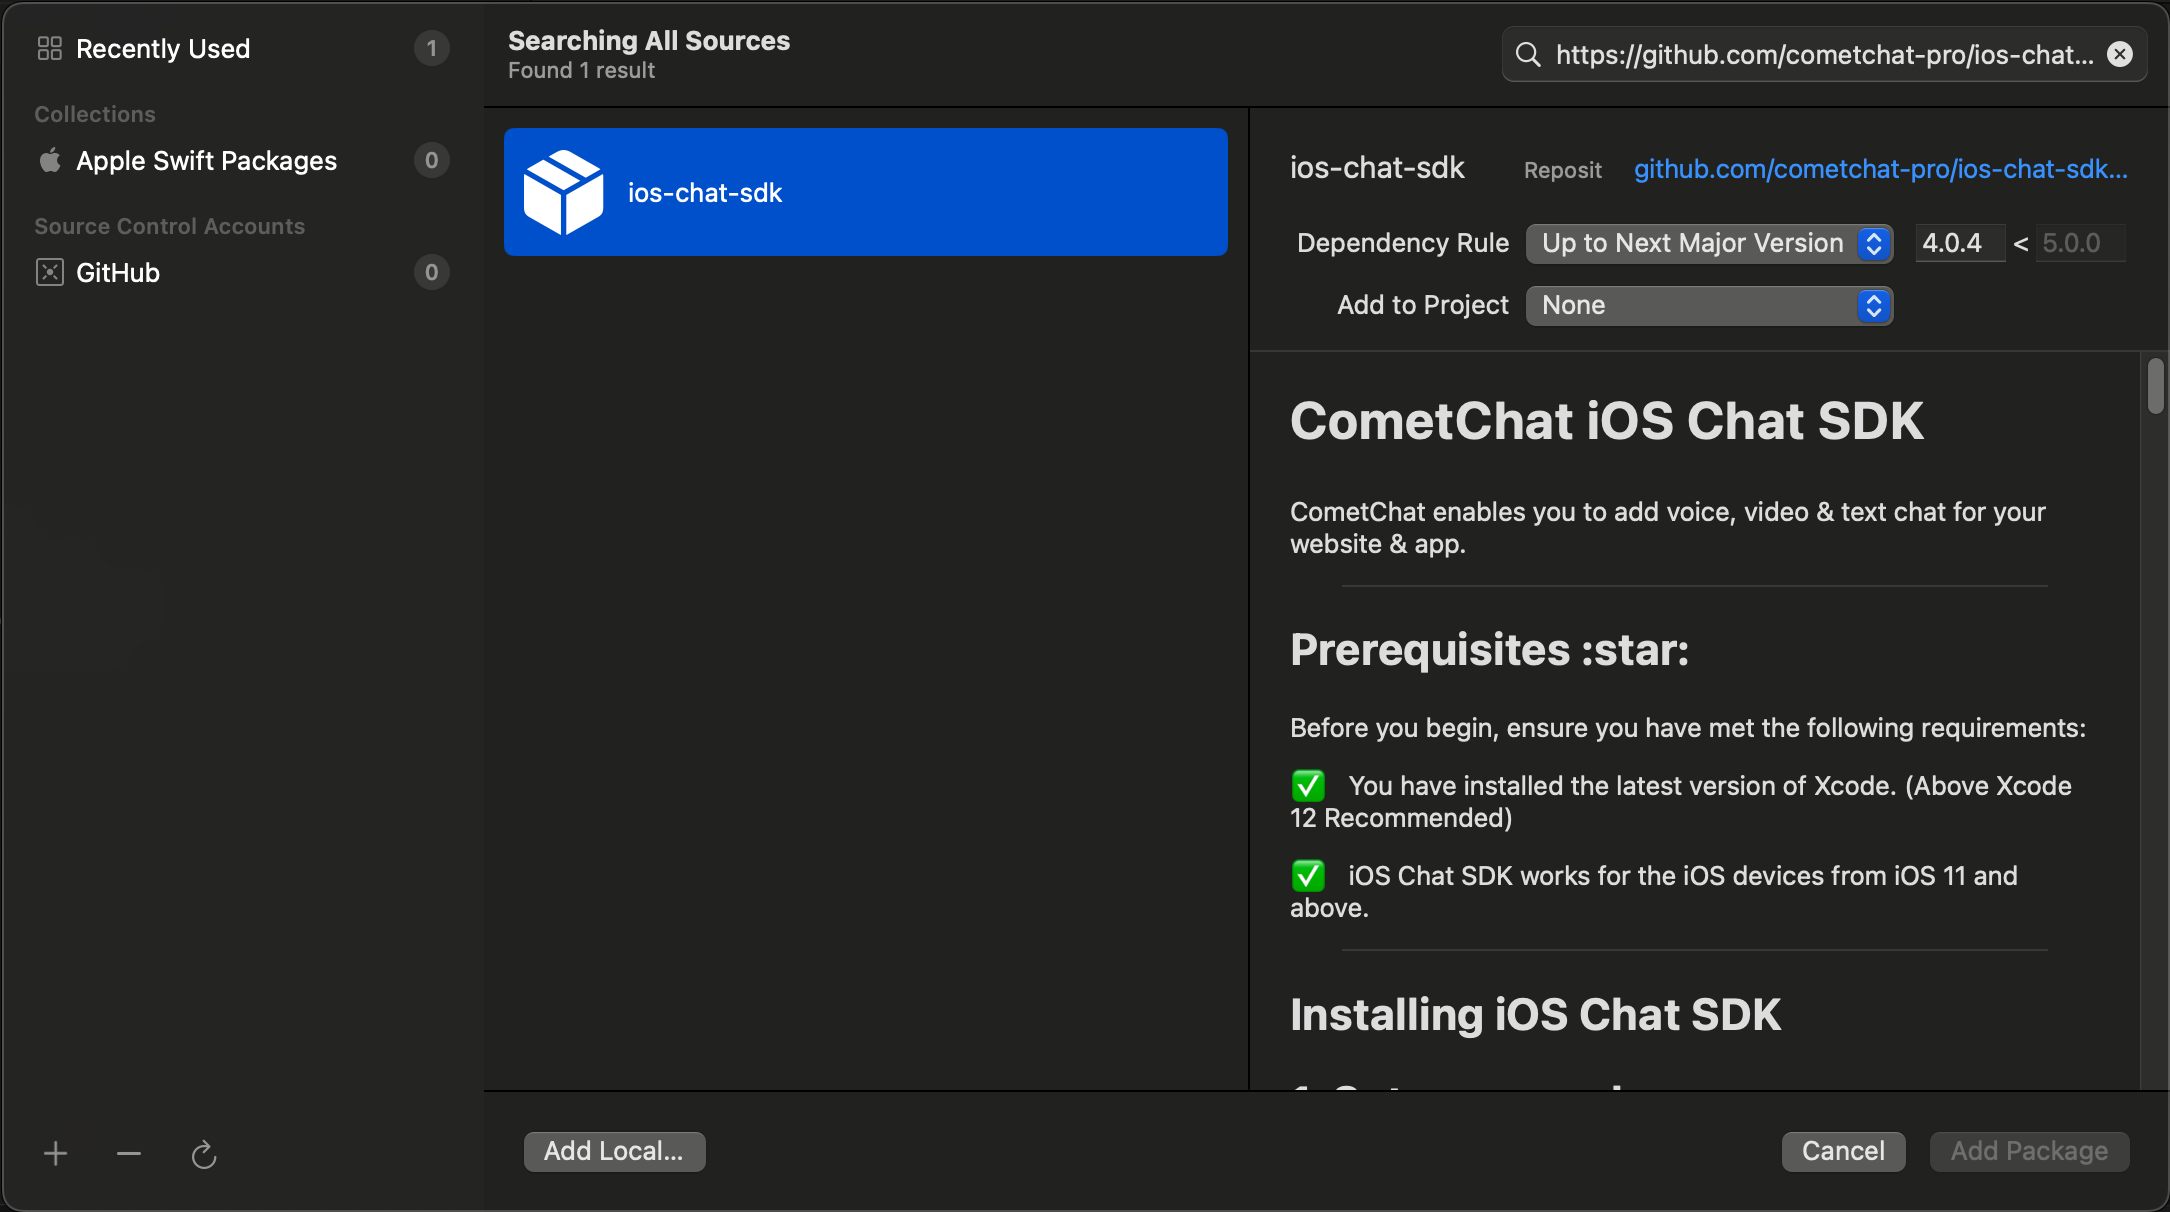
- Once the pop-up appears, enter the github repository address in the search bar
https://github.com/cometchat/sdk/ios.gitand set dependency rule toUp to Next Major Versionand set version as6. Then click on the Add Package button.
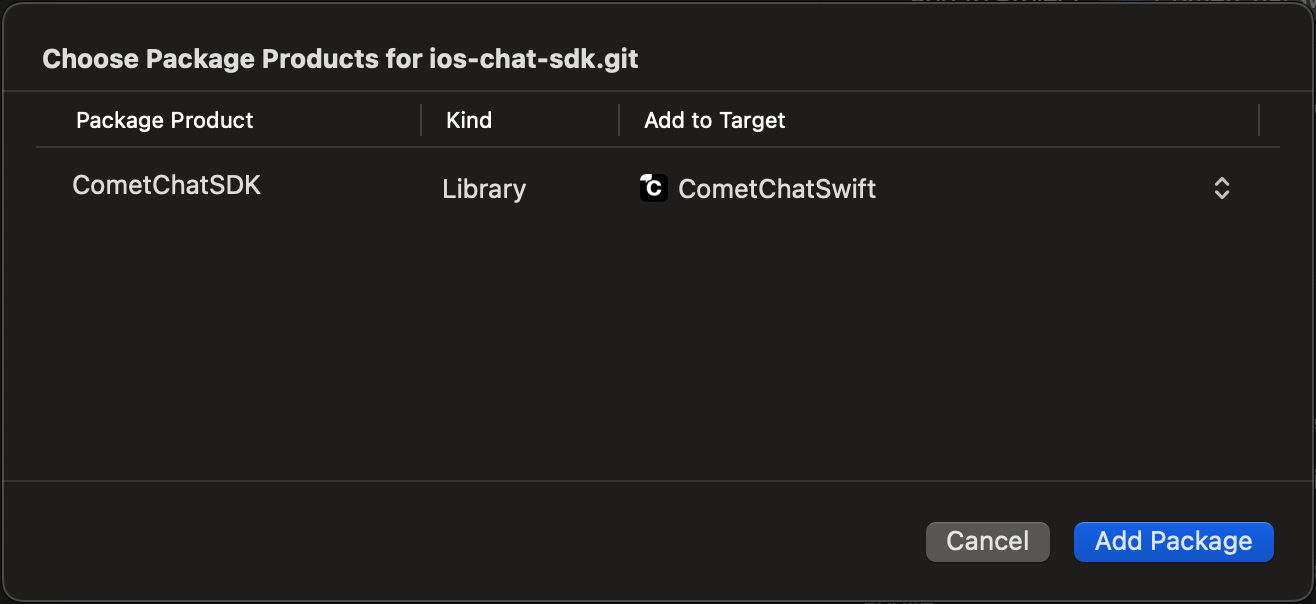
- CometChatSDK must be checked in the Package Product column and click on Add Package. This will add Package Dependencies menu in Xcode.
Setup Bitcode
You can set the Enable Bitcode setting to YES present in build settings in your XCode project.

If you are using CometChat Pro SDK having the version less than 2.0.8, then you need to set Enable Bitcode to NO
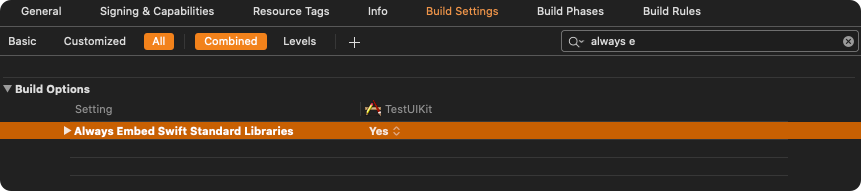
Swift Standard Libraries
CometChatSDKframework build on Swift, you have to ensure the required libraries are embedded. This can be done by setting the “Always Embed Swift Standard Libraries” checkbox in your target’s build settings to “Yes”:
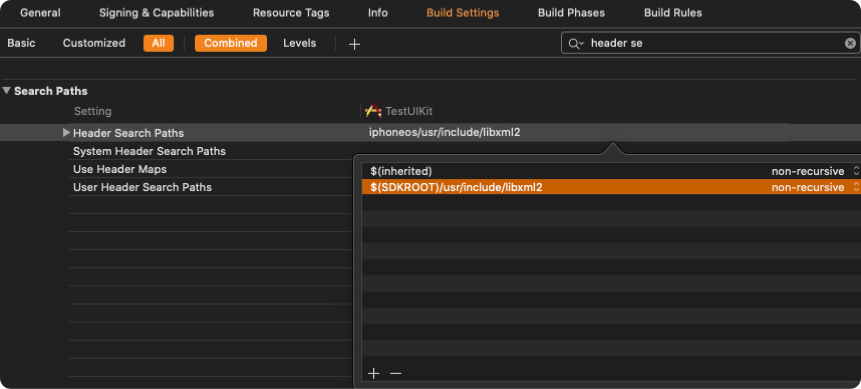
Set Header Search Path
Set the Header Search Paths to $SDKROOT/usr/include/libxml2.
Initialize CometChat
The init() method initializes the settings required for CometChat.
The init() method takes the below parameters:
- appID - You CometChat App ID
- appSettings - An object of the AppSettings class can be created using the AppSettingsBuilder class. The region field is mandatory and can be set using the
setRegion()method.
The AppSettings class allows you to configure three settings:
- Region: The region where you app was created.
- Presence Subscription: Represents the subscription type for user presence (real-time online/offline status)
- autoEstablishSocketConnection(boolean value): This property takes a boolean value which when set to true informs the SDK to manage the web-socket connection internally. If set to false, it informs the SDK that the web-socket connection will be managed manually. The default value for this parameter is true. For more information on this, please check the Managing Web-Socket connections manually section. The default value for this property is true.
- overrideAdminHost(adminHost: string): This method takes the admin URL as input and uses this admin URL instead of the default admin URL. This can be used in case of dedicated deployment of CometChat.
- overrideClientHost(clientHost: string): This method takes the client URL as input and uses this client URL instead of the default client URL. This can be used in case of dedicated deployment of CometChat.
We suggest you call the method on app startup preferably in the didFinishLaunchingWithOptions: method of the AppDelegate class.
- Swift
- Objective C
import CometChatSDK

class AppDelegate: UIResponder, UIApplicationDelegate{
{
   var window: UIWindow?
   let appId: String = "ENTER APP ID"
   let region: String = "ENTER REGION CODE"

func application(_ application: UIApplication, didFinishLaunchingWithOptions launchOptions: [UIApplication.LaunchOptionsKey: Any]?) -> Bool {

let mySettings = AppSettings.AppSettingsBuilder()
  							.subscribePresenceForAllUsers()
  							.setRegion(region: region)
  							.autoEstablishSocketConnection(true)
  							.build()

  CometChat.init(appId: appId ,appSettings: mySettings,onSuccess: { (isSuccess) in
            if (isSuccess) {
                print("CometChat Pro SDK intialise successfully.")
            }
        }) { (error) in
                print("CometChat Pro SDK failed intialise with error: \\(error.errorDescription)")
        }
        return true
    }
}
#import <CometChatSDK_CometChatSDK-Swift.h>

@interface AppDelegate ()

@end

@implementation AppDelegate


- (BOOL)application:(UIApplication *)application didFinishLaunchingWithOptions:(NSDictionary *)launchOptions {

  NSString *region = @"REGION";
  NSString *appID = @"YOUR_APP_ID";

    AppSettingsBuilder *appSettingBuilder = [[AppSettingsBuilder alloc]init];
    AppSettings *appSettings = [[[appSettingBuilder subscribePresenceForAllUsers]setRegionWithRegion:region]build];

    [[CometChat alloc]initWithAppId: appID appSettings:appSettings onSuccess:^(BOOL isSuccess) {
        NSLog(isSuccess ? @"CometChat Initialize Success:-YES" : @"CometChat Initialize Success:-NO");
    } onError:^(CometChatException * error) {
        NSLog(@"Error %@",[error errorDescription]);
    }];
    return YES;
}
Make sure you replace the appId with your CometChat App ID in the above code.
Register and Login your User
Once initialization is successful, you will need to create a user.
To create users on the fly, you can use the createUser() method. This method takes a User object and the API Key as input parameters and returns the created User object if the request is successful.
- Swift
let newUser : User = User(uid: "user1", name: "Kevin") __ Replace with your uid and the name for the user to be created.
let authKey = "AUTH_KEY" __ Replace with your Auth Key.
CometChat.createUser(user: newUser, apiKey: apiKey, onSuccess: { (User) in
      print("User created successfully. \\(User.stringValue())")
  }) { (error) in
     print("The error is \\(String(describing: error?.description))")
}
Once initialization is successful, you will need to log the user into CometChat using the login() method.
The login method needs to be called in the following scenarios:
- When the user is logging into the App for the first time.
- If the
CometChat.getLoggedInUser()function returns nil.
This straightforward authentication method is ideal for proof-of-concept (POC) development or during the early stages of application development. For production environments, however, we strongly recommend using an Auth Token instead of an Auth Key to ensure enhanced security.
- Swift
- Objective C
let uid    = "SUPERHERO1"
let authKey = "YOUR_AUTH_KEY"

if CometChat.getLoggedInUser() == nil {

	CometChat.login(UID: uid, apiKey: apiKey, onSuccess: { (user) in

  	print("Login successful : " + user.stringValue())

	}) { (error) in

  	print("Login failed with error: " + error.errorDescription);

	}

}
NSString *uid 	 = @"SUPERHERO1";
NSString *apiKey = @"YOUR_API_KEY";

if ([CometChat getLoggedInUser == nil]){

[CometChat loginWithUID:uid apiKey:apiKey onSuccess:^(User * user) {

    __ Login Successful
    NSLog(@" Login Successful :%@",[user stringValue]);

} onError:^(CometChatException * error) {

    __ Login error
    NSLog(@" Login failed with exception: %@",[error errorDescription]);

}];
}
Make sure you replace the API_KEY with your CometChat ApiKey in the above code.
We have set up 5 users for testing having UIDs: SUPERHERO1, SUPERHERO2, SUPERHERO3, SUPERHERO4 and SUPERHERO5.
The login() method returns the User object containing all the information of the logged in user.
UID can be alphanumeric with underscore and hyphen. Spaces, punctuation and other special characters are not allowed.
Integrate our iOS UI Kit
Please refer iOS UI Kit section to integrate iOS UI Kit inside your app.