
What you’ll build

  • A Vercel AI SDK agent with streaming + tools
  • The same agent connected to CometChat (Agent ID + Deployment URL)
  • A customized chat experience using UI Kit Builder
  • An export to React UI Kit code or Chat Widget for integration

Prerequisites

  • A CometChat account and an app: Create App
  • A Vercel AI SDK agent (HTTP endpoint) plus the adaptor package:
    vercel-cometchat-adaptor
  • Node.js environment with: ai, @ai-sdk/openai, zod, and Express (or another HTTP framework)

Step 1 - Create your CometChat app

1

Create or open an app

Sign in at app.cometchat.com. Create a new app or open an existing one.
2

Copy credentials

Note your App ID, Region, and Auth Key (needed if you export the Chat Widget later).

Step 2 - Connect your Vercel AI SDK Agent

Navigate to AI Agent → Get Started and then AI Agents → Add Agent.
1

Choose provider

Select Vercel AI SDK.
2

Basic details

Provide:
  • Name and optional Icon
  • (Optional) Greeting and Introductory Message
  • (Optional) Suggested messages
3

Vercel configuration

Paste/define:
  • Agent ID — a unique handle that matches how you route traffic (e.g., support).
  • Deployment URL — the public HTTPS endpoint that receives CometChat requests.
  • (Optional) Headers — JSON auth headers that your endpoint expects.
4

Save & enable

Click Save, then ensure the agent’s toggle is ON in the AI Agents list.
Tip: The vercel-cometchat-adaptor handles conversion between CometChat events and the Vercel AI SDK. Keep the Agent ID and Deployment URL stable so you don’t need to reconnect.

Step 3 - Define Frontend Actions (Optional)

1

Add an action

Go to AI Agent → Actions and click Add to create a frontend action your agent can call (e.g., “Open Product,” “Start Demo,” “Book Slot”).
2

Define fields

Include:
  • Display Name — Shown to users (e.g., “Open Product Page”).
  • Execution Text — How the agent describes running it (e.g., “Opening product details for the user.”).
  • Name — A unique, code-friendly key (e.g., open_product).
  • Description — What the tool does and when to use it.
  • Parameters — JSON Schema describing inputs (the agent will fill these).
3

Validate inputs (schema)

Example parameters JSON:
{
  "type": "object",
  "required": ["productId"],
  "properties": {
    "productId": {
      "type": "string",
      "description": "The internal product ID to open"
    },
    "utm": {
      "type": "string",
      "description": "Optional tracking code"
    }
  }
}
4

Handle in your UI

At runtime, listen for tool calls and execute them client-side (e.g., route changes, modals, highlights).

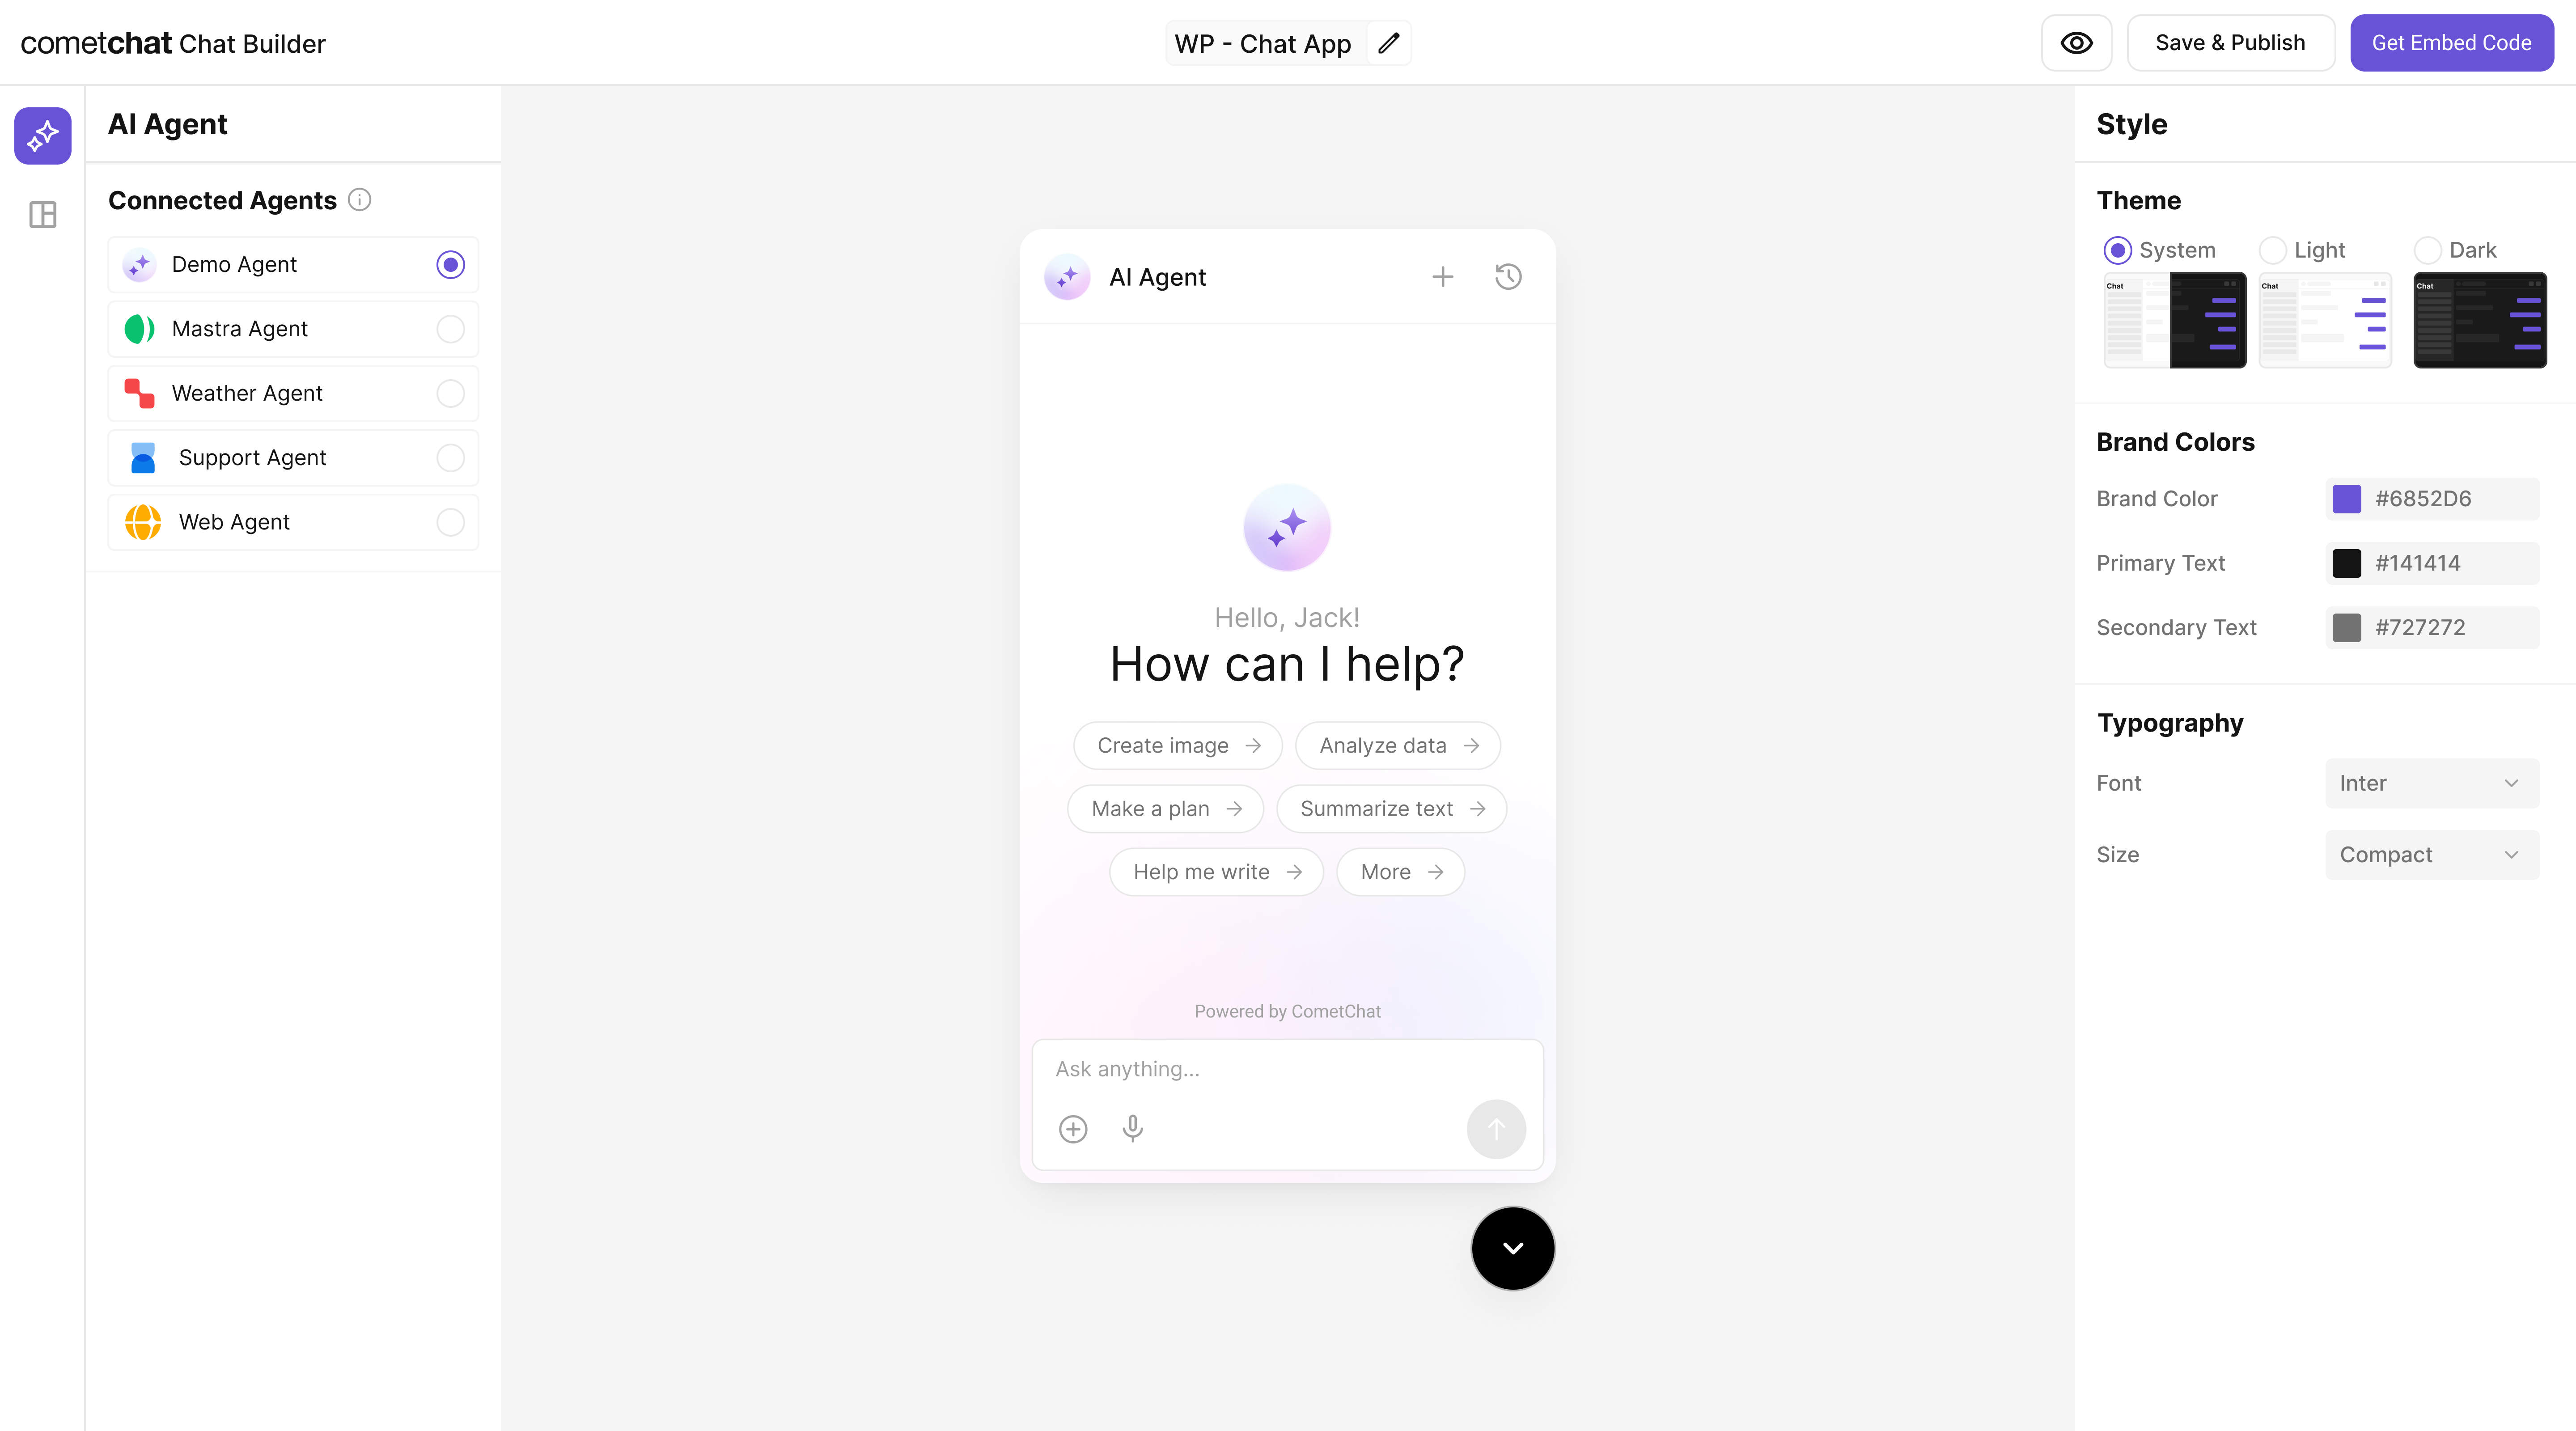
Step 4 - Customize in UI Kit Builder

1

Open variant

From AI Agents click the variant (or Get Started) to enter UI Kit Builder.
2

Customize & Deploy

Select Customize and Deploy.
3

Adjust settings

Update theme, layout, and features; confirm the Vercel agent is attached.
4

Preview

Use live preview to validate responses & any tool triggers.

Step 5 - Export & Integrate

Choose how you’ll ship the experience (Widget or React UI Kit export).
The Vercel AI SDK agent from Step 2 is included automatically in exported variants—no extra code needed for basic conversations.
1

Decide delivery mode

Pick Chat Widget (fastest) or export React UI Kit for code-level customization.
2

Widget path

Open UI Kit Builder → Get Embedded Code → copy script + credentials.
3

React UI Kit path

Export the variant as code (UI Kit) if you need deep theming or custom logic.
4

Verify agent inclusion

Preview: the Vercel agent should appear without extra config.

Step 6 - Deploy & Secure (Reference)

Need a public Vercel AI SDK agent? Use these reference blocks to define, expose, and deploy one securely.
// vercel/agent.ts
import { streamText, stepCountIs, tool } from "ai";
import { openai } from "@ai-sdk/openai";
import { z } from "zod";

const weatherTool = tool({
  description: "Get a simple temperature estimate for a location",
  inputSchema: z.object({
    location: z.string().describe("City or region to check"),
  }),
  outputSchema: z.object({
    location: z.string(),
    temperature: z.number(),
  }),
  execute: async ({ location }) => {
    // Replace with a real data source; this is a stub.
    return {
      location,
      temperature: 72 + Math.floor(Math.random() * 10) - 5,
    };
  },
});

export async function runVercelAgent({
  messages,
  tools = {},
}: {
  messages: any[];
  tools?: Record<string, unknown>;
}) {
  return streamText({
    model: openai("gpt-4o-mini"),
    stopWhen: stepCountIs(100),
    messages,
    tools: {
      weather: weatherTool,
      ...tools,
    },
  });
}
  • TypeScript (Express)
  • JavaScript (Express)
// server.ts
import express from "express";
import cors from "cors";
import bodyParser from "body-parser";
import {
  convertCometChatMessagesToVercelMessages,
  convertCometChatToolsToVercelAISDKTools,
  mapVercelStreamChunkToCometChatEvent,
} from "vercel-cometchat-adaptor";
import { runVercelAgent } from "./vercel/agent";

const app = express();
const port = process.env.PORT || 4000;

app.use(cors());
app.use(bodyParser.json());

app.post("/agent/vercel", async (req, res) => {
  try {
    const cometChatTools = Array.isArray(req.body.tools)
      ? convertCometChatToolsToVercelAISDKTools(req.body.tools)
      : {};

    const messages = convertCometChatMessagesToVercelMessages(req.body.messages);
    if (!Array.isArray(messages) || messages.length === 0) {
      return res.status(400).json({ error: "Invalid request" });
    }

    res.setHeader("Content-Type", "text/event-stream");
    res.setHeader("Cache-Control", "no-cache");
    res.setHeader("Connection", "keep-alive");

    const runId = req.body.runId || `run_${Date.now()}`;
    const threadId = req.body.threadId || "thread_1";

    const stream = await runVercelAgent({ messages, tools: cometChatTools });

    for await (const chunk of stream.fullStream) {
      const events = mapVercelStreamChunkToCometChatEvent(chunk);
      for (const event of events) {
        event.runId = runId;
        event.threadId = threadId;
        event.timestamp = event.timestamp || Date.now();
        res.write(`data: ${JSON.stringify(event)}\n\n`);
      }
    }

    res.end();
  } catch (error) {
    console.error(error);
    res.write(
      `data: ${JSON.stringify({
        type: "error",
        message: "Agent processing failed",
        timestamp: Date.now(),
      })}\n\n`
    );
    res.end();
  }
});

app.listen(port, () => {
  console.log(`Server running at http://localhost:${port}/agent/vercel`);
});

Local Development

  1. npm install to pull dependencies (including vercel-cometchat-adaptor).
  2. npm run dev (or vercel dev) to start the local server.

Quick test against the Express route:

curl -N -X POST http://localhost:4000/agent/vercel \
  -H "Content-Type: application/json" \
  -d '{"messages":[{"role":"user","content":"Say hi"}]}'

Temporary Public Tunnel

ngrok http 4000
cloudflared tunnel --url http://localhost:4000
loca.lt --port 4000

Append route (e.g. /agent/vercel) to the forwarded HTTPS URL.

Production Patterns

  • Serverless: Convert the route to a Vercel /api handler or edge function.
  • Container: Run the Express app in Docker; add health checks.
  • Edge: Use @vercel/edge runtime and keep tools stateless.

Security

  • Rate limit by IP + user.
  • Add auth (Bearer / JWT) for private agents.
  • Log tool calls (id, latency) for observability.

CometChat Mapping

Use the final HTTPS URL + path for Deployment URL. Reuse the same string you configured in code as the Agent ID.

Deploy (Vercel, Render, Fly, etc.) then copy the public URL as your Deployment URL and confirm the Agent ID used in code.

Docs: https://sdk.vercel.ai/docs

Test your setup

1

Enable the agent

In AI Agents, ensure your Vercel agent shows Enabled.
2

Preview in UI Kit Builder

Open UI Kit Builder and start a preview session.
3

Validate conversation

Send a message; confirm the agent streams responses.
4

Test actions

Trigger a Frontend Action and verify your UI handles the tool call.

Troubleshooting

  • Verify your Deployment URL is publicly reachable and returns text/event-stream.
  • Check server logs for runtime errors or missing environment variables.
  • Confirm the Action’s Name in CometChat exactly matches the tool name your UI listens for.
  • Validate the Parameters JSON Schema; the agent uses this to fill inputs.
  • Use authKey only for development. For production, implement a secure token flow for user login.

By combining the CometChat Agentic Interface with the Vercel AI SDK, you can connect intelligent agents with end users instantly and securely.
The vercel-cometchat-adaptor library simplifies message and event translation, creating a reliable bridge between CometChat and Vercel-powered AI systems.