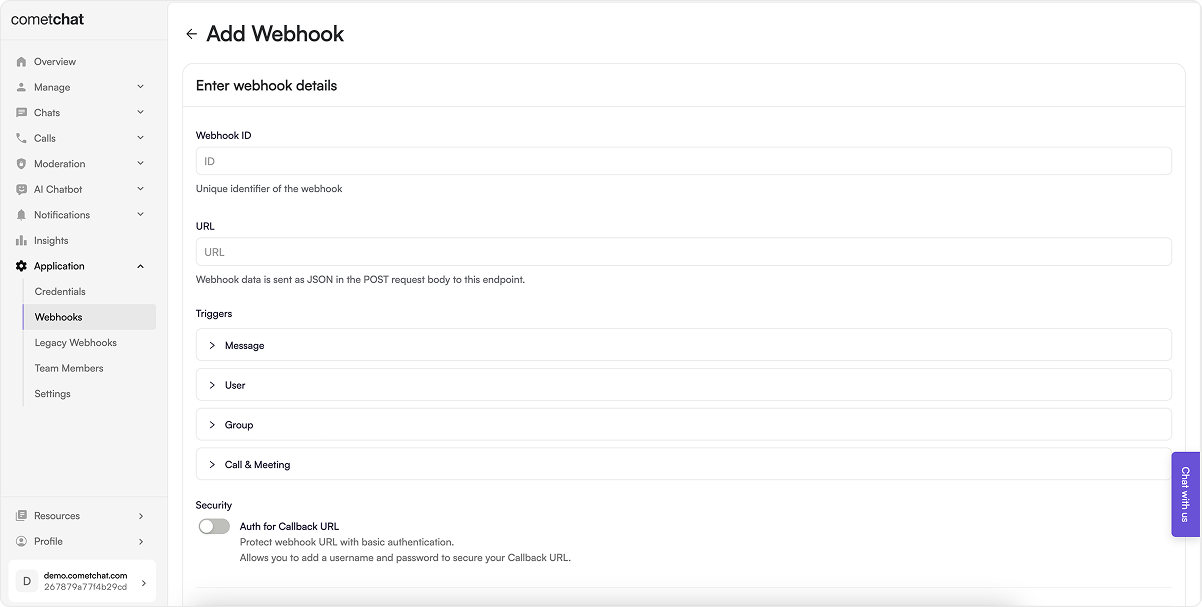
Option 1: Managing Webhooks via Dashboard
You can easily configure webhook triggers through the CometChat dashboard.Steps to Configure:
- Log in to the CometChat Dashboard and select your app.
- Navigate to Settings > Webhooks in the left-hand menu.
- Click Add Webhook to create a new webhook.
-
Provide the following details:
- Webhook ID – A unique identifier.
- URL – Your server endpoint where event payloads will be sent.
- Triggers – Enable events you wish to listen to.
- Security – Enable authentication for enhanced security.
- Enable the webhook.
- Click Save to apply your configuration.

Option 2: Managing Webhooks via Management APIs
If you prefer automation or need to manage webhooks programmatically, you can use our REST APIs.Webhook Operations
| Operation | API Reference |
|---|---|
| Create a new webhook | Create Webhook |
| Update an existing webhook | Update Webhook |
| List all webhooks | List Webhooks |
| Get webhook by ID | Get Webhook |
| Delete a webhook | Delete Webhook |
Trigger Operations
| Operation | API Reference |
|---|---|
| Add triggers to a webhook | Add Triggers |
| List triggers for a webhook | List Triggers |
| Remove triggers from a webhook | Remove Triggers |
Choose the method that best fits your use case—Dashboard for quick setup, or APIs for advanced and automated configurations.