> ## Documentation Index
> Fetch the complete documentation index at: https://www.cometchat.com/docs/llms.txt
> Use this file to discover all available pages before exploring further.
# Setup
> CometChat Calling SDK v4 - Stable Release - Setup for iOS
The **CometChatCalls** is developed to keep developers in mind and aims to reduce development efforts significantly. Let's start to integrate Calls Kit into your project.
***
## Before you begin
Before installing **CometChatCalls for iOS**, you need to create a CometChat application on the CometChat Dashboard, which comprises everything required in a chat service including users, groups, calls & messages. You will need the `App ID` , `AuthKey`, `Region` of your CometChat application when initializing the SDK.
**i. Register on CometChat 🧑💻**
* To install **CometChatCalls for iOS**, you need to first register on **CometChat Dashboard**. [Click here to sign up](https://app.cometchat.com/login).
**ii. Get Your Application Keys 🔑**
* Create a **new app**
* Head over to the **QuickStart** or **API & Auth Keys section** and note the **App ID**, **Auth Key**, and **Region**.
Each CometChat application can be integrated with a single client app. Within the same application, users can communicate with each other across all platforms, whether they are on mobile devices or on the web.
***
## Prerequisites
The minimum requirements for **CometChatCalls for iOS** are:
* `macOS`
* `Xcode`
* `iOS 13.0 and later`
* `Swift 5.0+`
***
## Get Started
You can start building a modern calling experience in your app by installing UIKit. This developer kit is an add-on feature to CometChat iOS SDK so installing it will also install the core Chat SDK.
***
### Step 1 : Create a project
To get started, open `Xcode` and create a new project.
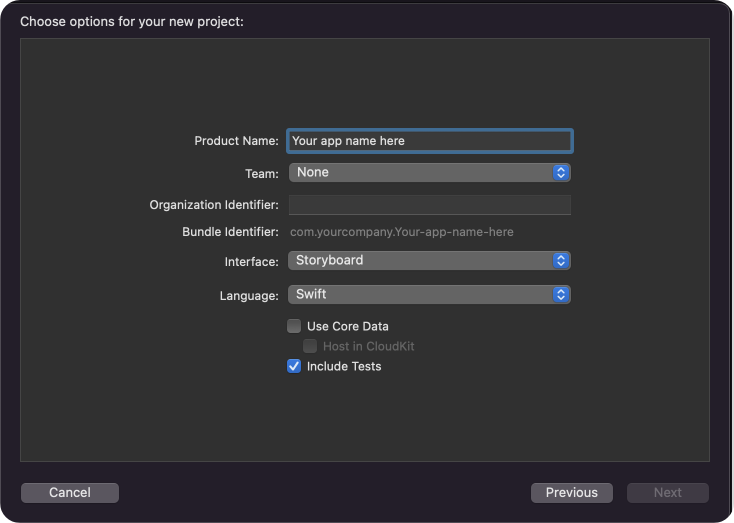
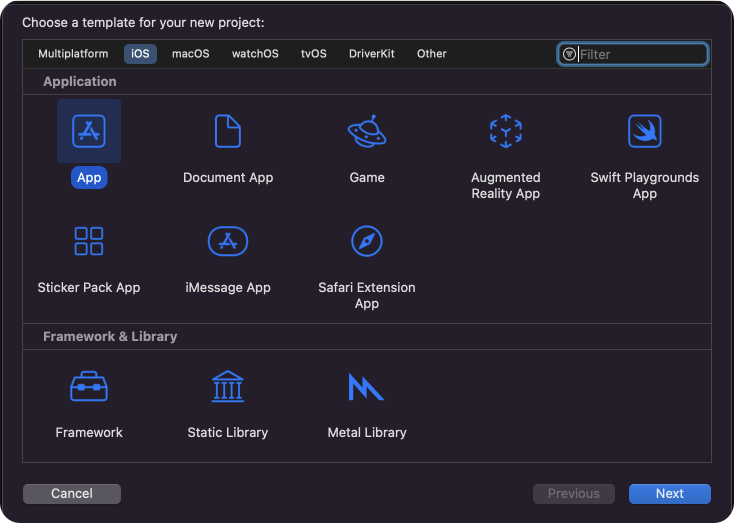 #### Enter name, identifier and proceed.
 ***
### Step 2 : Install CometChatProCalls Kit
You can install **CometChatCalls for iOS** through **Swift Package Manager or Cocoapods**
### CocoaPods
We recommend using [CocoaPods](https://cocoapods.org/), as they are the most advanced way of managing iOS project dependencies. Open a terminal window, move to your project directory, and then create a `Podfile` by running the following command.
```bash theme={null}
$ pod init
```
Add the following lines to the Podfile.
```ruby theme={null}
platform :ios, '11.0'
use_frameworks!
target 'YourApp' do
pod 'CometChatSDK', '4.0.72'
pod 'CometChatCallsSDK', '4.2.2'
end
```
And then install the `CometChatCalls` framework through CocoaPods.
```bash theme={null}
$ pod install
```
If you're facing any issues while installing pods then use the below command.
```bash theme={null}
$ pod install --repo-update
```
Always get the latest version of `CometChatCalls` by command.
```bash theme={null}
$ pod update CometChatCallsSDK
```
CometChatCallsSDK version `4.0.0` is compatible with `4.0.0` version of CometChatSDK
### Swift Package Manager
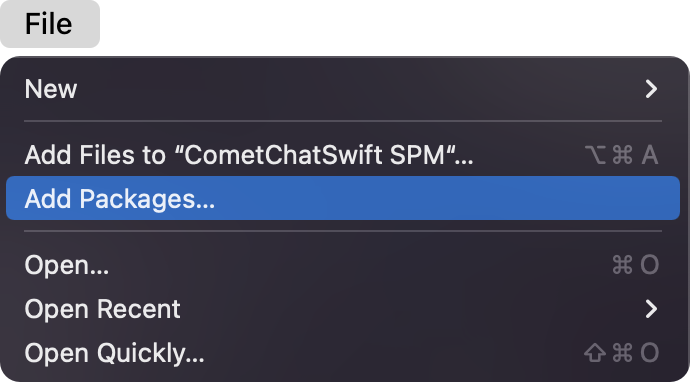
1. Go to your Swift Package Manager's **File** tab and select **Add Packages**.
***
### Step 2 : Install CometChatProCalls Kit
You can install **CometChatCalls for iOS** through **Swift Package Manager or Cocoapods**
### CocoaPods
We recommend using [CocoaPods](https://cocoapods.org/), as they are the most advanced way of managing iOS project dependencies. Open a terminal window, move to your project directory, and then create a `Podfile` by running the following command.
```bash theme={null}
$ pod init
```
Add the following lines to the Podfile.
```ruby theme={null}
platform :ios, '11.0'
use_frameworks!
target 'YourApp' do
pod 'CometChatSDK', '4.0.72'
pod 'CometChatCallsSDK', '4.2.2'
end
```
And then install the `CometChatCalls` framework through CocoaPods.
```bash theme={null}
$ pod install
```
If you're facing any issues while installing pods then use the below command.
```bash theme={null}
$ pod install --repo-update
```
Always get the latest version of `CometChatCalls` by command.
```bash theme={null}
$ pod update CometChatCallsSDK
```
CometChatCallsSDK version `4.0.0` is compatible with `4.0.0` version of CometChatSDK
### Swift Package Manager
1. Go to your Swift Package Manager's **File** tab and select **Add Packages**.
 2. Add `CometChatProCalls` into your `Package Repository` as below:
```bash theme={null}
https://github.com/cometchat/ios-calls-sdk.git
```
3. To add the package, select Version Rules, enter Up to Exact Version, **`4.1.2`**, and click Next.
2. Add `CometChatProCalls` into your `Package Repository` as below:
```bash theme={null}
https://github.com/cometchat/ios-calls-sdk.git
```
3. To add the package, select Version Rules, enter Up to Exact Version, **`4.1.2`**, and click Next.
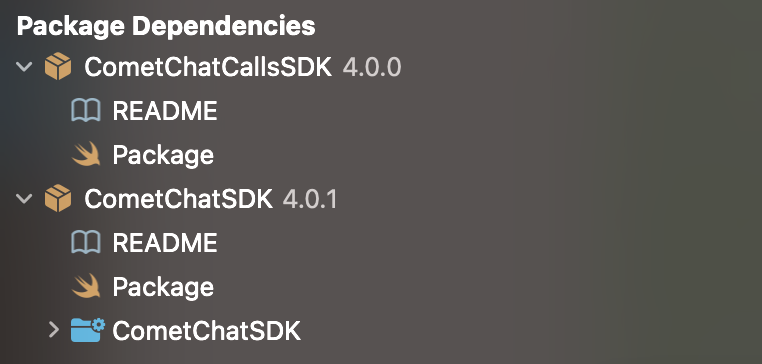
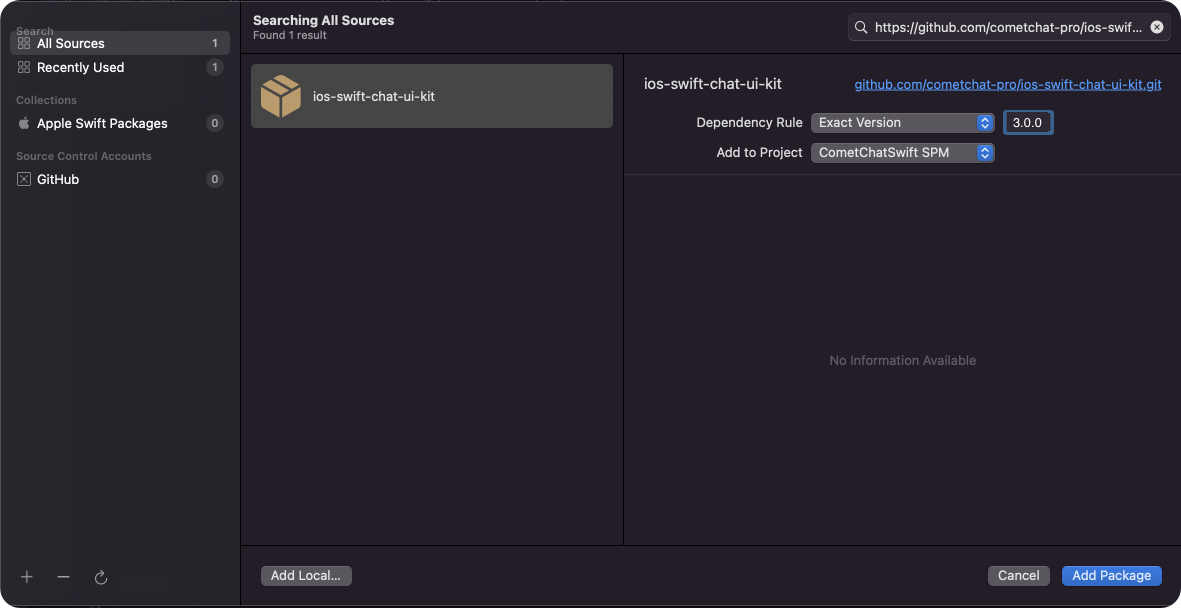 4. Once, the package is added it will look like this.
 ### **Cocoa Pods**
Go to root directory. (Where the .xcodeproj reside.) and perform these commands.
Pod installation
1. pod init
2. open -a Xcode Podfile
Your pod file will open in the text editor. Add your project dependency.
3. pod 'CometChatCallsSDK', '4.2.2'
4. For M1 Mac - arch -x86\_64 pod install or For Intel Mac - pod install
***
## Initialize CometChatProCalls
### 1. CallsAppSettings
The `init()` method takes `CallsAppSettings` as a parameter and user can set it by `CallsAppSettingBuilder`. User should be first set the `CallsAppSettings`.
CallsAppSettings has 3 parameters
1. `appId` it is mandatory parameter.
2. `region` It is mandatory parameter.
3. `host` It is optional parameter.
```swift theme={null}
import CometChatProCalls
let appID = "APP_ID"
let region = "REGION"
let host = "HOST"
let callSettings: CometChatProCalls.CallSettings?
let callAppSettings = CallAppSettingsBuilder()
.setAppId(appId)
.setRegion(region)
.setHost(host)
.build()
```
```objc theme={null}
@interface ViewController : UIViewController
@property (nonatomic, strong) CallSetting *callSettings;
@property (nonatomic, strong) NSString *appId;
@property (nonatomic, strong) NSString *region;
@property (nonatomic, strong) NSString *host;
@end
@implementation ViewController
-(void)setupCallsSetting {
self.callAppSettings = [[[[[CallAppSettingsBuilder new]
setAppId:self.appId]
setRegion:self.region]
setHost:self.host]
build];
}
@end
```
Make sure you replace the **appId** with your CometChat *appId* and *region* with your app region in the above code.
### 2. Init() Method
From the above CallAppSettings, pass the settings to the init() method.
```swift theme={null}
guard let callAppSettings = callAppSettings else { return }
CometChatCalls.init(callsAppSettings: callAppSettings) { success in
print("CometChatCalls init success: \(success)")
} onError: { error in
print("CometChatCalls init error: \(String(describing: error?.errorDescription))")
}
```
### **Cocoa Pods**
Go to root directory. (Where the .xcodeproj reside.) and perform these commands.
Pod installation
1. pod init
2. open -a Xcode Podfile
Your pod file will open in the text editor. Add your project dependency.
3. pod 'CometChatCallsSDK', '4.2.2'
4. For M1 Mac - arch -x86\_64 pod install or For Intel Mac - pod install
***
## Initialize CometChatProCalls
### 1. CallsAppSettings
The `init()` method takes `CallsAppSettings` as a parameter and user can set it by `CallsAppSettingBuilder`. User should be first set the `CallsAppSettings`.
CallsAppSettings has 3 parameters
1. `appId` it is mandatory parameter.
2. `region` It is mandatory parameter.
3. `host` It is optional parameter.
```swift theme={null}
import CometChatProCalls
let appID = "APP_ID"
let region = "REGION"
let host = "HOST"
let callSettings: CometChatProCalls.CallSettings?
let callAppSettings = CallAppSettingsBuilder()
.setAppId(appId)
.setRegion(region)
.setHost(host)
.build()
```
```objc theme={null}
@interface ViewController : UIViewController
@property (nonatomic, strong) CallSetting *callSettings;
@property (nonatomic, strong) NSString *appId;
@property (nonatomic, strong) NSString *region;
@property (nonatomic, strong) NSString *host;
@end
@implementation ViewController
-(void)setupCallsSetting {
self.callAppSettings = [[[[[CallAppSettingsBuilder new]
setAppId:self.appId]
setRegion:self.region]
setHost:self.host]
build];
}
@end
```
Make sure you replace the **appId** with your CometChat *appId* and *region* with your app region in the above code.
### 2. Init() Method
From the above CallAppSettings, pass the settings to the init() method.
```swift theme={null}
guard let callAppSettings = callAppSettings else { return }
CometChatCalls.init(callsAppSettings: callAppSettings) { success in
print("CometChatCalls init success: \(success)")
} onError: { error in
print("CometChatCalls init error: \(String(describing: error?.errorDescription))")
}
```