## Overview
Agent Builder provides the capability to create, configure, and customize AI agents directly within CometChat. It supports selecting models, integrating ready-to-use tools, APIs, and MCPs, and deploying agents without relying on any external management or orchestration platforms.
**Where AI Agents respond.** Agents created in Agent Builder respond only in one-on-one conversations between an end user and the agent user. They do not respond when added to a group, even as a member or owner. If your use case requires an agent in group conversations, share your requirements on [feedback.cometchat.com](https://feedback.cometchat.com).
## Getting Started
### How to create an agent – step-by-step guide
Sign in at CometChat Dashboard ↗. Create a new app or open an existing one where the agent will live.
From the dashboard, go to AI Agent → Agent Builder and select Add AI Agent.
Provide the required metadata before you can create the agent:
* **Agent Name** - enter a clear, memorable name.
* **Icon URL** - supply an image URL for the agent avatar.
* **Description** - describe the agent’s purpose so teammates can recognise it later.
Click Add once all required fields are complete. Agent Builder redirects you to the configuration page where you can connect models, instructions, tools, and MCP endpoints.
After creation, configure instructions, tools, and MCPs from the left-hand tabs. Detailed guidance lives in the Instructions, Tools, and MCP sections.
## Advanced Configuration
### Instructions
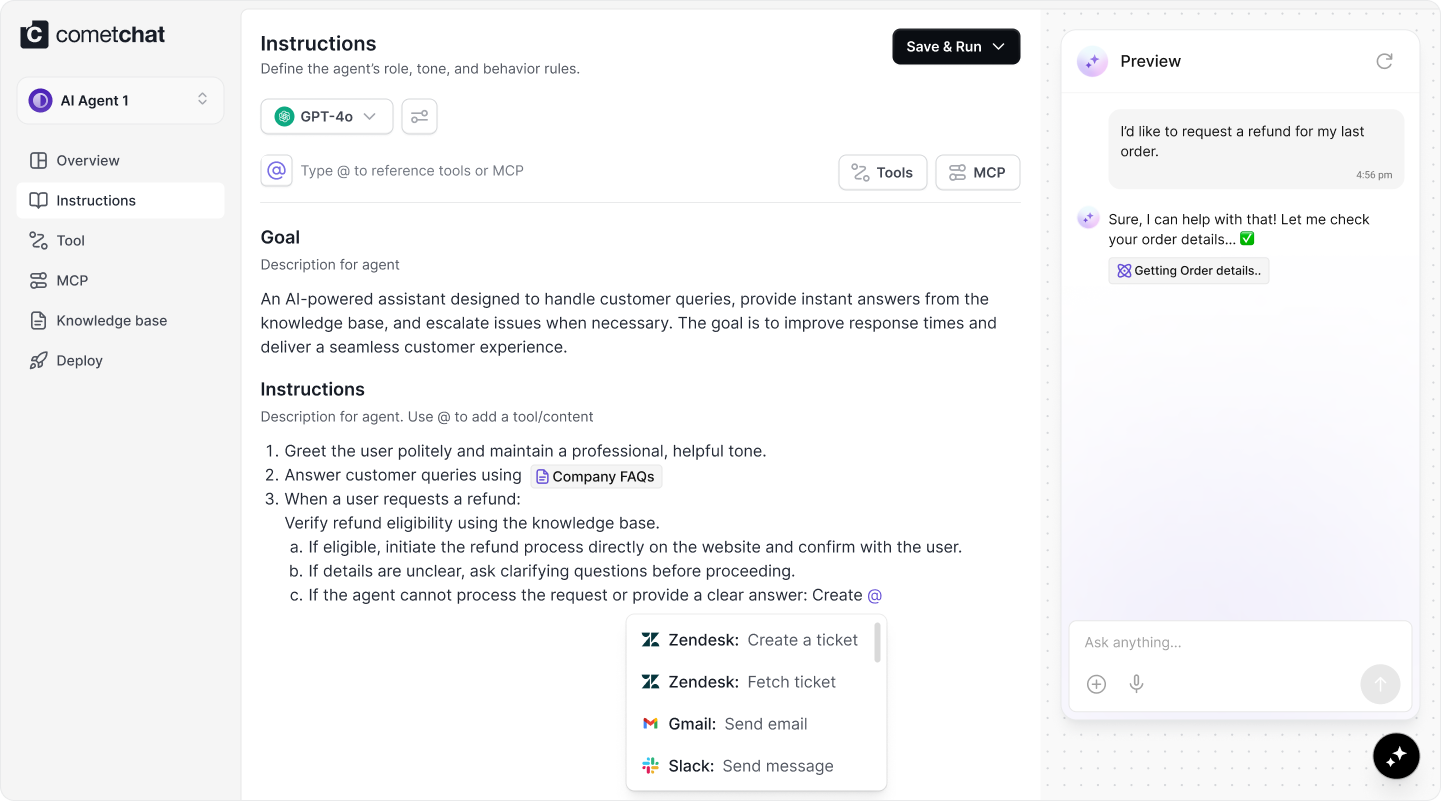
* Instructions define how your agent behaves, what it knows, and how it should respond. Use them to set tone, outline guardrails, and describe hand-off rules.
* The instructions editor supports `@` mentions so you can reference specific tools and MCP resources inline—this gives the agent unambiguous guidance about when to invoke each capability.
### Tools and MCPs
* Attach tools for deterministic actions (custom APIs, Google Suite, or other integrations) and link MCP endpoints for richer context.
* You can embed any of these capabilities directly inside instructions using the `@` menu, ensuring the agent knows exactly when and how to rely on them.