> ## Documentation Index
> Fetch the complete documentation index at: https://www.cometchat.com/docs/llms.txt
> Use this file to discover all available pages before exploring further.

# Create an AI Agent with AG2

> Connect an AG2 (AutoGen) agent to CometChat, customize it with UI Kit Builder, and ship it as React UI Kit code or a Chat Widget.

## What you’ll build

* An **AG2 ConversableAgent** with callable tools
* The same agent **connected to CometChat** (Agent ID + Deployment URL)
* A **customized chat experience** using **UI Kit Builder**
* An export to **React UI Kit code** *or* **Chat Widget** for integration

***

## Prerequisites

* A CometChat account and an app: **[Create App](https://app.cometchat.com/apps)**
* Python 3.10+ and `pip`
* Environment variables:
  * `OPENAI_API_KEY` (required for AG2 LLM calls)
  * `WEATHER_API_KEY` (optional — enables real weather data in the sample tool)
* Git (to clone the example project)

***

## Step 1 - Create your CometChat app

<Steps>
  <Step title="Create or open an app">
    Sign in at <b><a href="https://app.cometchat.com/apps">app.cometchat.com</a></b>. Create a new app or open an existing one.
  </Step>

  <Step title="Copy credentials">
    Note your <b>App ID</b>, <b>Region</b>, and <b>Auth Key</b> (needed if you export the Chat Widget later).
  </Step>
</Steps>

***

## Step 2 - Connect your AG2 Agent

Navigate to **AI Agent → Get Started** and then **AI Agents → Add Agent**.

<Steps>
  <Step title="Choose provider">
    Select **AG2 (AutoGen)**.
  </Step>

  <Step title="Basic details">
    Provide:

    <ul>
      <li><b>Name</b> and optional <b>Icon</b></li>
      <li>(Optional) <b>Greeting</b> and <b>Introductory Message</b></li>
      <li>(Optional) <b>Suggested messages</b> such as “What’s the weather in Austin?”</li>
    </ul>
  </Step>

  <Step title="AG2 configuration">
    Paste the following from your deployment:

    <ul>
      <li><b>Agent ID</b> — for the sample project, use <code>weather</code>.</li>
      <li><b>Deployment URL</b> — the HTTPS endpoint that proxies to <code>/agent</code> on your server.</li>
    </ul>
  </Step>

  <Step title="Save & enable">
    Click <b>Save</b>, then ensure the agent’s toggle is <b>ON</b> in the **AI Agents** list.
  </Step>
</Steps>

> **Tip:** Keep your Deployment URL stable (e.g., `https://your-domain.tld/agent`). Update server logic without changing the URL to avoid reconfiguration.

***

## Step 3 - Define Frontend Actions (Optional)

<Steps>
  <Step title="Add an action">
    Go to <b>AI Agent → Actions</b> and click <b>Add</b> to create a frontend action your agent can call (e.g., “Open Product,” “Start Demo,” “Book Slot”).
  </Step>

  <Step title="Define fields">
    Include:

    <ul>
      <li><b>Display Name</b> — Shown to users (e.g., “Open Product Page”).</li>
      <li><b>Execution Text</b> — How the agent describes running it.</li>
      <li><b>Name</b> — A unique, code-friendly key (e.g., <code>open\_product</code>).</li>
      <li><b>Description</b> — What the tool does and when to use it.</li>
      <li><b>Parameters</b> — JSON Schema describing inputs (the agent will fill these).</li>
    </ul>
  </Step>

  <Step title="Validate inputs (schema)">
    Example parameters JSON:

    ```json theme={null}
    {
      "type": "object",
      "required": ["location"],
      "properties": {
        "location": {
          "type": "string",
          "description": "City, zip code, or coordinates"
        }
      }
    }
    ```
  </Step>

  <Step title="Handle in your UI">
    Listen for tool calls at runtime and execute them client-side (route changes, dashboards, highlights).
  </Step>
</Steps>

***

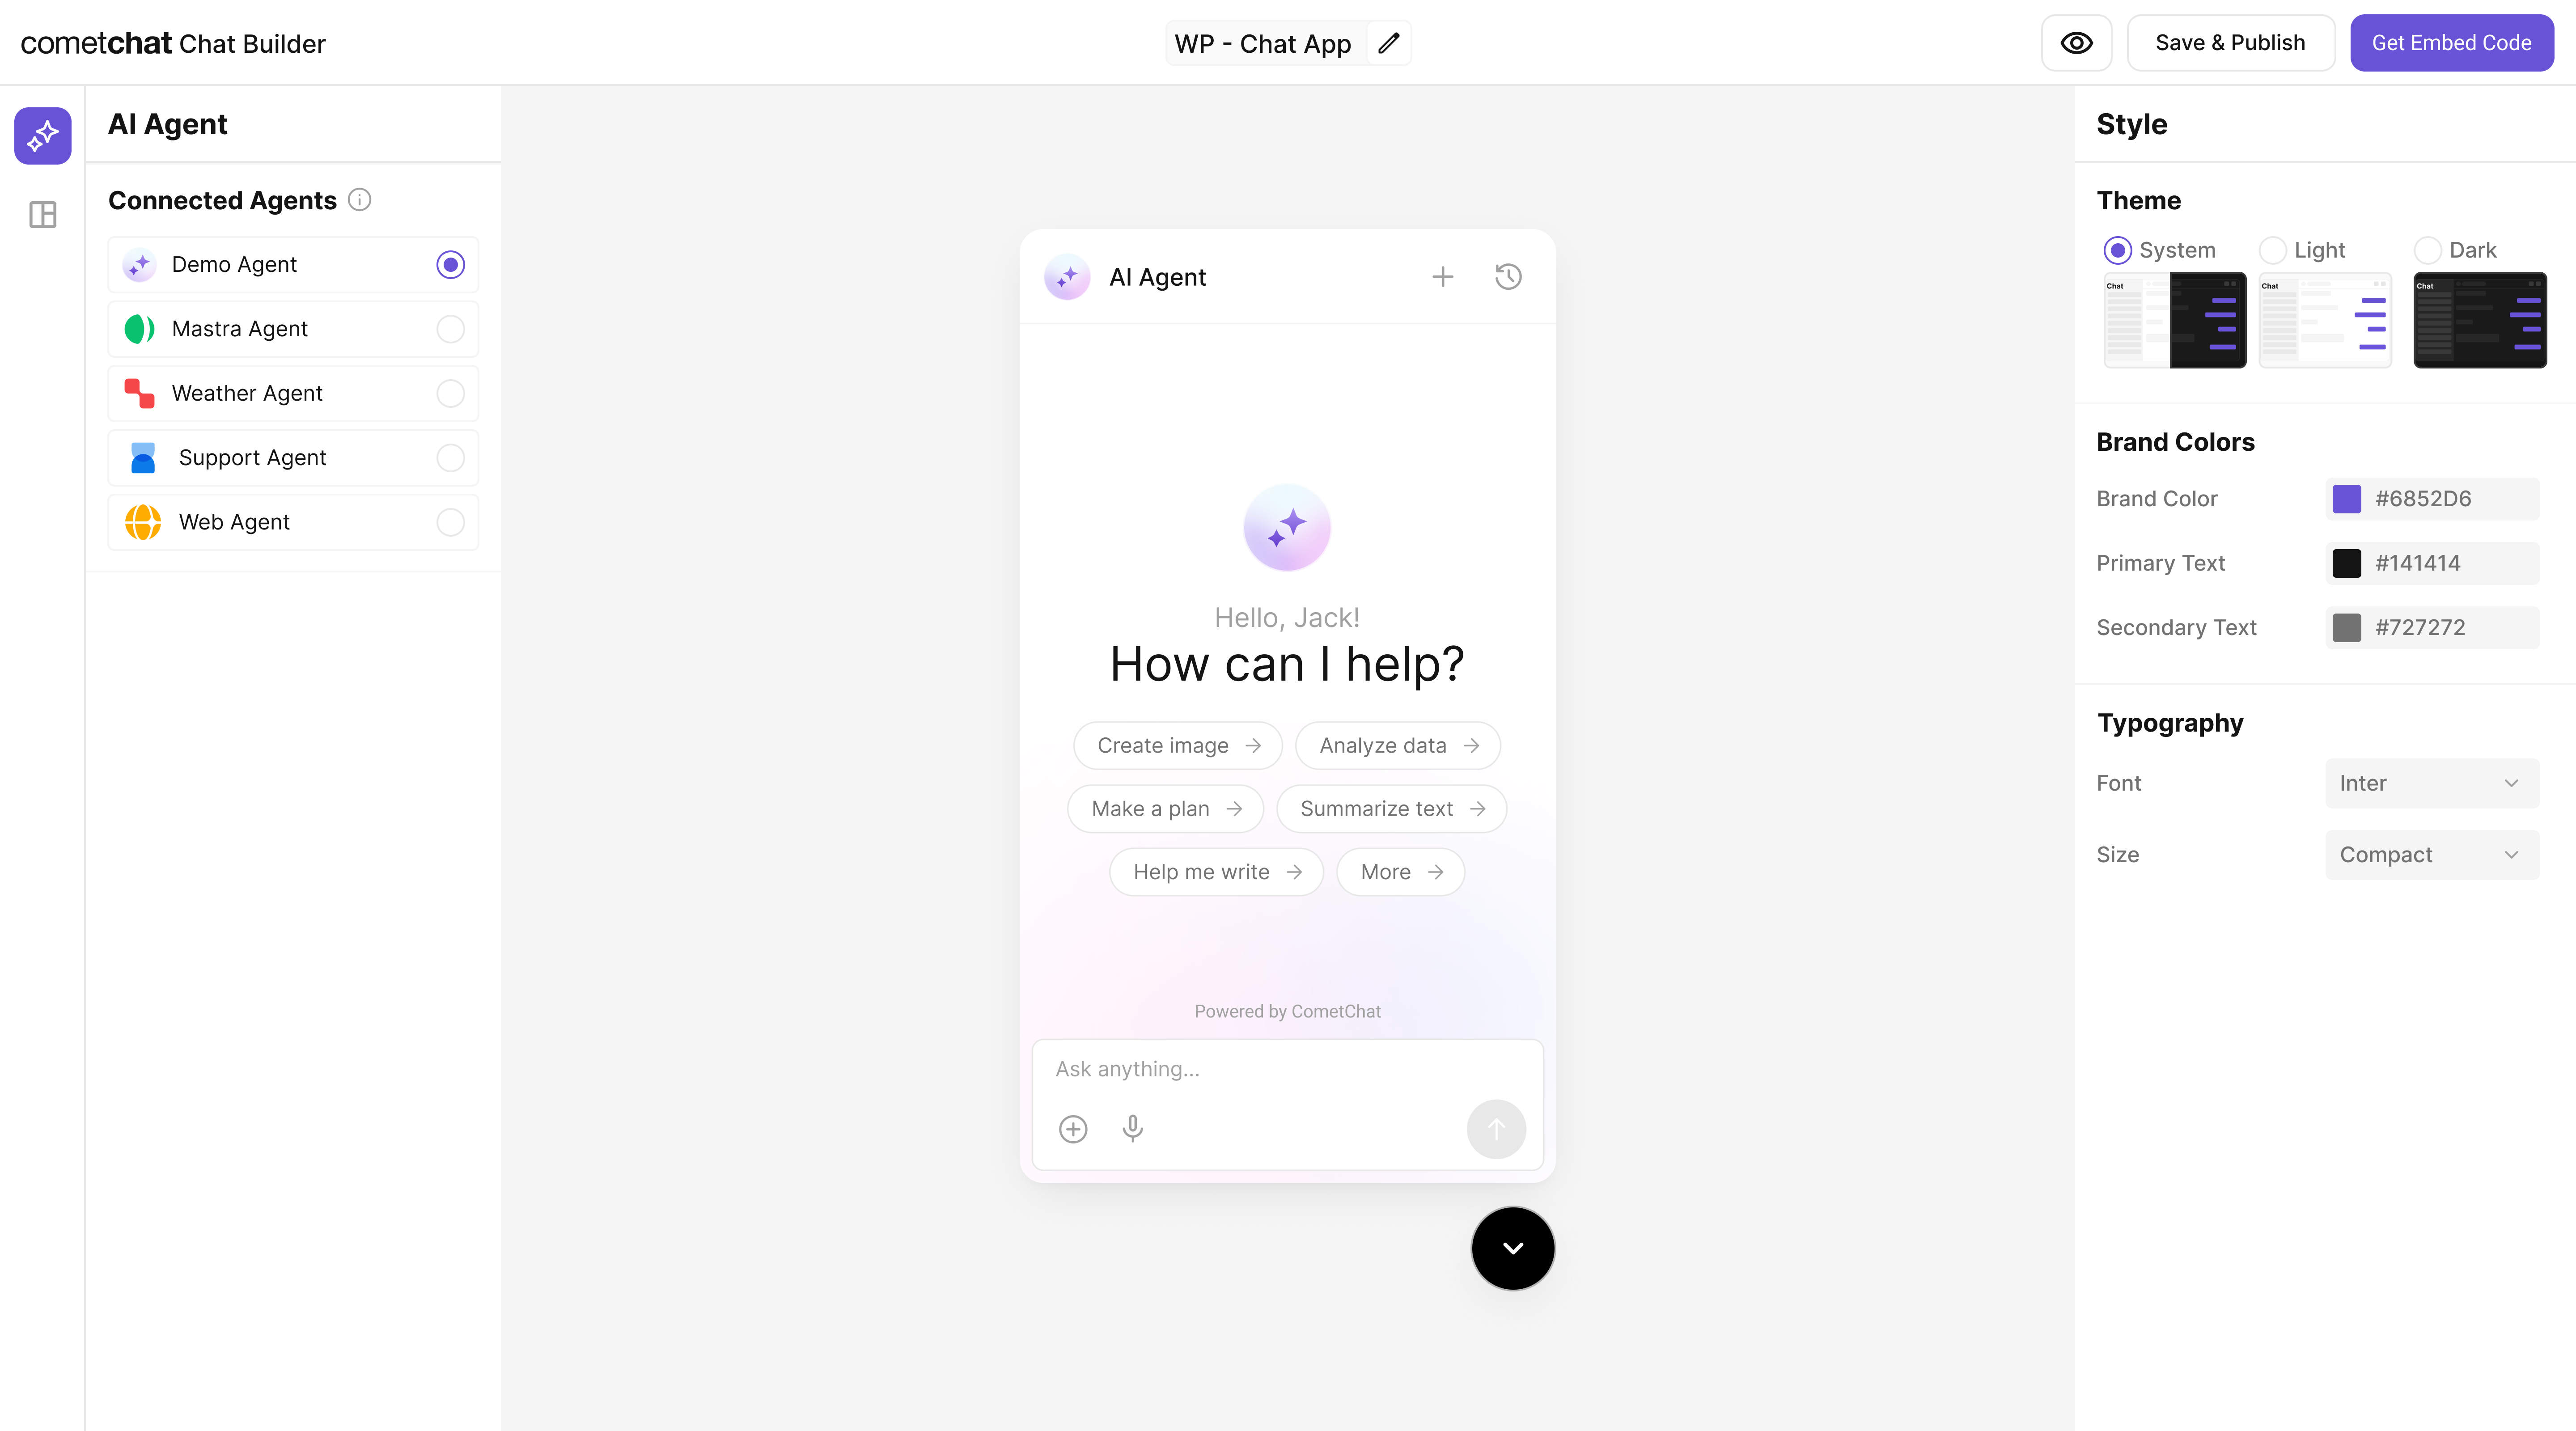
## Step 4 - Customize in UI Kit Builder

<Steps>
  <Step title="Open variant">From <b>AI Agents</b> click the variant (or Get Started) to enter UI Kit Builder.</Step>
  <Step title="Customize & Deploy">Select <b>Customize and Deploy</b>.</Step>
  <Step title="Adjust settings">Theme, layout, features; ensure the AG2 agent is attached.</Step>
  <Step title="Preview">Use live preview to validate responses & tool triggers.</Step>
</Steps>

<Frame>
  <img src="https://mintcdn.com/cometchat-22654f5b/2U5tVIzH12dbbFtr/images/ai-agent-chat-builder-preview.png?fit=max&auto=format&n=2U5tVIzH12dbbFtr&q=85&s=7e5a476c0f779f984406b979ed12f972" width="5760" height="3200" data-path="images/ai-agent-chat-builder-preview.png" />
</Frame>

***

## Step 5 - Export & Integrate

Choose how you’ll ship the experience (Widget or React UI Kit export).

<CardGroup>
  <Card title="Widget Builder" icon={<img src="/docs/images/products/ai-agents.svg" alt="Widget" />} description="Embed / script" href="/widget/ai-agents" horizontal />

  <Card title="React UI Kit" icon={<img src="/docs/images/icons/react.svg" alt="React" />} href="https://www.cometchat.com/docs/ui-kit/react/ai-assistant-chat" horizontal>Pre Built UI Components</Card>
</CardGroup>

> The AG2 agent from Step 2 is included automatically in exported variants—no extra code needed for basic conversations.

<Steps>
  <Step title="Decide delivery mode">Pick <b>Chat Widget</b> (fastest) or export <b>React UI Kit</b> for code-level customization.</Step>
  <Step title="Widget path">Open <b>Widget Builder</b> → Get Embedded Code → copy script + credentials.</Step>
  <Step title="React UI Kit path">Export the variant as code (UI Kit) if you need deep theming or custom logic.</Step>
  <Step title="Verify agent inclusion">Preview: the AG2 agent should appear without extra config.</Step>
</Steps>

***

## Step 6 - Run Your AG2 Agent (Reference)

<AccordionGroup>
  <Accordion title="Clone & install dependencies">
    <ol>
      <li><code>git clone [https://github.com/cometchat/ai-agent-ag2-examples.git](https://github.com/cometchat/ai-agent-ag2-examples.git)</code></li>
      <li><code>cd ai-agent-ag2-examples/ag2-cometchat-agent</code></li>
      <li><code>python -m venv .venv && source .venv/bin/activate</code> (or <code>.venv\Scripts\activate</code> on Windows)</li>
      <li><code>pip install -r requirements.txt</code></li>
    </ol>
  </Accordion>

  <Accordion title="Configure environment">
    <p>Create a <code>.env</code> file:</p>

    ```bash theme={null}
    OPENAI_API_KEY=sk-your-key
    # Optional: enables live data from OpenWeatherMap
    WEATHER_API_KEY=your-openweather-key
    ```

    <p>Without <code>WEATHER\_API\_KEY</code>, the tool still returns stubbed error messages that the agent can surface gracefully.</p>
  </Accordion>

  <Accordion title="Inspect the agent">
    ```python theme={null}
    # agent.py (excerpt)
    llm_config = LLMConfig(
        config_list=[{
            "api_type": "openai",
            "model": "gpt-4o-mini",
            "api_key": self.openai_api_key,
        }],
        temperature=0.7,
    )

    self.agent = ConversableAgent(
        name="WeatherAssistant",
        system_message="You are a helpful assistant that can provide weather information...",
        llm_config=llm_config,
        human_input_mode="NEVER",
    )

    @self.agent.register_for_llm
    def get_weather(location: Annotated[str, "City name, zip code, or coordinates"]) -> Dict[str, Any]:
        return self.get_weather(location)
    ```

    <p>The agent streams Server-Sent Events (SSE) with tool call telemetry and message chunks so CometChat can render partial replies in real time.</p>
  </Accordion>

  <Accordion title="Run & expose the API">
    <ol>
      <li><code>uvicorn server:app --reload --host 0.0.0.0 --port 8000</code></li>
      <li>Verify health: <code>curl [http://localhost:8000/health](http://localhost:8000/health)</code></li>
      <li>Trigger a message (SSE response):</li>
    </ol>

    ```bash theme={null}
    curl -N -X POST http://localhost:8000/agent \
      -H "Content-Type: application/json" \
      -d '{
        "thread_id": "demo-thread",
        "run_id": "demo-run",
        "messages": [
          { "role": "user", "content": "What is the weather in Austin?" }
        ],
        "tools": []
      }'
    ```

    <p>Use a tunneling tool (ngrok, Cloudflare Tunnel, etc.) to create the public <b>Deployment URL</b> CometChat needs.</p>
  </Accordion>

  <Accordion title="Production checklist">
    <ul>
      <li>Configure logging, rate limiting, and auth (API key/JWT) on the `/agent` route.</li>
      <li>Store secrets in server-side env vars only; never expose them in client code.</li>
      <li>Namespace tool calls and sanitize user input before hitting external APIs.</li>
      <li>Scale the FastAPI app behind your preferred hosting (Render, Fly.io, Vercel functions, etc.).</li>
    </ul>
  </Accordion>
</AccordionGroup>

***

## Test your setup

<Steps>
  <Step title="Enable the agent">In <b>AI Agents</b>, ensure your AG2 agent shows <b>Enabled</b>.</Step>
  <Step title="Preview in UI Kit Builder">Open <b>UI Kit Builder</b> and start a preview session.</Step>
  <Step title="Validate conversation">Send a message; confirm the agent responds.</Step>
  <Step title="Test actions">Trigger a <b>Frontend Action</b> and verify your UI handles the tool call.</Step>
</Steps>

***

## Troubleshooting

<AccordionGroup>
  <Accordion title="Agent not responding">
    <ul>
      <li>Verify your <b>Deployment URL</b> is publicly reachable (no VPN/firewall).</li>
      <li>Check server logs for 4xx/5xx errors or missing API keys.</li>
    </ul>
  </Accordion>

  <Accordion title="Tool call not executed">
    <ul>
      <li>Confirm the Action’s <b>Name</b> matches the tool name emitted by AG2.</li>
      <li>Ensure your agent registers tools via <code>register\_for\_llm</code> and proxies execution.</li>
    </ul>
  </Accordion>

  <Accordion title="Auth issues in exports">
    <ul>
      <li>Use <code>authKey</code> only for development. For production, implement a <b>secure token</b> flow for user login.</li>
    </ul>
  </Accordion>
</AccordionGroup>